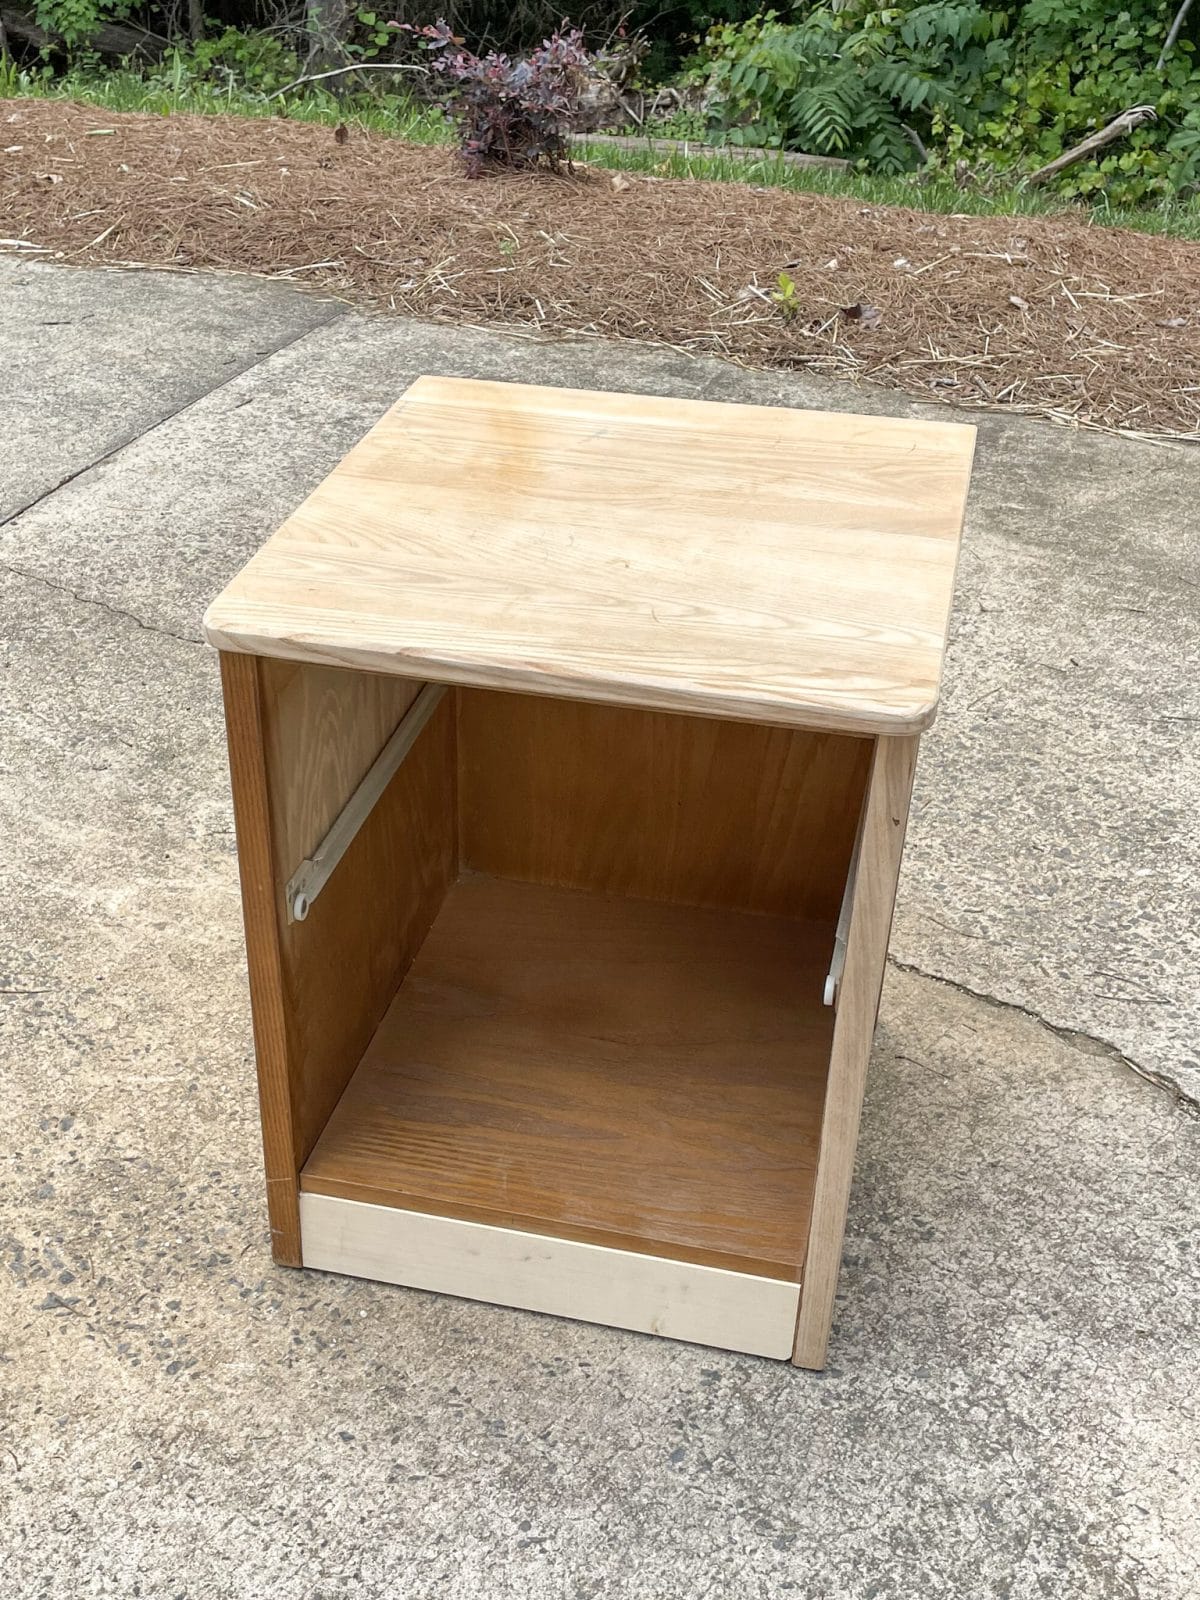
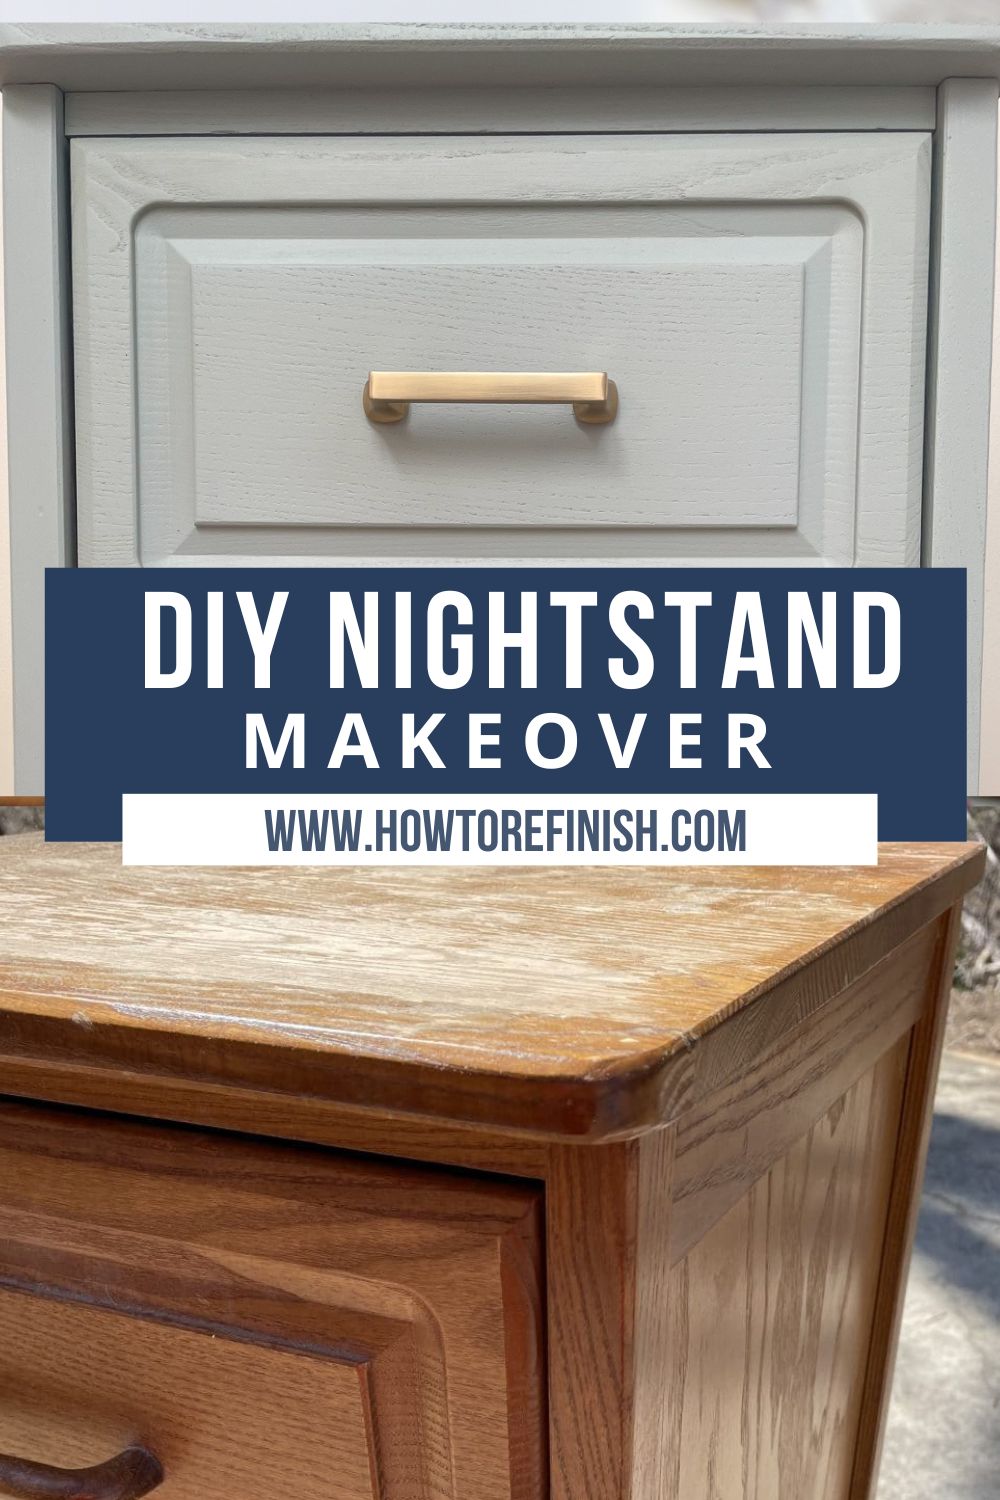
I’m always on the lookout for solid used furniture. While looking for a piece for a kitchen island project, I ran across a sad-looking 1980s-style oak nightstand. BINGO! Facebook Marketplace is usually a gold mine, but we found this at a local thrift store. Bargain! $5! This nightstand was a prime candidate to be my next refinished nightstand project.

While this bedside table is solid, it is not the most appealing piece of furniture. The grainy oak, the yellow tint to the old finish, and the rounded edges date this sucker. I have completed many nightstand makeovers, and this one will be a drastic change. It is amazing how much a piece of furniture can be transformed by stripping and staining or painting it. 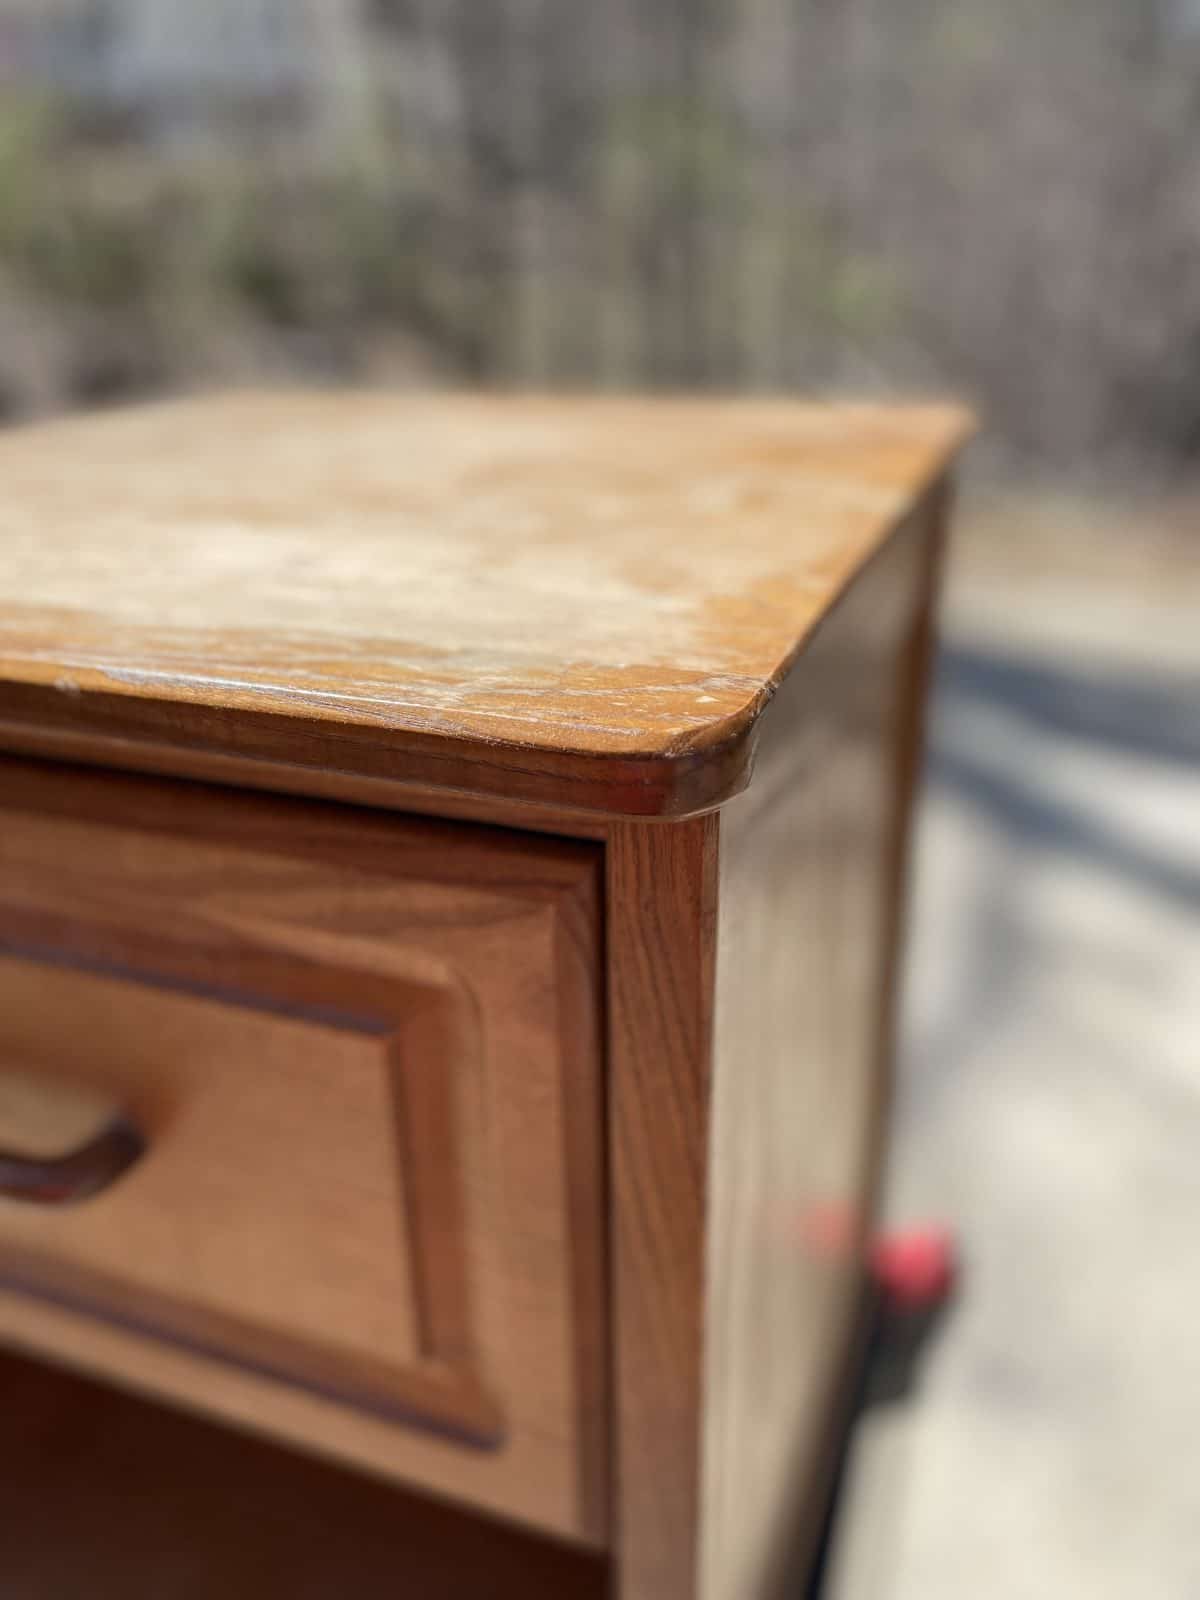
I bought this for my oldest daughter’s room. Her room was one of the first to be completed during our whole house remodel. However, she had two pieces of furniture that have caused us some problems. Her bedside table was in desperate need of being replaced or being the star of the next DIY nightstand makeover. I am in the process of completing a beautiful refurbishing of a fabulous dresser for her room which will solve the other furniture problem. I’ll have that post up soon! I knew this refurbished nightstand would be a perfect fit for her room.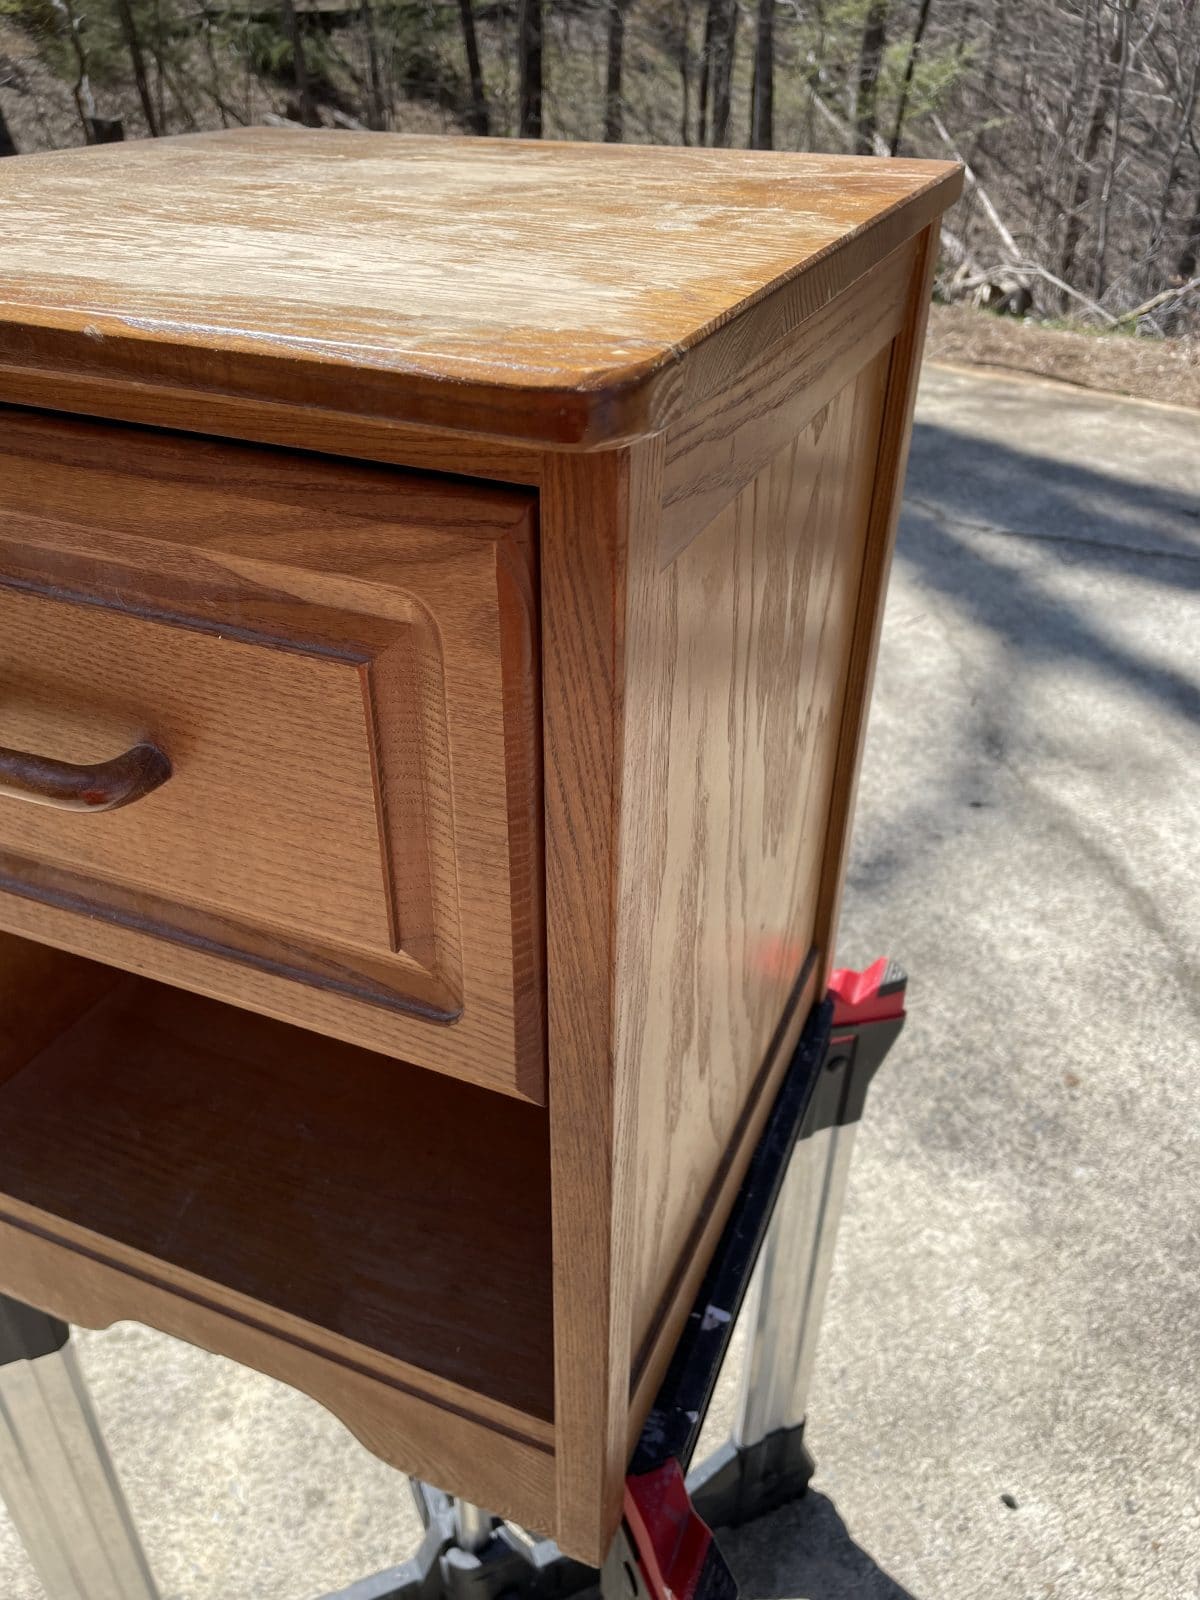
I had several nightstand refinishing ideas. Color? Drawer pull? Structural changes? So, just a few tweaks on this retro nightstand for me to bring it into the 21st century. I’ll give you the play-by-play of each change later in the post that completed this refinished nightstand project.
Supplies I needed for this nightstand makeover
A cleaning solution of either TSP or DIY cleaning solution (ingredients listed below)


Hammer and screwdriver or drill


Sandpaper, sanding sponges (120 and 220-grit paper), or orbital sander


Primer
Paint


Drawer pull
Now let’s start this nightstand makeover
Most of my projects follow the same steps from beginning to end. I attempt to make my projects as simple as possible and very economical. I will walk you through the steps I follow and how I finished each one. Let’s go.
Prep all surface areas of the furniture
I needed a solution to thoroughly clean the entire surface area of dirt, grime, and grease/oil. I usually use a DIY cleaning solution of 1 part water to 1 part vinegar. You can also use TSP, which is fantastic for dirty items. I use both but just went with what I already had mixed up in the garage.
This is a great time to hit the piece with a sander. I’ll explain my fiasco with the sanding I did later in the post. Give it a scratch sand with 120 grit sandpaper. This will knock down any rough surfaces on the wood. Use sandpaper, a sanding sponge, or a power sander for the scratch sand.
Putty any damaged spots, crevices, or grooves you want to fill in on the furniture. If you have old hardware holes that will not work with your new hardware, make sure to putty these holes now. Once the putty is dry, lightly sand for a smooth finish; wipe the nightstand with a lint-free cloth, microfiber cloth, or tack cloth to ensure you have gotten all the dust off before its paint time.
Decide if there are any structural changes to make to the project
This nightstand is straight from the 1980s. Does anyone remember The A-Team, Alf, New Edition, Hulkamania, Atari, or, if you were lucky, the original Nintendo? Well, this piece fits right in with these classics. The rounded edges and wooden drawer pull date this nightstand! I decided I wanted to modernize it by removing the rounded kickplate and adding a new solid kickplate.
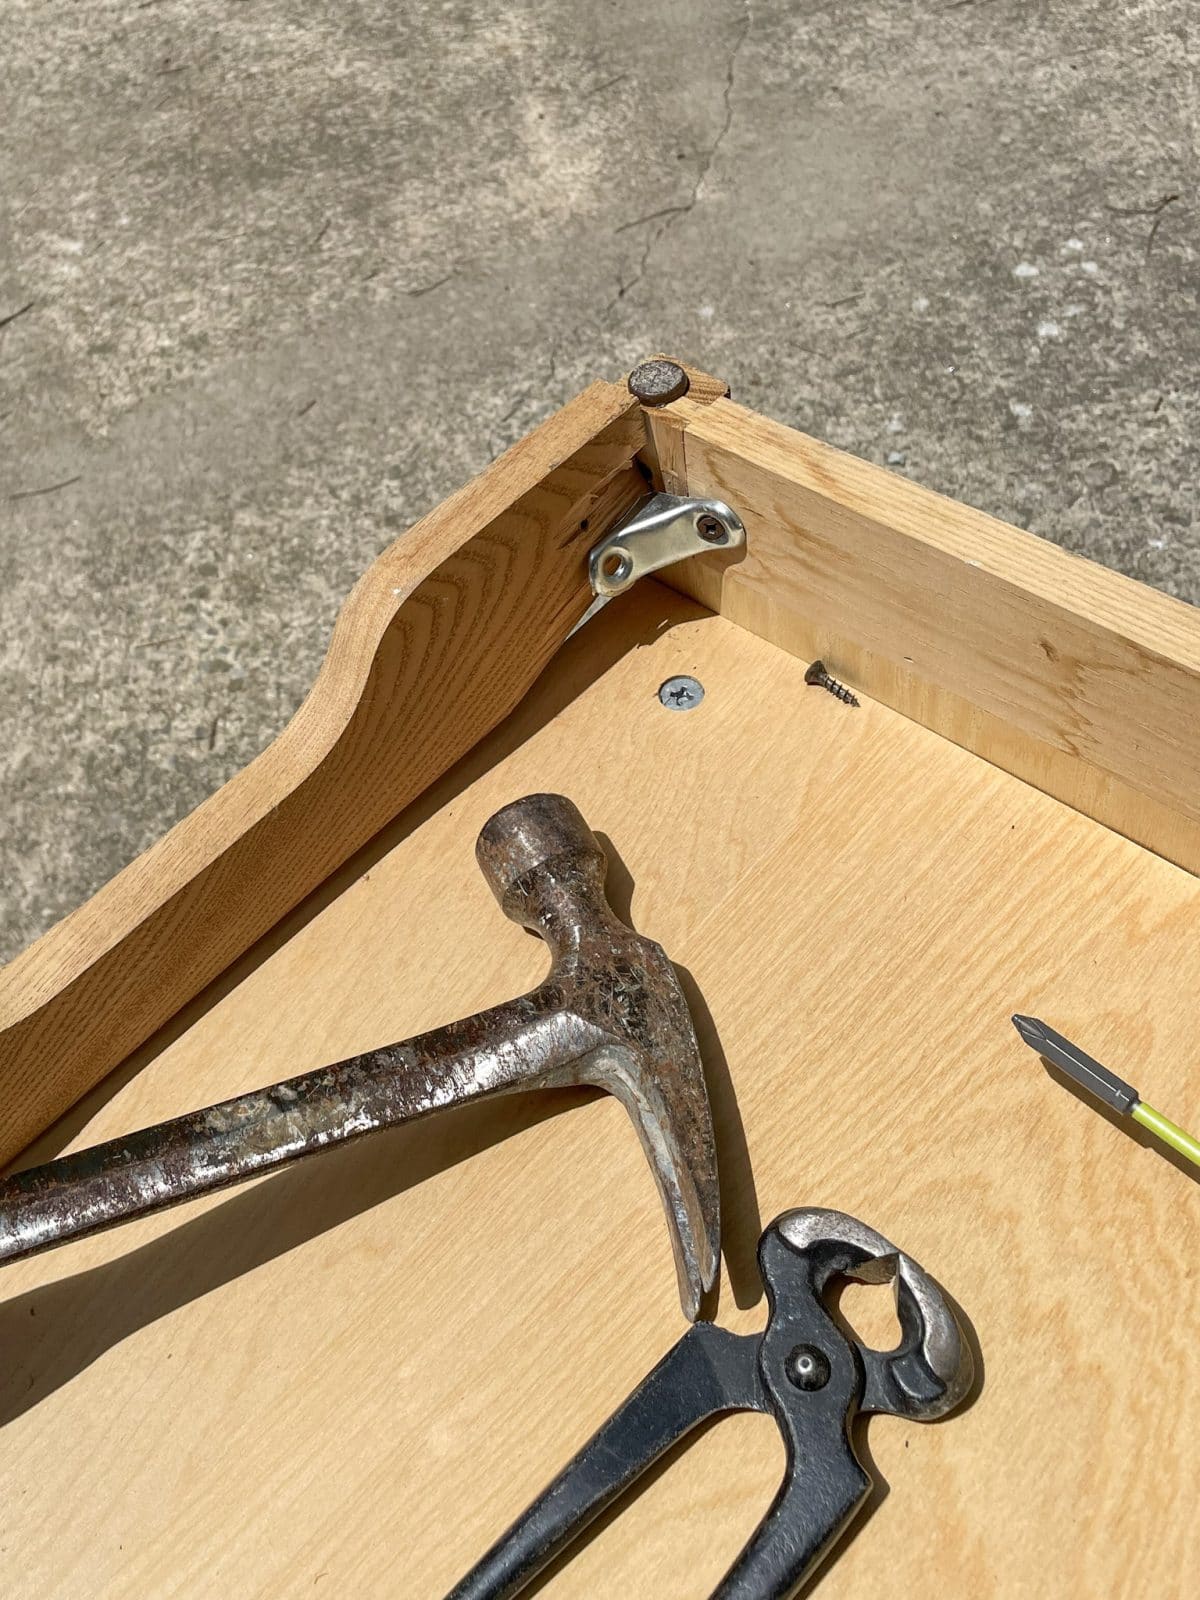
I turned the nightstand upside down and saw I needed to remove a few screws, and then…demo time. A small demo, though. I knocked the rounded kickplate out with a few swings of the hammer. I can already see the potential in this refinished nightstand.
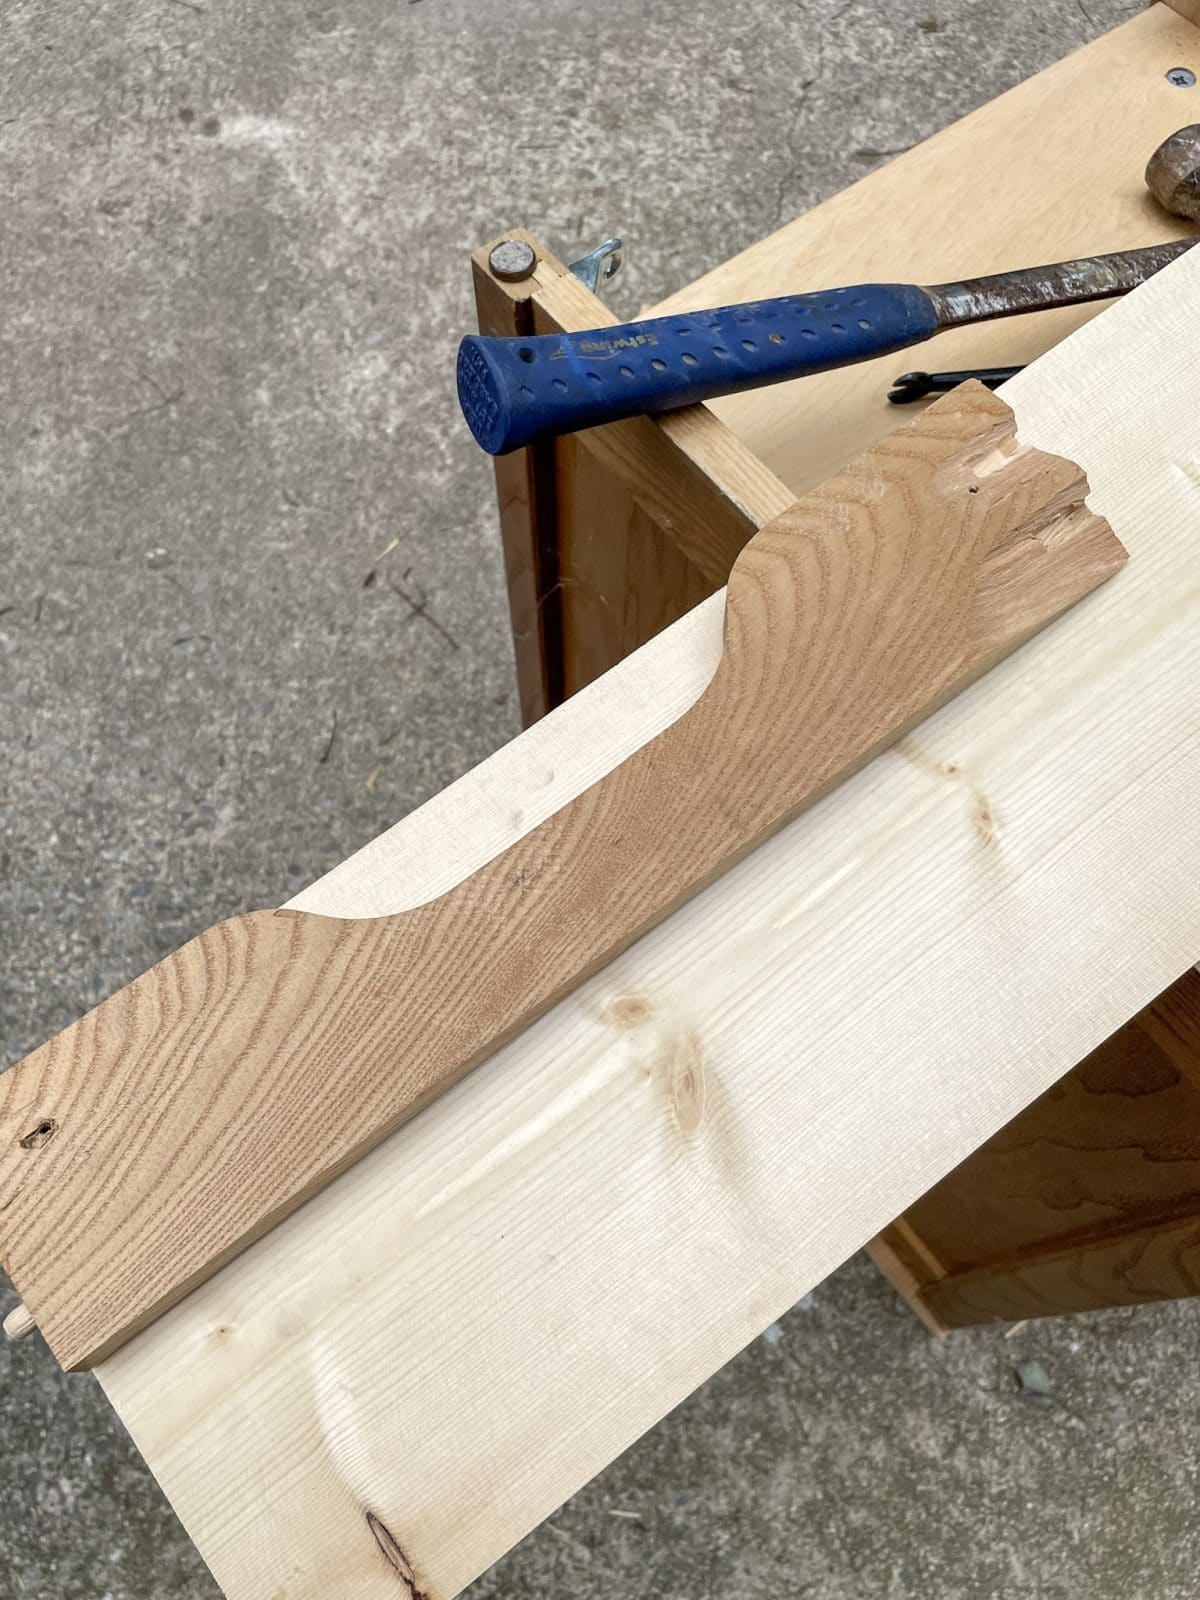
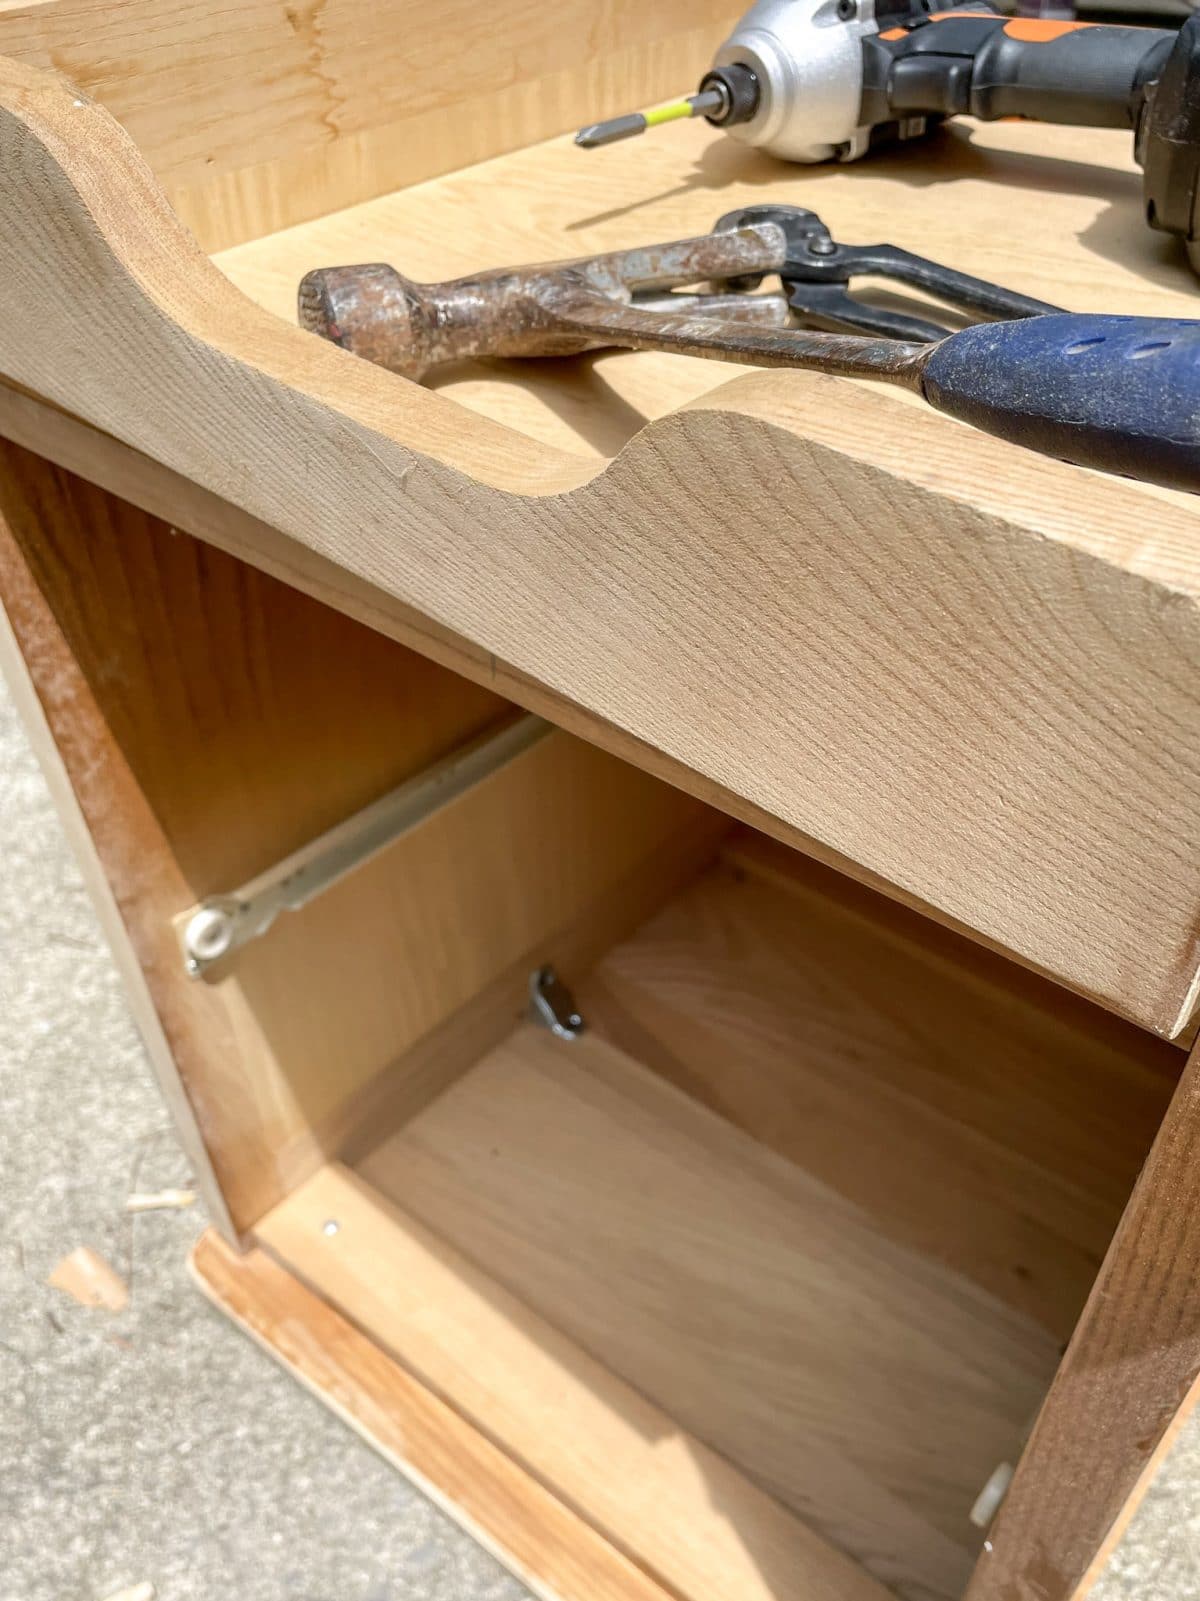
The removed rounded kickplate was used as a template to measure the replacement kickplate. Ideally, oak would have been the right solution for this piece, but I didn’t have any spare oak on hand. So, I chose pine because it was the handiest piece of scrap wood at my fingertips.
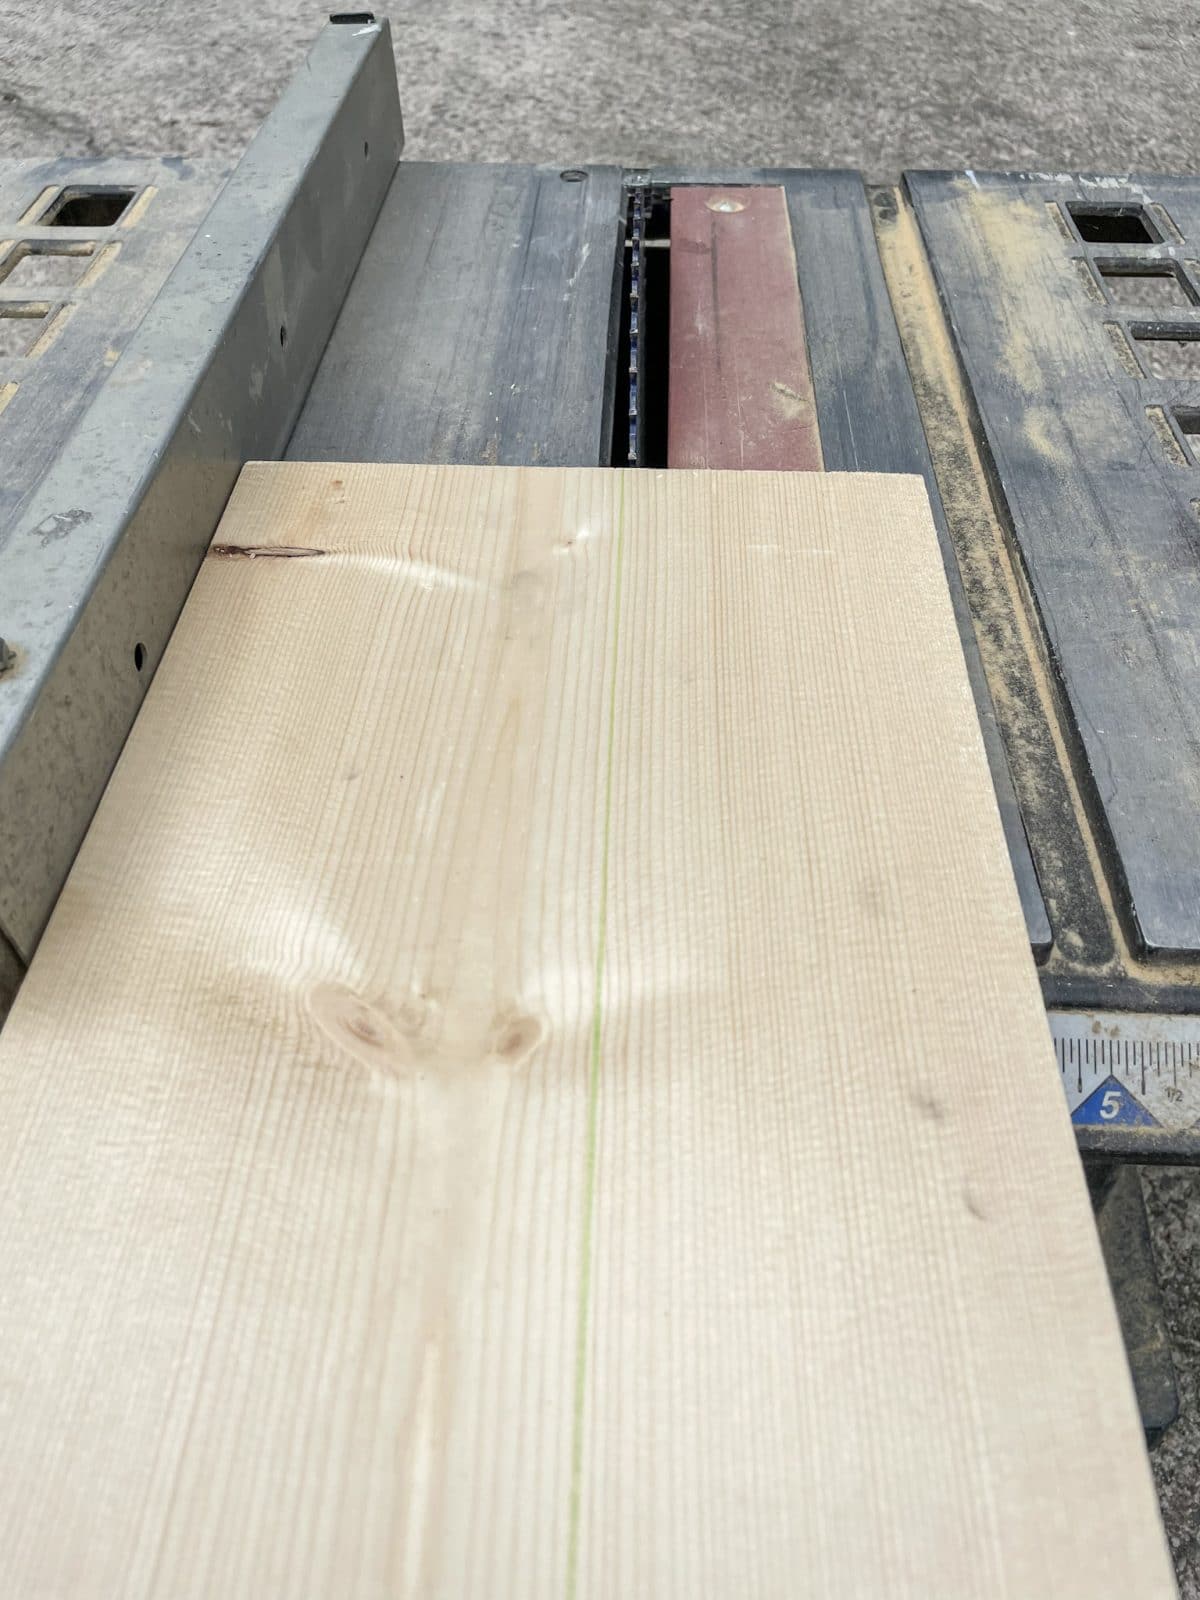
I used my table saw to cut the new kickplate to size.

My nailgun made it simple to attach the new kickplate to the frame of the nightstand. Bam. That was an easy way to give this piece an updated look.
Choose the finish for the nightstand
While thinking about the finish for the night stand, I decided to strip it and stain it with a weathered oak stain. I thought the weathered look of the oak would be a perfect complement to the refinished nightstand. Halfway through the sanding of the golden oak nightstand, I realized that there was a stain on the top that I could not get out. I tried several DIY home remedies for removing the stain, but nothing worked. It was such a deep stain that I could not sand down far enough into the oak top. This stain was sticking with us for the long haul. So this dilemma caused me to back up and rethink the finish.
Paint it is. A quick cleaning with mineral spirits and a clean cloth gave me an excellent clean canvas to start painting on.
I had a local big box store color match a pillow from my daughter’s bed. It is a beautiful teal color that is more blue than green. This new paint will pop and pull the color out of the pillow in my daughter’s room. It will all work out after all!
How to paint a nightstand
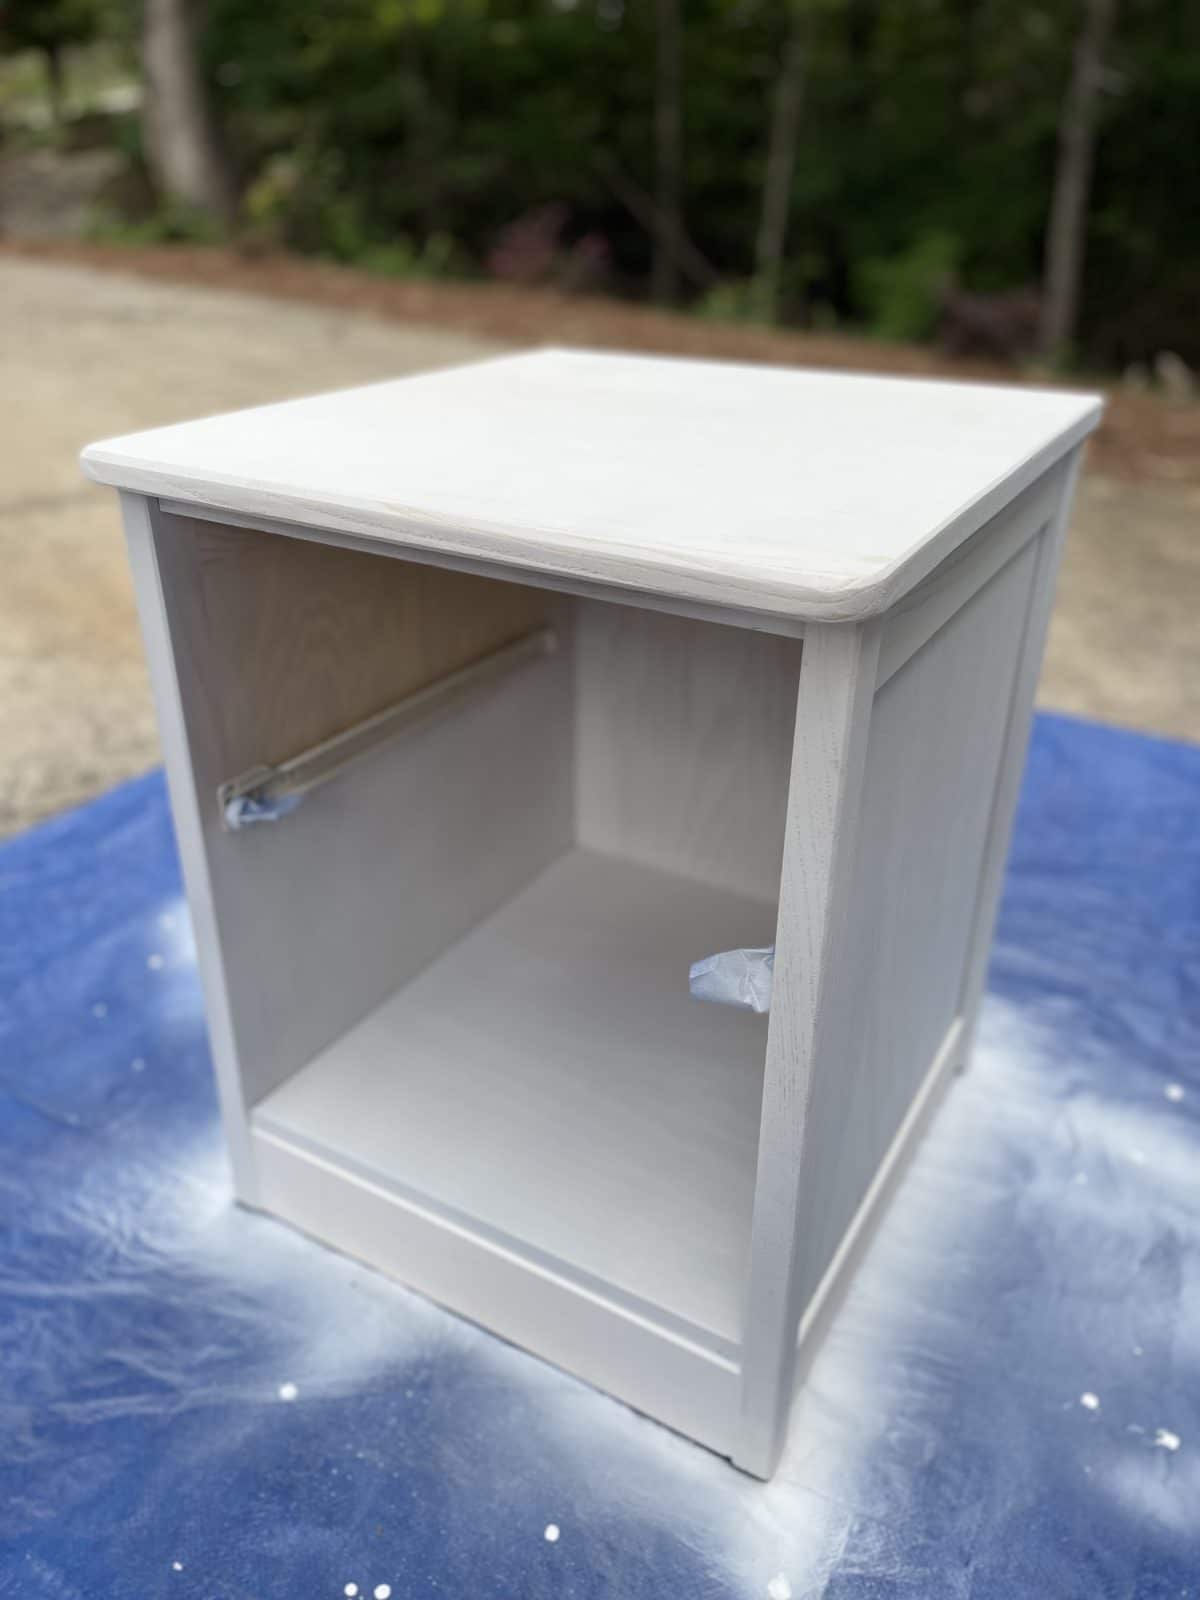
Now that I have the new paint, I’m ready to take another step towards moving this nightstand makeover into modern times. I primed the 1980s nightstand with two coats of Killz latex primer. Since I had sanded the finish, the grain would soak up anything I put on it. So, I applied two heavy coats of primer to tame the grain. A light sanding, once dried, had the piece ready for its new color. This refinished nightstand is almost complete.
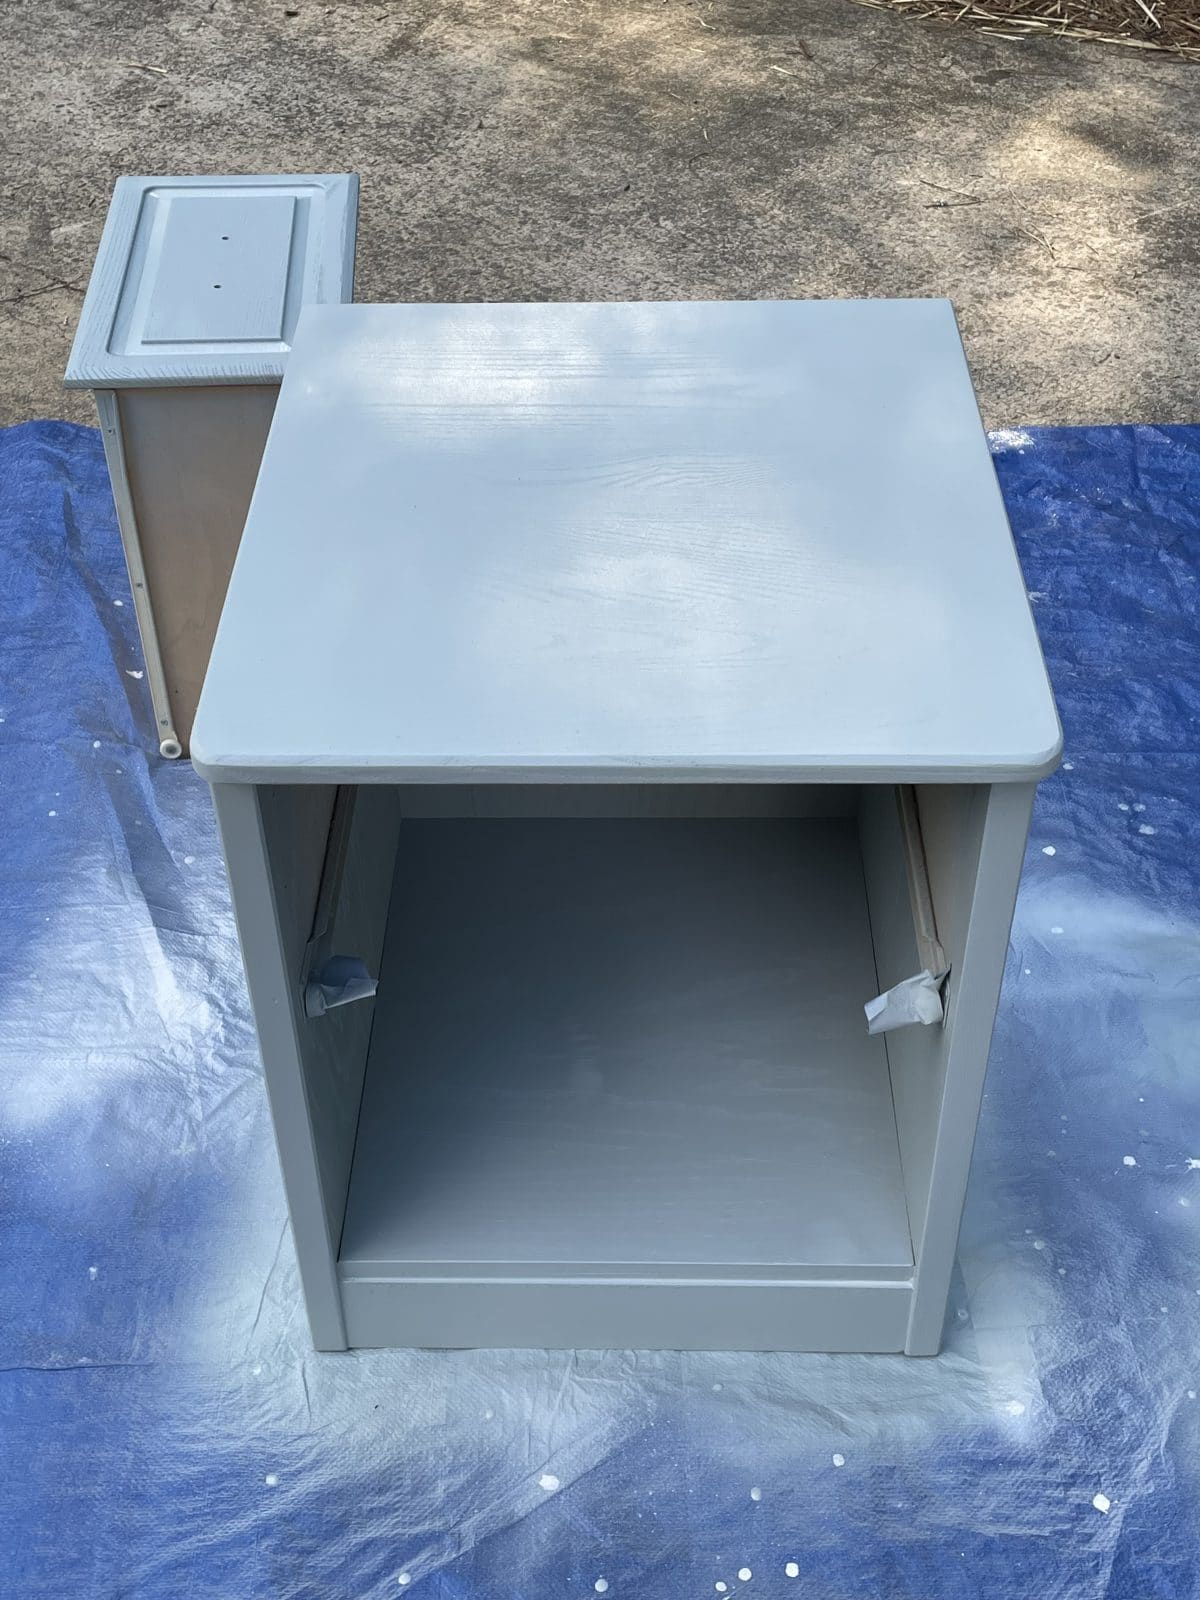
I thinned the paint to the specifications of my paint sprayer. Sprayers are different regarding what type of material they can spray and the paint’s viscosity. Check the directions for your sprayer to determine what kind and how thin the material needs to be for the sprayer to give you a nice smooth finish.
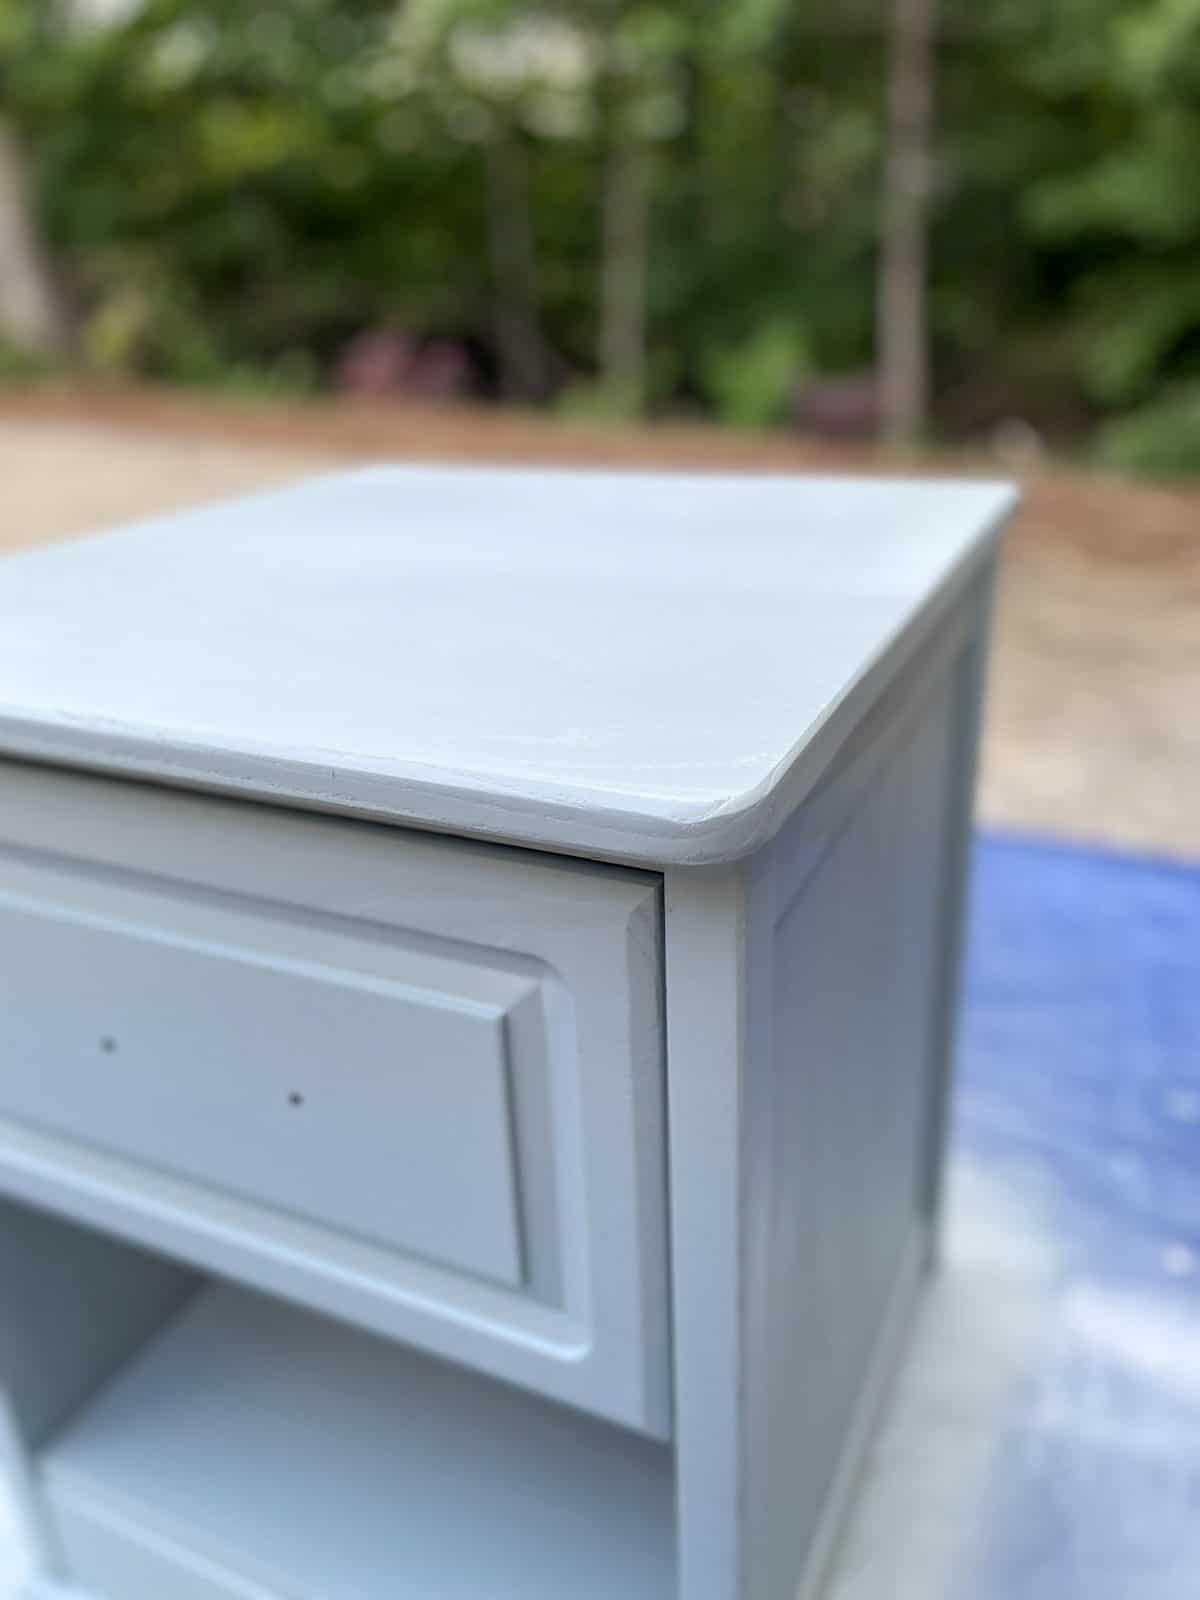
I gave this nightstand three coats of Behr Ultra Scuff Defense paint in a satin sheen. I wanted this piece to be extra durable since it will be getting a lot of abuse in a teenager’s room. This summer has been brutally hot, so furniture is drying fast for me. Make sure to give ample time for paint cure. Spraying this nightstand gave it a professional finish.
Seal your nightstand after refinishing
It is best to seal all refinished furniture. Whether hardening wax, polyurethane, lacquer, shellack, or you name it, the furniture needs an agent on top of the paint that will protect it for years. I went with a matte polyurethane. Even though I use an ultra-clear matte poly, it still seems to make a slightly darker color on the piece. Polyurethane works excellent in my paint sprayer, so I went with it and gave it two coats of top coat. More coats of poly will help with durability.
Finishing touches…new hardware
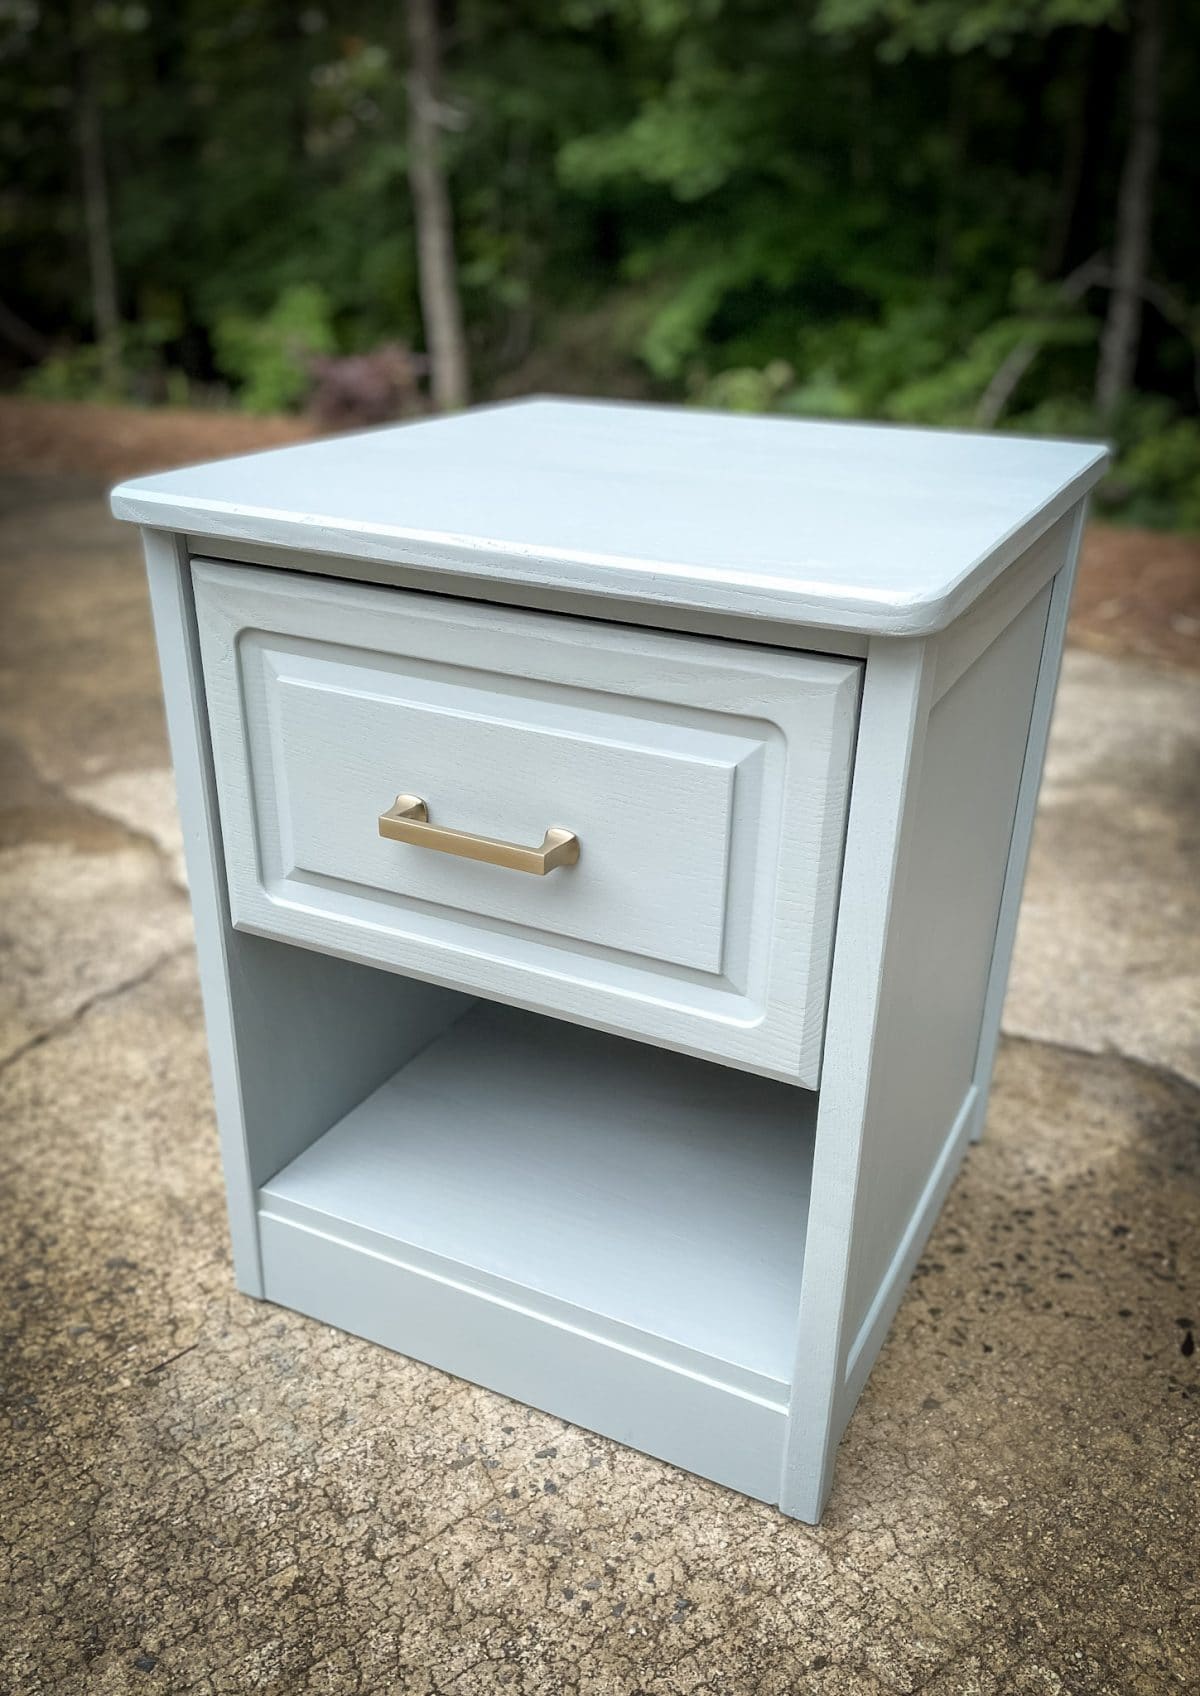
This step is so easy and yet so impactful. Update your hardware. That’s it. A new brushed bronze drawer pull brought this entire piece together. Boom. The refinished nightstand looks fantastic.
There you have it. I have given you a complete walkthrough of refinishing a nightstand. I am all about simplifying everything in this process. You don’t have to be a pro to complete a nightstand makeover.
Here are a few questions that may come up when thinking about refinishing a nightstand.

How do you upgrade a nightstand?
OK, If you’re not brave enough YET to tackle this project, you can upgrade a nightstand with a few quick and straightforward ideas. Update the hardware. Check out Pottery Barn, West Elm, McGee & Co, or Restoration Hardware for trends on furniture so you can emulate their style on your furniture. Restyle the nightstand. Change lamps, add a few intriguing hardback books under the light, place your favorite scented candle on the nightstand, or add a small plant.
Can I paint over a nightstand?
Of course. We paint over everything. Wait until I share my painted fabric headboard with you! Finding the type of paint used initially is a high priority. Oil-based paint is going to perform very differently than water-based paint. It matters what you’re painting on top of.
Best paint for a nightstand?
Take your pick. It’s like cereal; everyone has a different favorite. Mine? Golden Grahams…hands down. Back to paint, I am a huge fan of chalk paint. It has a beautiful texture, is very easy to use, has few paint streaks if painted properly, has a beautiful matte finish, and can be bought or made. Check out my post chalk paint best brands for a list of fantastic chalk paint options and the DIY recipe I prefer to use.
That’s it. This enjoyable and straightforward project took a 35-year-old nightstand and gave it new life. Do you have any DIY nightstand makeover ideas? What about painted nightstand ideas or nightstand refinishing ideas. I would love to hear your plans and see your results.
MORE REFINISH WOOD WITH PAINT PROJECTS:
- Painted Mid Century Dresser
- 80’s Dresser Makeover – Complete Guide with Pictures
- 40 DIY Dresser Makeover Ideas
Leave a Reply