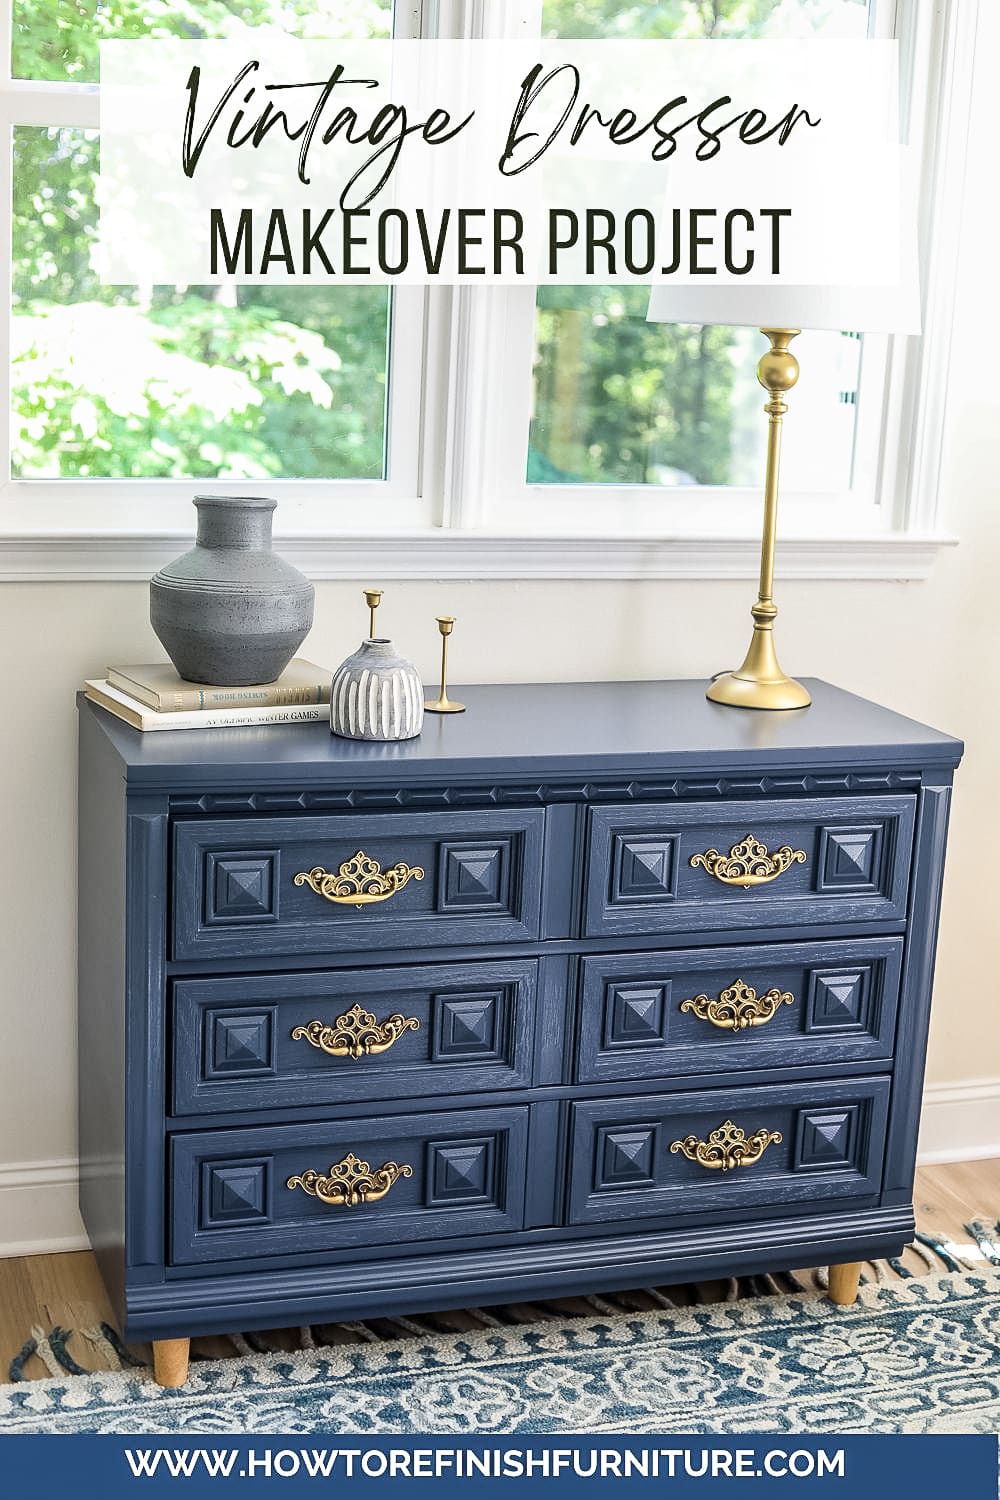
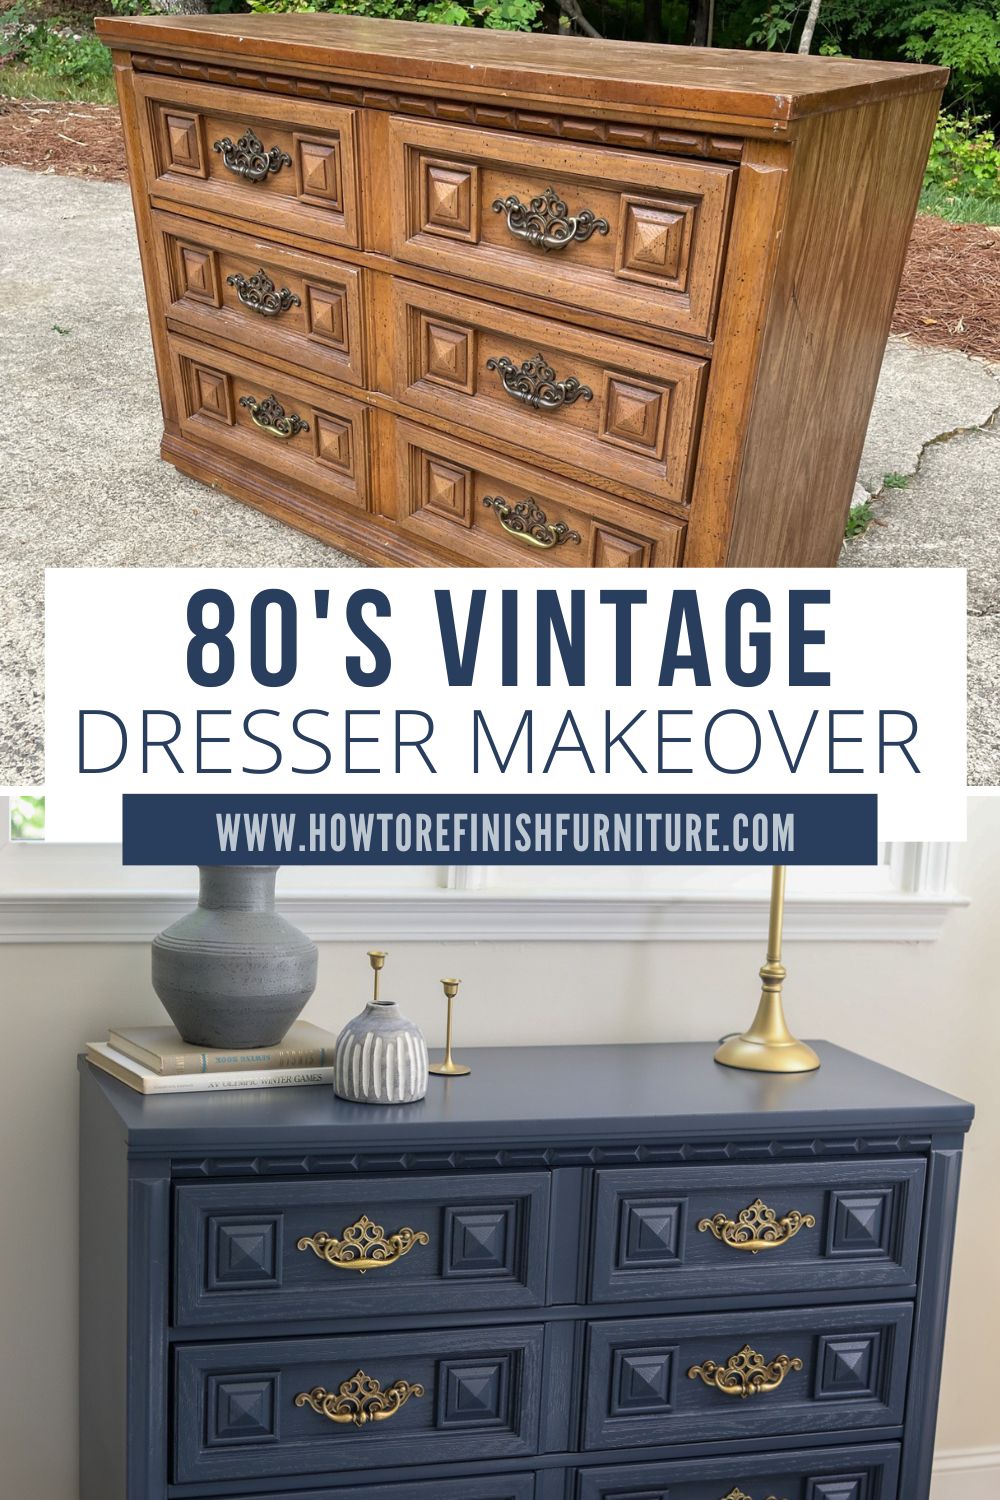
Learn how to refinish a lowboy chest of drawers with a few tools, supplies, and, most importantly, your imagination! This 80’s dresser makeover is a quick and simple way to get an updated look on a budget.
I took my son and his friend for a quick breakfast a couple of weeks ago. My wife had done the same with our girls. So, after we ate, we met at one of my favorite local thrift stores. This thrift store is organized, for the most part, really clean, with reasonable prices and great-smelling restrooms. No, for real, their bathrooms smell amazing. Facebook Marketplace is a great place to find DIY makeover pieces; however, I love the experience of searching for and finding that old piece dying for a new look. Anyway, as we were browsing through the aisles, we came across this 80’s dresser makeover waiting to happen. We picked up a few other pieces I’ll also post soon. Make sure to check back!
Alert* I use a few terms throughout this post while talking about the same thing. People call this piece of furniture different names. Some call it a dresser, lowboy chest of drawers, buffet, console, credenza, or bachelor’s chest. Just roll with me. lol.
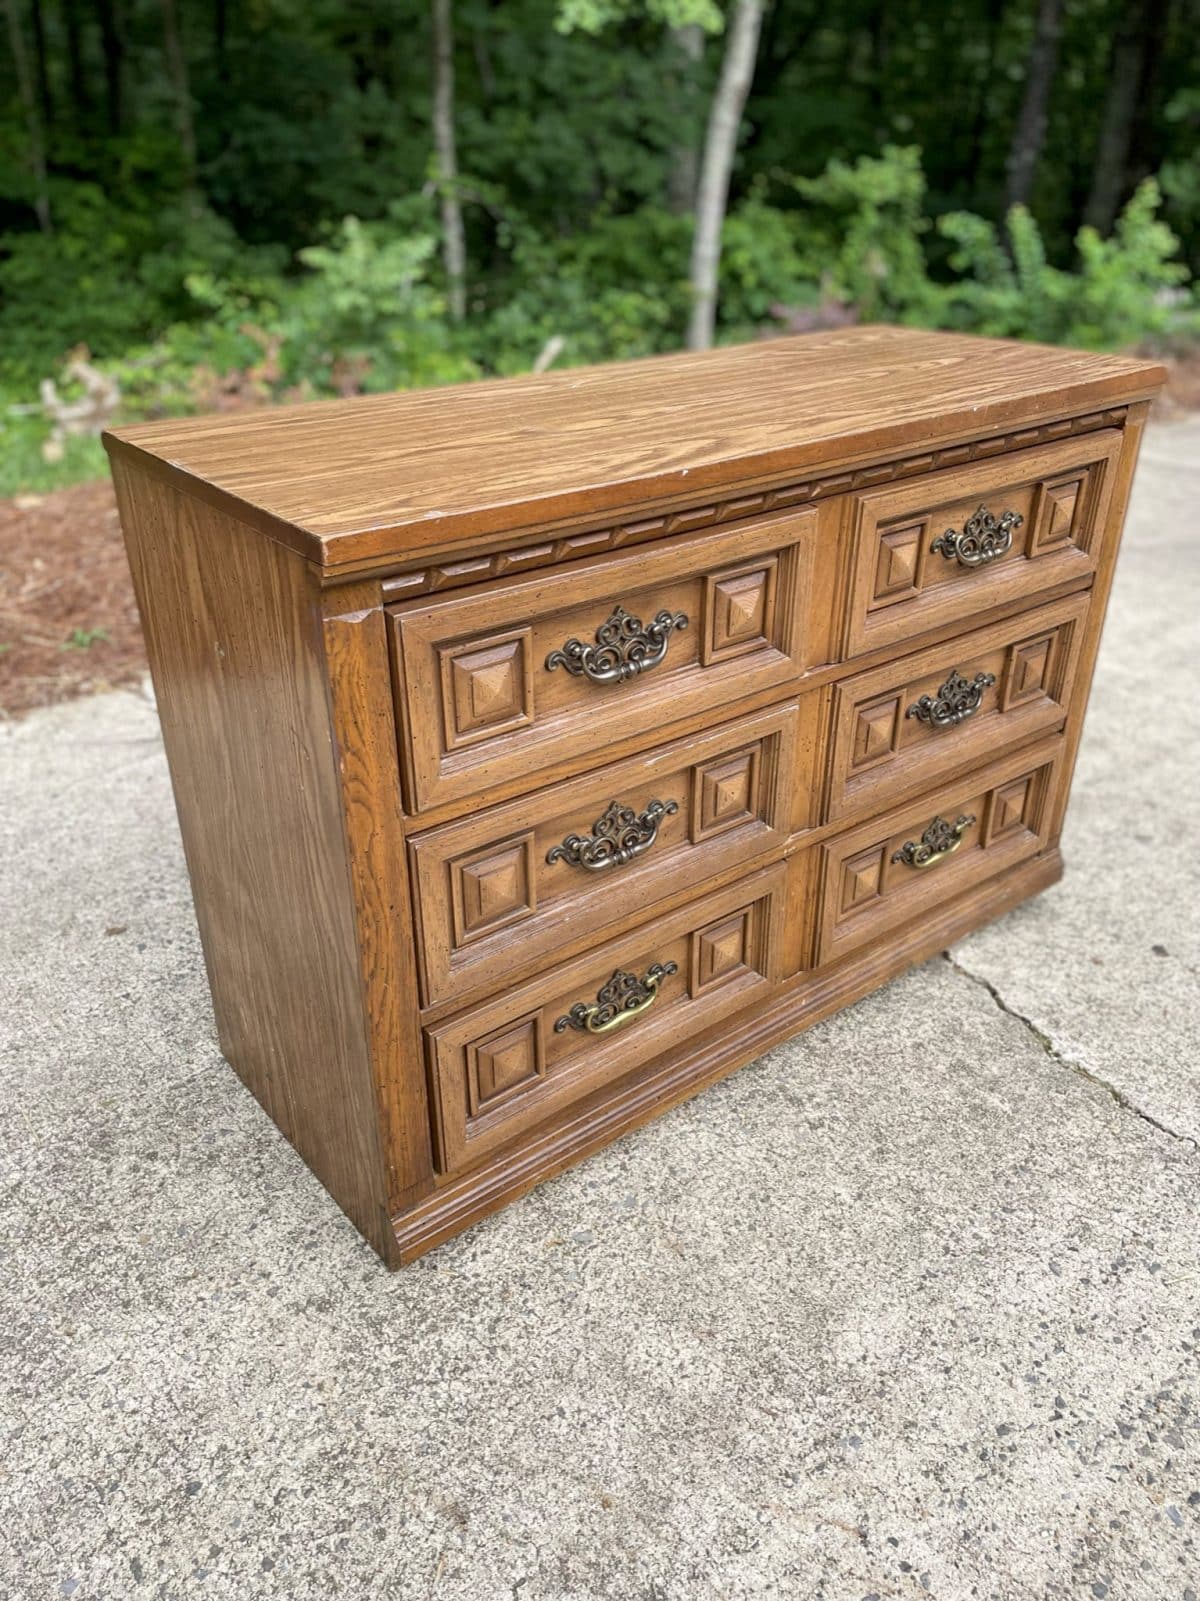
This old dresser is straight from the 80s: Oak veneer cabinet box, solid wood trim pieces, and weird plastic drawer fronts. I would have loved to have said this was a solid wood lowboy dresser, but that is not the case here. I am huge on two things: making my projects as simple as possible and affordable. This allows you to come alongside me on these projects and complete your DIY dresser redo project if you choose. So, this lowboy chest of drawers will make a great dresser, TV console, or credenza when it is complete.
Supply list for this 80’s dresser makeover
- TSP Cleaning solution or my DIY cleaning solution of 1 part vinegar to 1 part water with a few squirts of dish soap
- Putty knife
- Wood filler
- 120 and 220 grit Sandpaper, sanding sponge, or orbital sander
- Primer
- Paint
- Polyurethane
- Paintbrush, paint roller, or paint sprayer
Now on with this vintage dresser redo
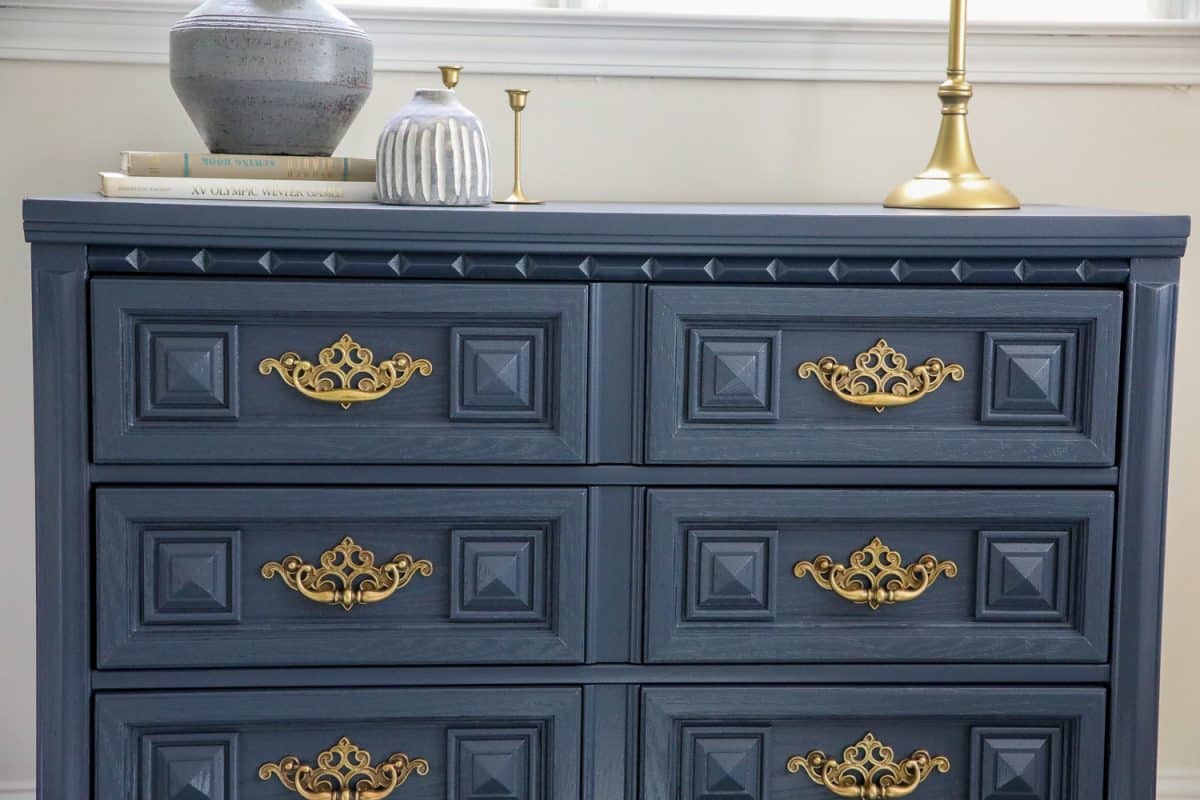
My first step is removing the hardware. I used a drill to remove the hardware to speed up this process. This hardware is original, brass, and a bit obnoxious. Perfect! I’m keeping it for a few reasons. I love the contrast of the brass and Benjamen Moore Hale Navy Blue I’m using to paint this. Another reason I am using the original hardware is because I want to show you how easy it is to clean up dirty brass hardware. Finally, I like my projects to be as simple and cost-effective as possible.
A crucial step is always to clean the wood furniture. (I got a little too anxious to start on this 80s dresser makeover and forgot to take pictures of the cleaning process.) Those pictures are boring anyway, so I guess they may be the best ones to miss. I was being honest. LOL.
I used TSP Cleaning Solution for this old chest. The top and sides were easy to clean, but the details on the drawers were a little trickier. I used a toothbrush to get in the tight spots to ensure I could get all the dust, dirt, grime, and oils.
Let’s get this DIY dresser makeover ready for paint
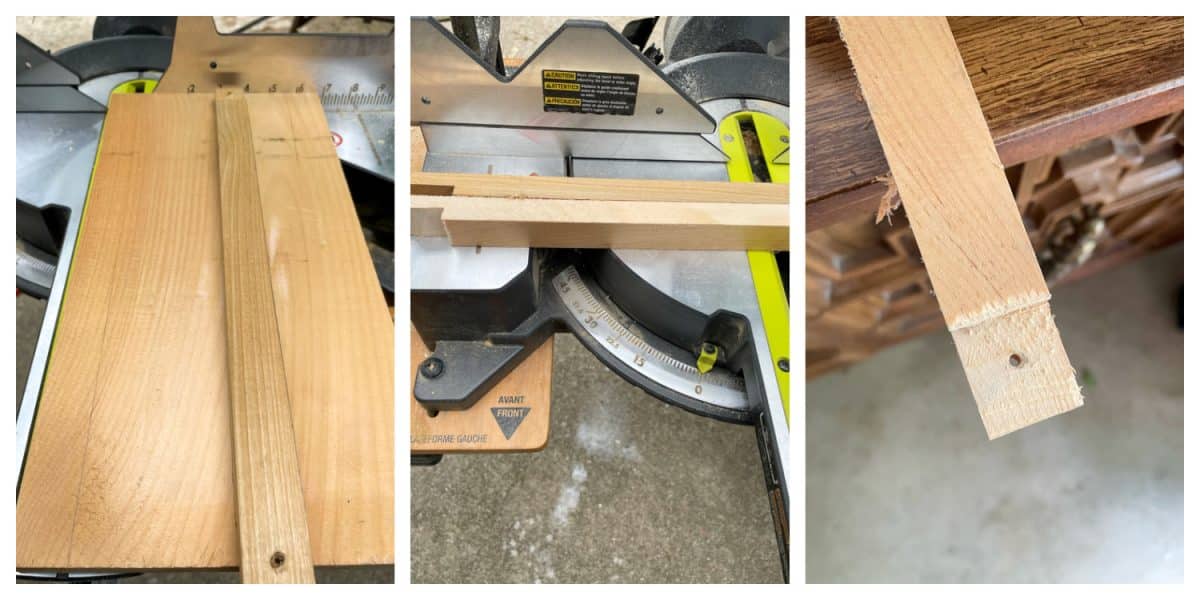 Two drawers on this piece had some severe wiggle to them. The slides on the dresser had cracked and loosed, allowing the drawers to float with every open or close freely. These had to be fixed! I removed all of the drawer slides and disregarded the broken slides. Using the good slide as a template, I cut new slides to the exact size and added the details necessary for the new slides to work appropriately.
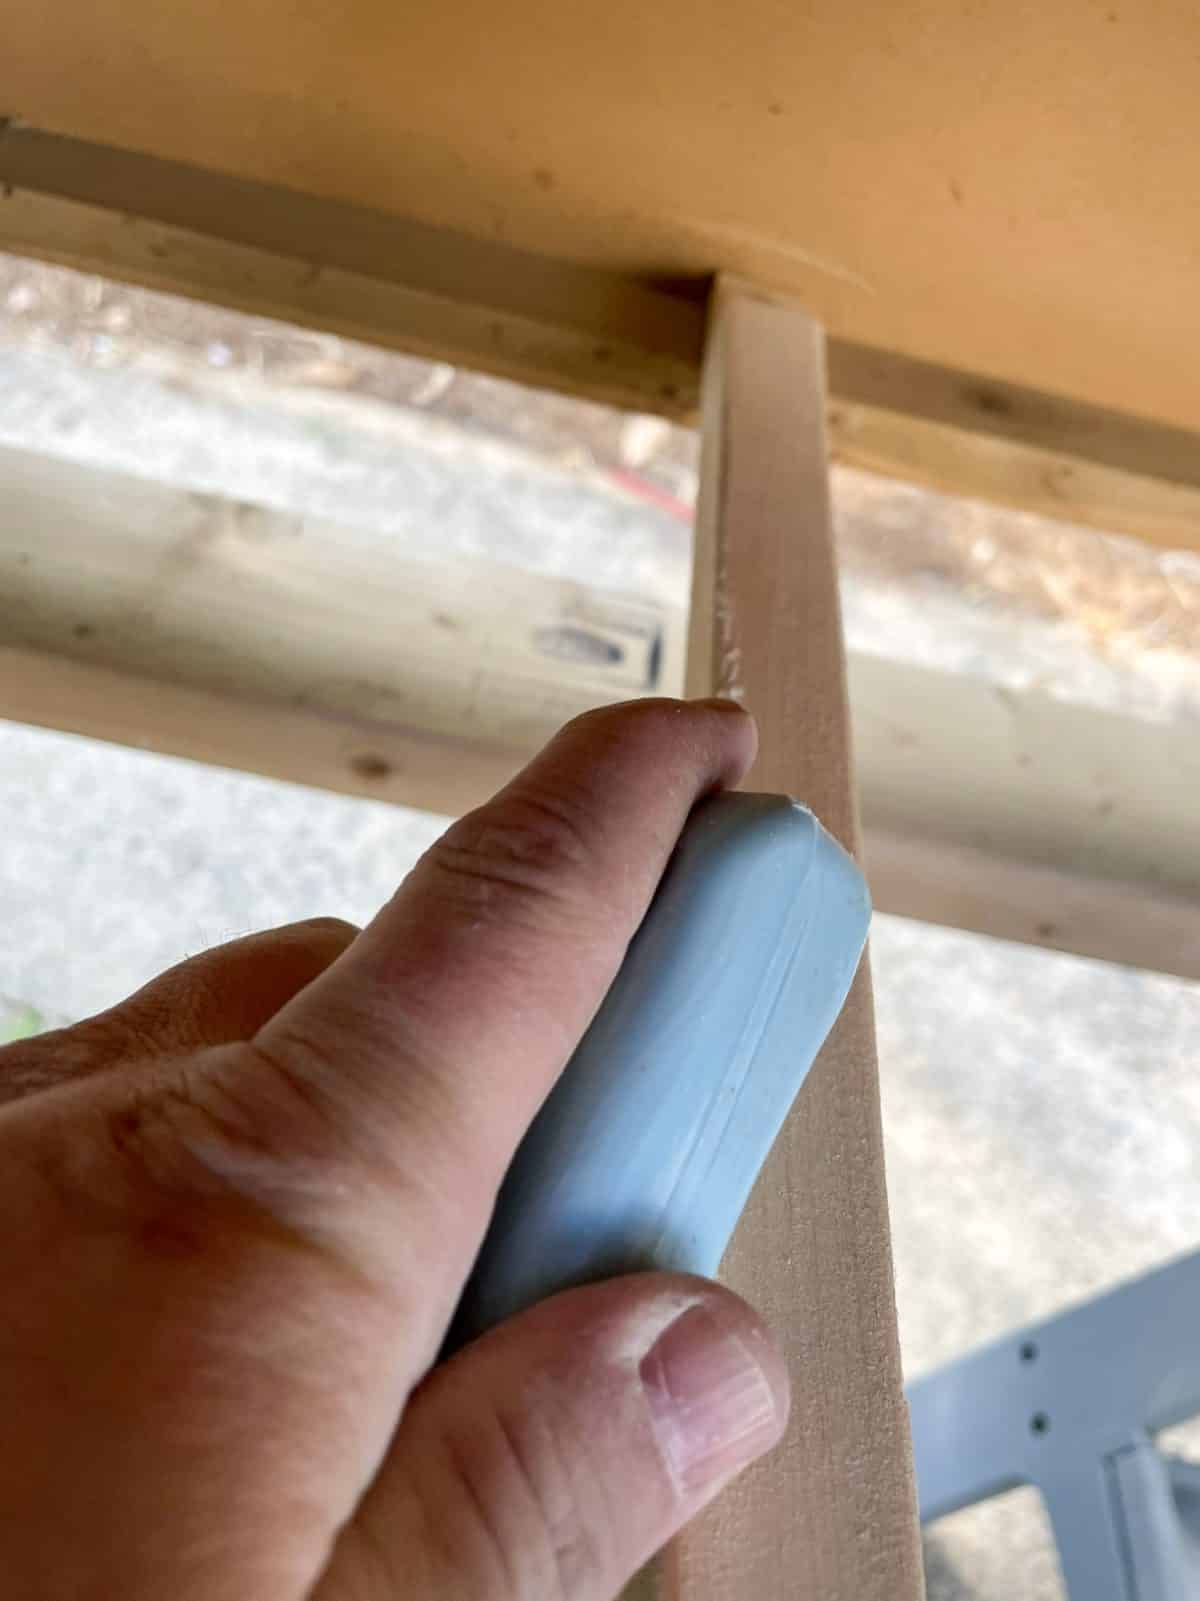
Once finished, I installed all three slides and used a bar of soap on the slides on the cabinet and track on the drawer to reduce the drag and lubricate the drawers.

The front right corner had some damage that I wanted to repair. This was a straightforward fix. A small amount of wood filler to help fill in the damaged corner.
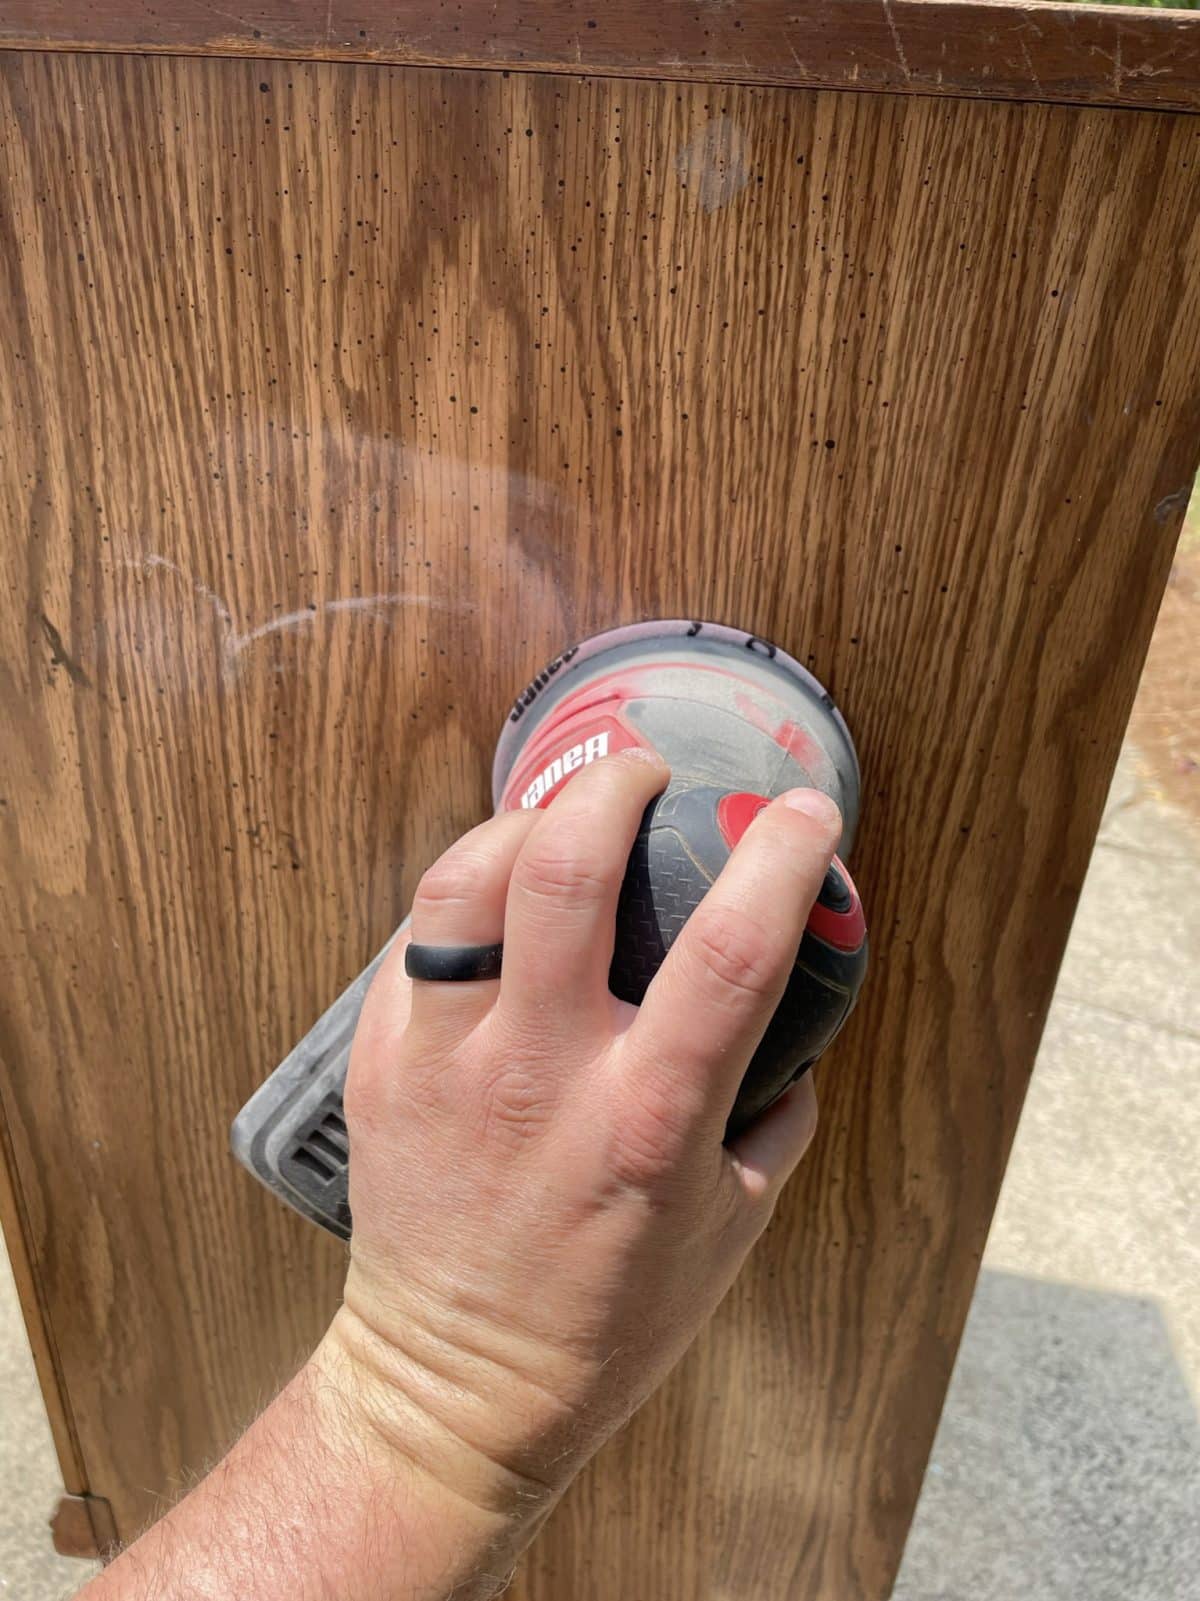
One step that is incredibly necessary but easy to skip is giving the original wood finish a scuff sand. This is a light sand to rough up the finish, which gives the primer something to adhere to. I used an orbital sander with 150 grit sandpaper. I gave the piece a thorough wipe-down with a damp cloth lint-free cloth to ensure all dust from sanding was removed. Once the piece was cleaned of all the scuff sand dust, I was ready to prime the lowboy chest of drawers.
Since I am using the original hardware instead of the new hardware, I did not have to alter the drawer fronts. Now on to the primer.
Primetime for this oak chest of drawers
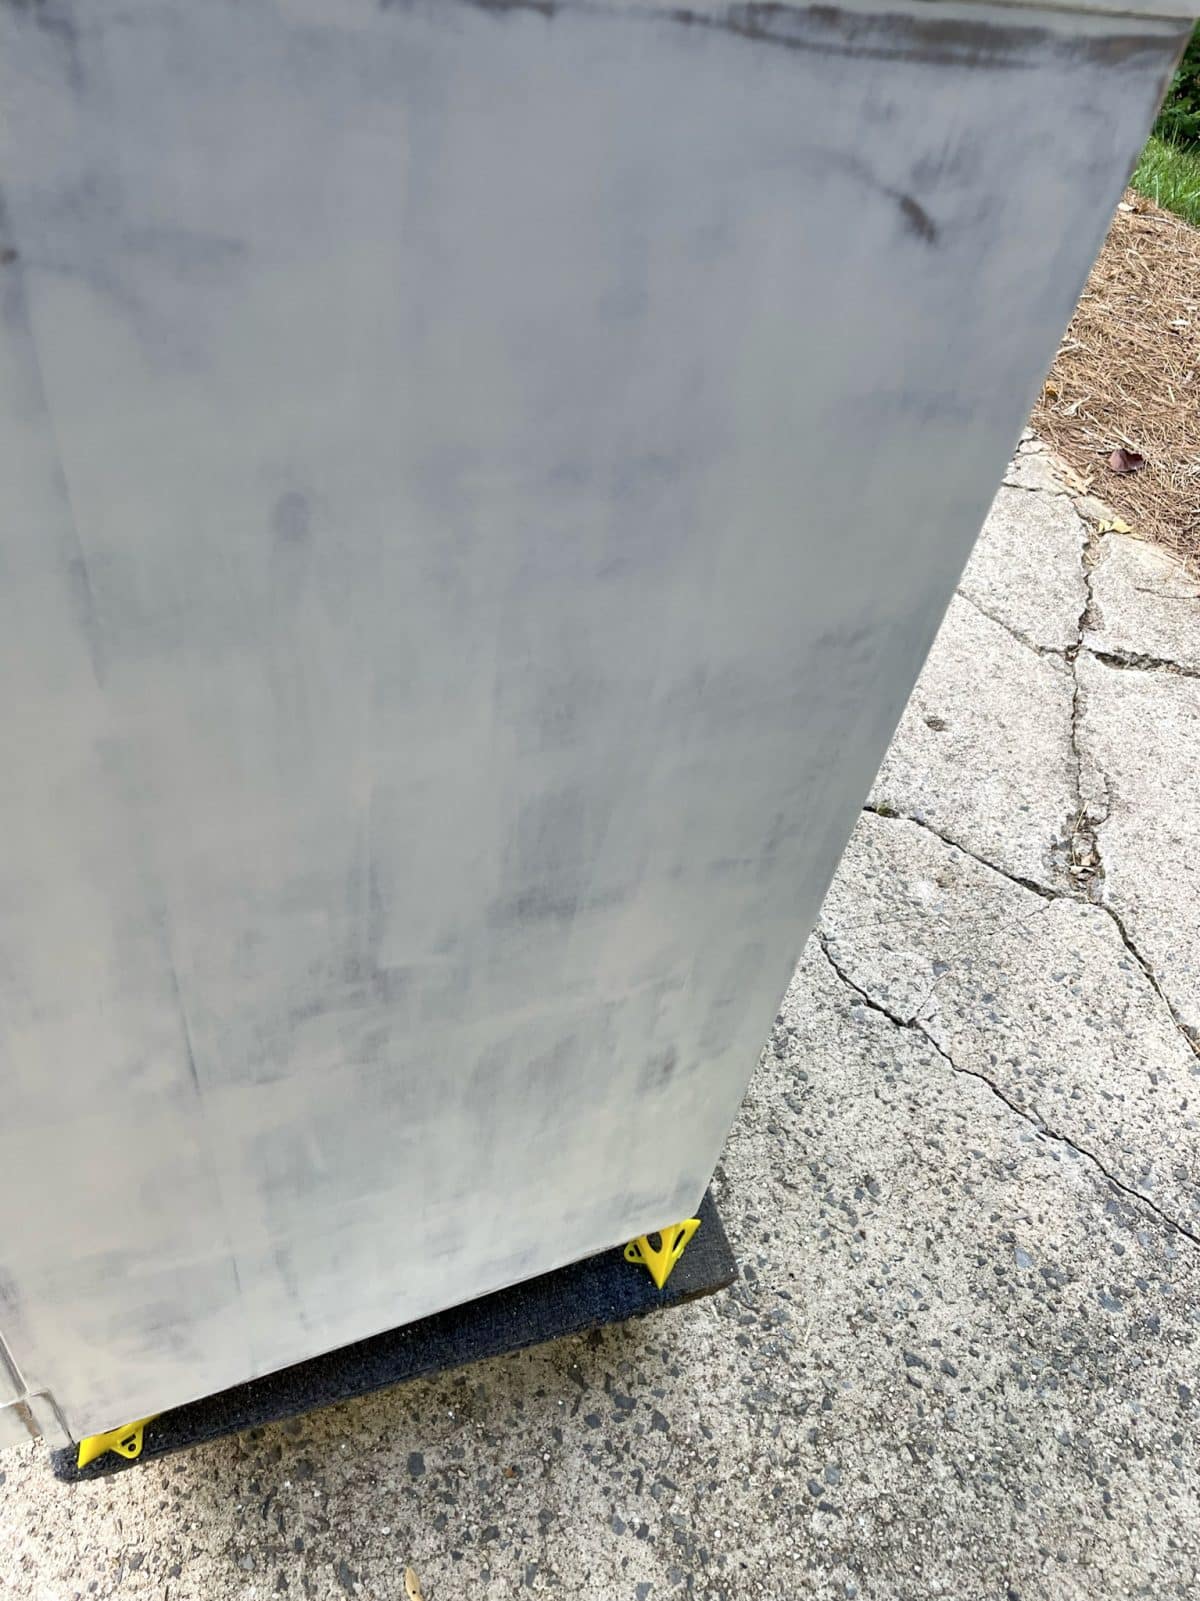
One of my favorite primers to use is Zinsser BIN shellac primer. This stuff sticks to everything! Kind of like my t-shirt on a hot, humid Tennessee day. I rolled the shellac primer with a foam roller and used a 2′ angled paintbrush to get into the tight spots on the drawer fronts. A quick sand with 220 grit sandpaper ensured a smooth finish.
Here comes the color on this dresser renovation
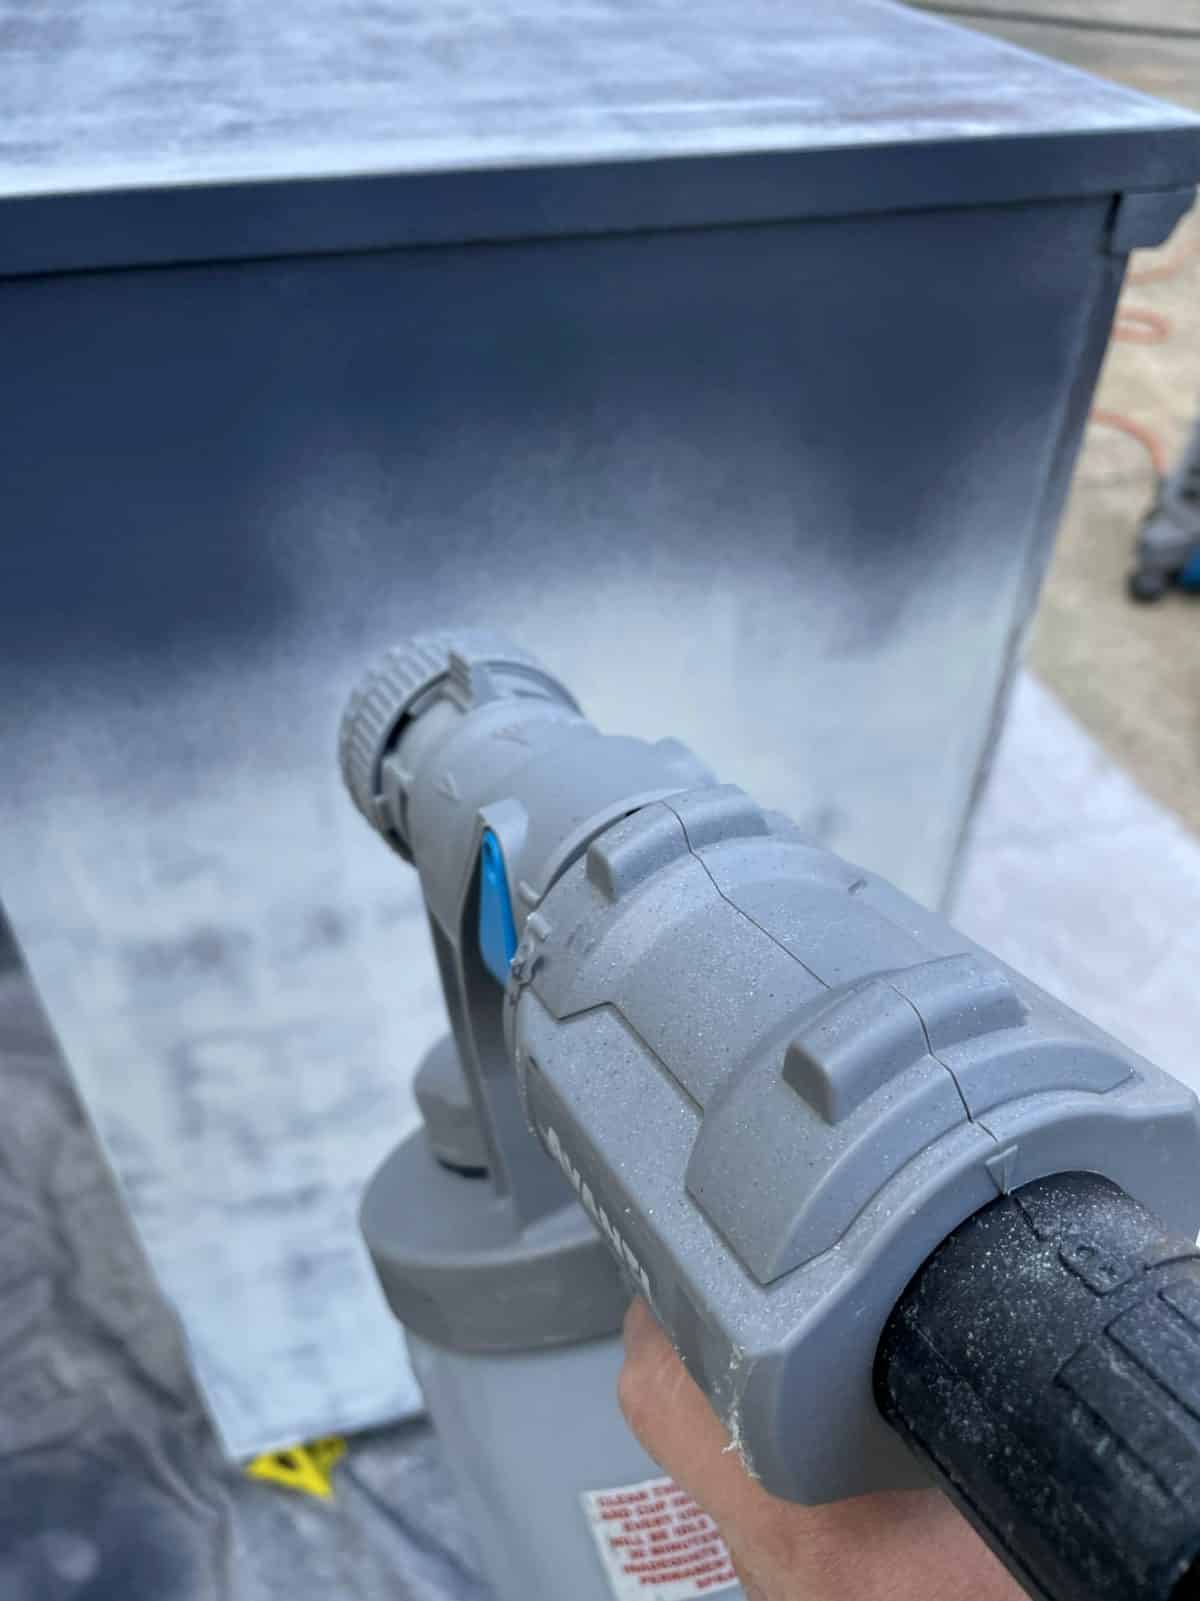
I have used Hale Navy by Benjamin Moore a few times. Once on a wall in my son’s room as well as on several furniture pieces. I figured Hale Navy was the right pick for this piece because of the contrast of the dark paint and brass drawer pulls. I used a satin finish for a softer appearance.
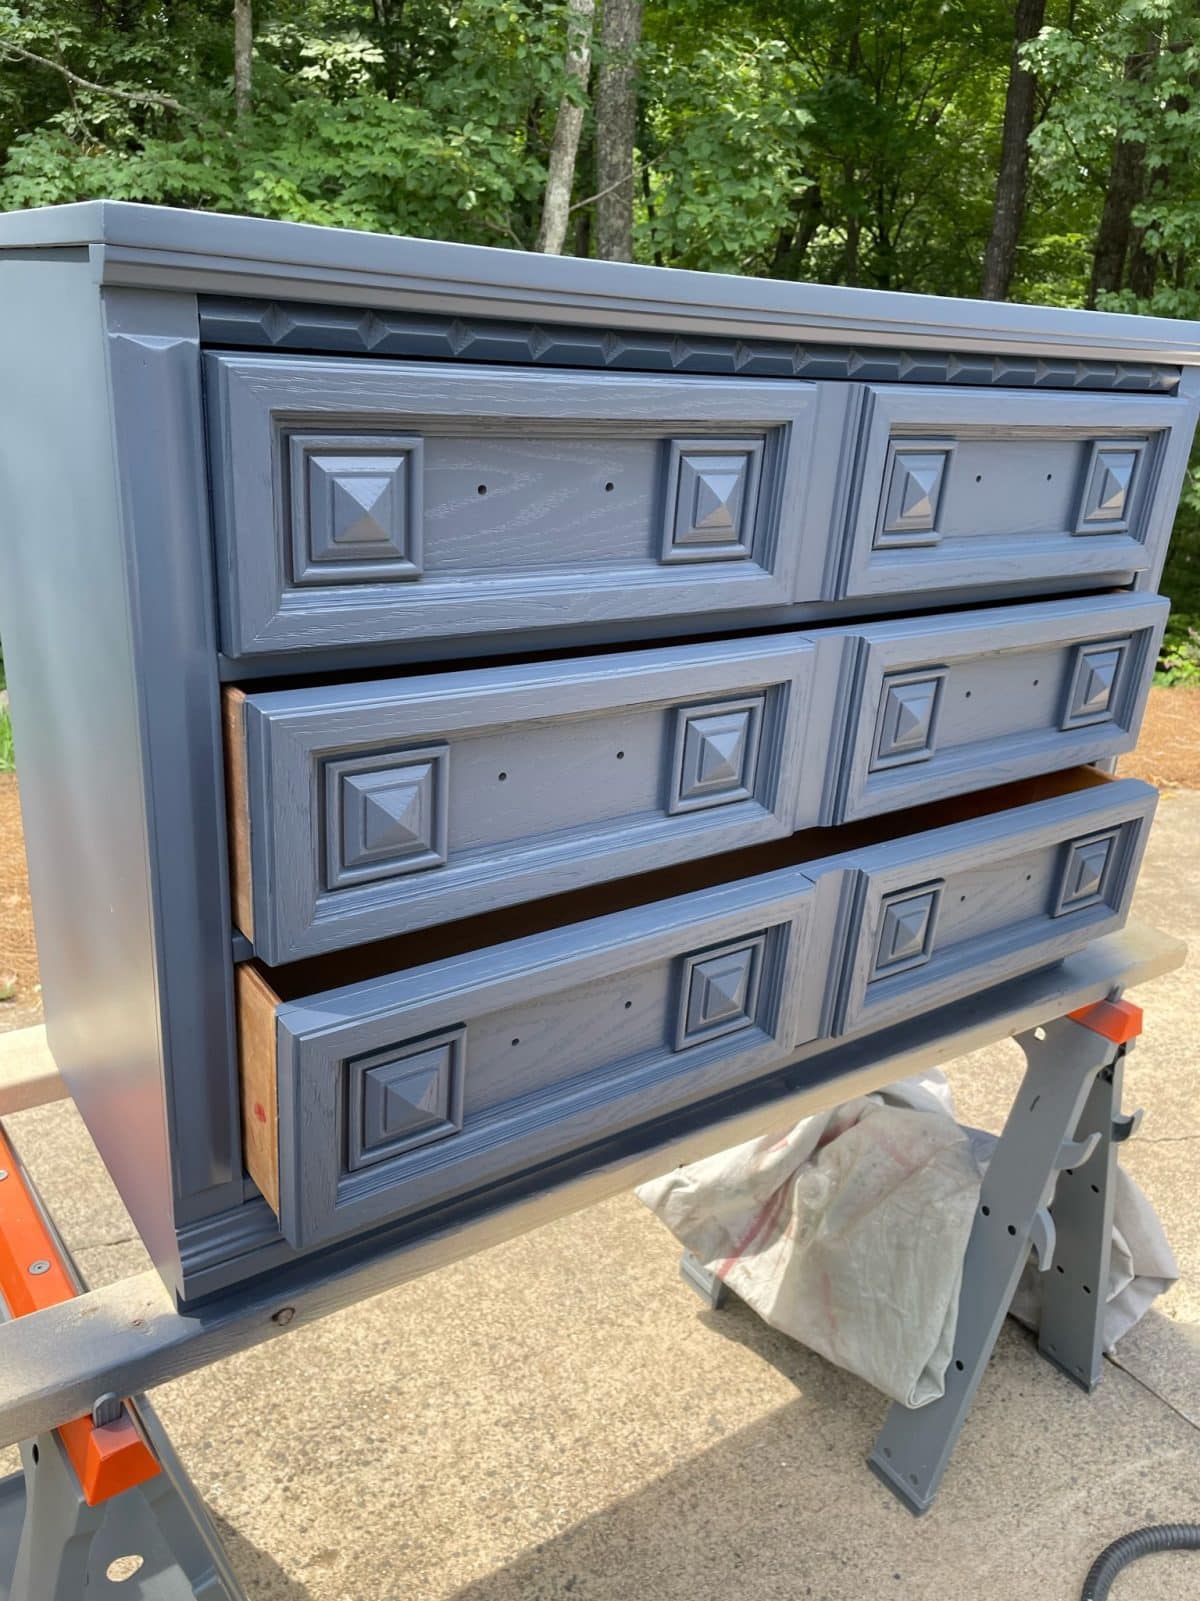
Remember that the goal is not to have the piece painted in one single coat of paint. So, multiple thin coats of paint from a sprayer are the way to go.
You can see after the first coat, there were still places on the dresser that would need more paint. It’s ready for a second coat.
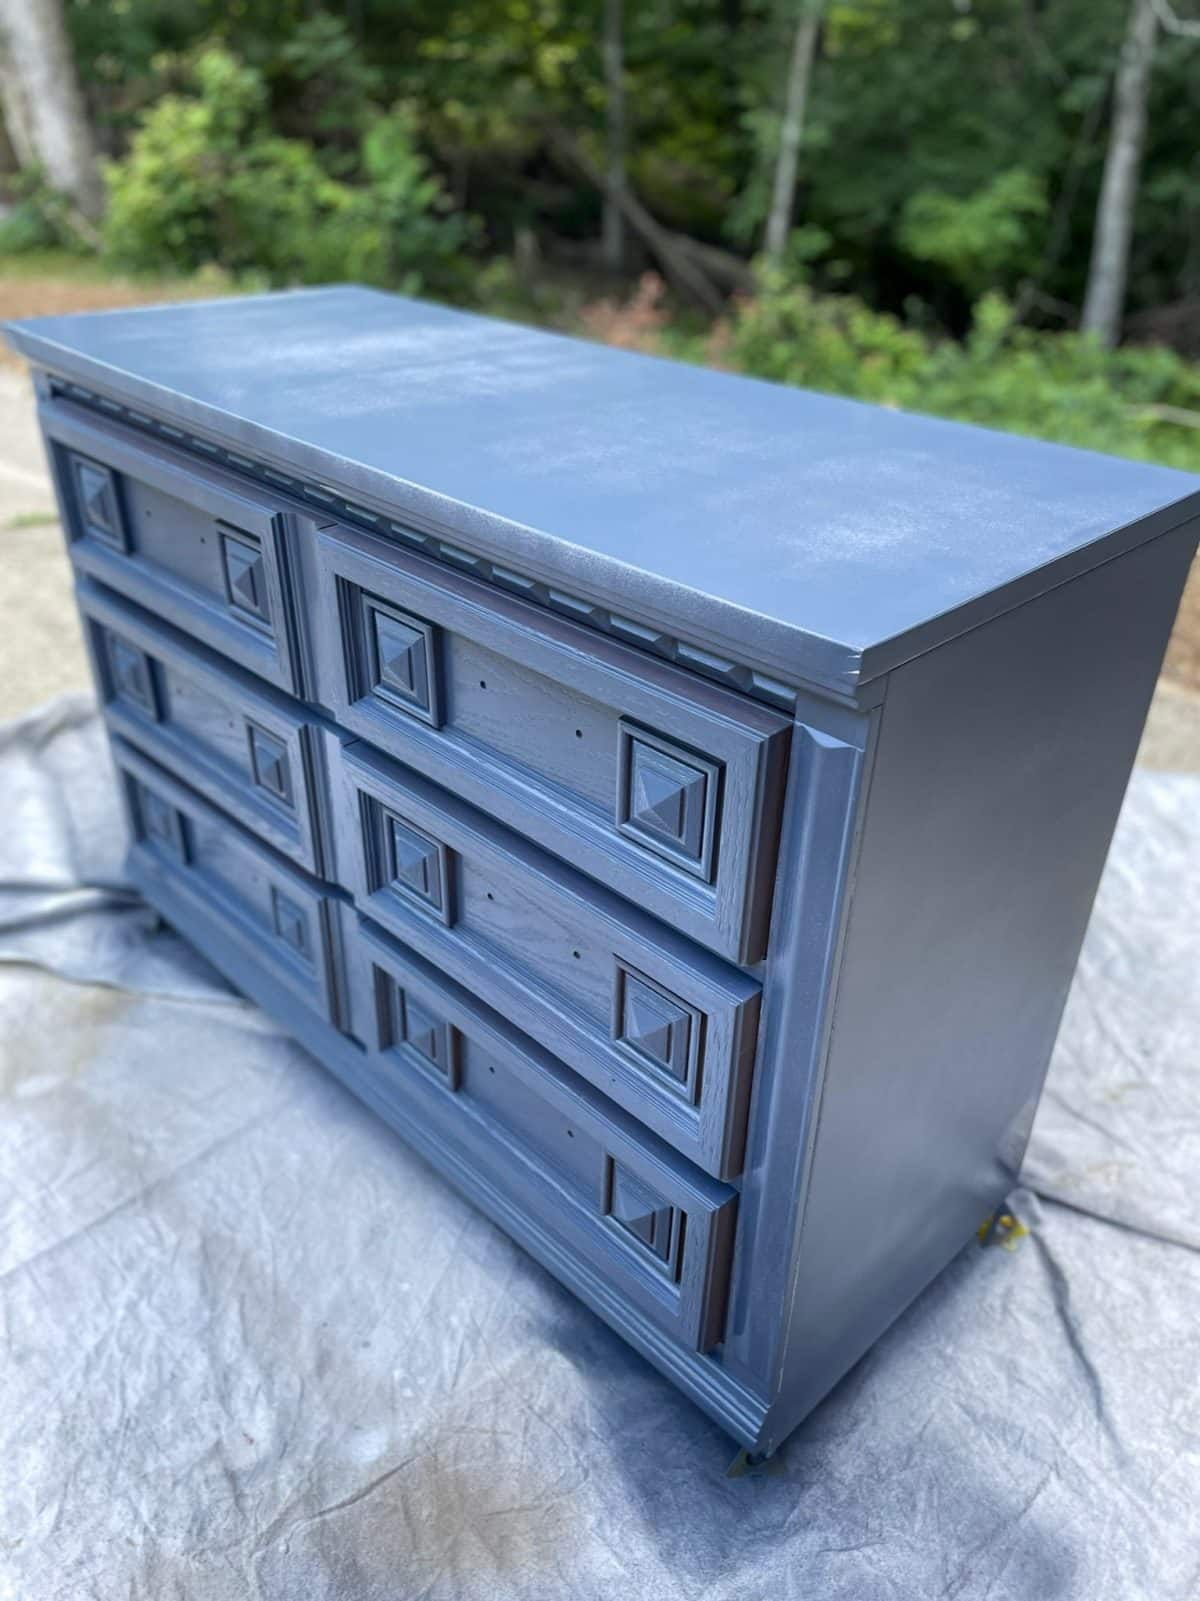
Three coats of paint gave me the proper coverage and finish I was looking for. Amazing what a fresh coat of paint can do for a vintage dresser makeover.
The oh-so-important topcoat For This 80’s Dresser Makeover
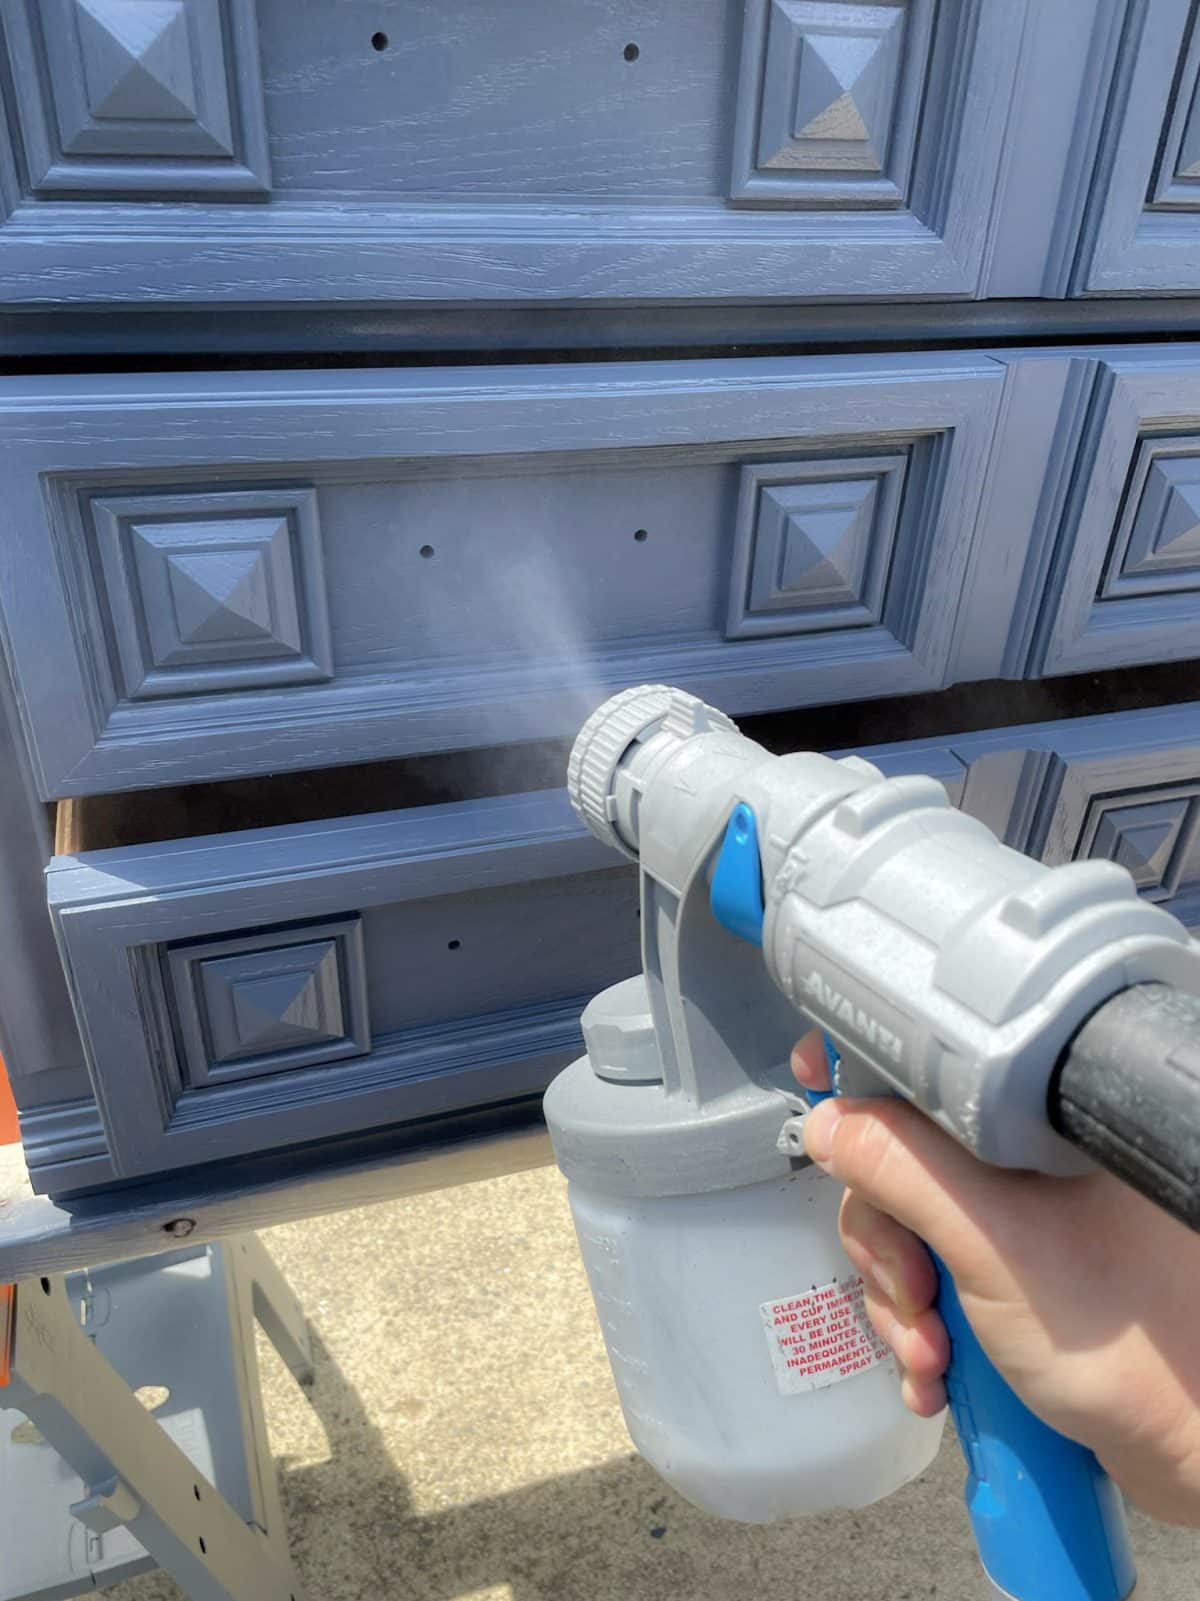
Remember that a paint sprayer will spray thinner coats than if you used a brush or roller to paint your furniture. You may need to do more coats than you think you need. I sprayed four thin coats of satin finish Minwax Polyacrylic which gave a beautiful sheen.
Just like that, the painting is complete. Two more steps to a completed 80s dresser makeover.
Clean the original hardware
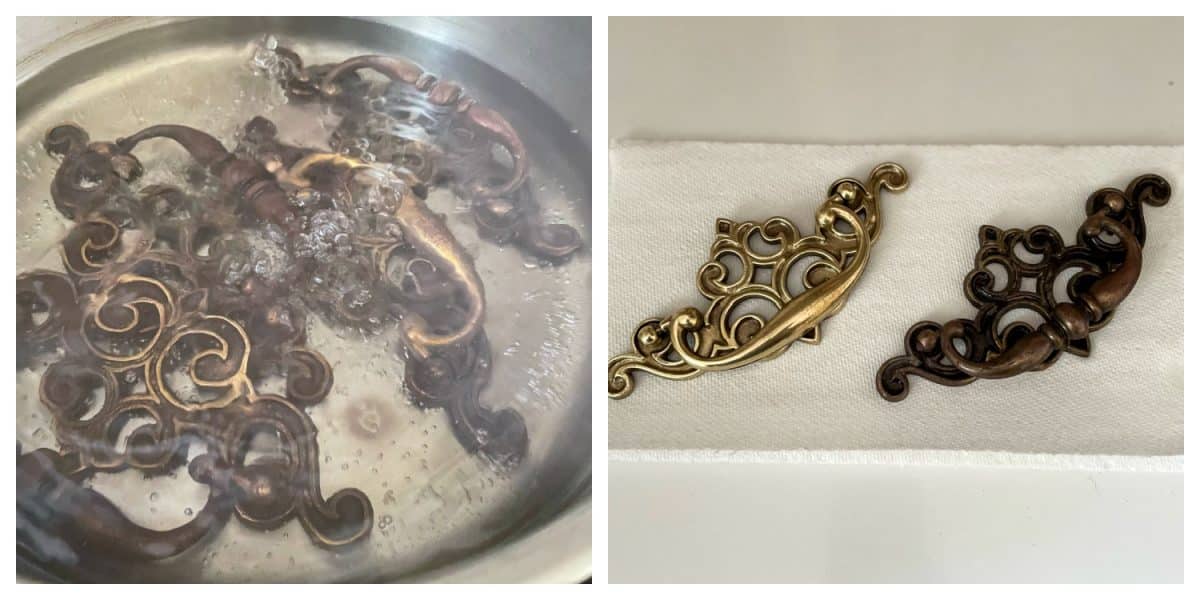
To clean the original hardware, I used a solution of one part water to one part vinegar. I put enough of the solution in a pot that the hardware was covered once in the pot. After twenty minutes of boiling, the hardware was ready to go through a huge transition. Once removed from the solution, I let the drawer pulls cool for a few minutes so I wouldn’t lose my fingerprints while trying to clean them. I wiped the drawer pulls with fine steel wool and rinsed them off. That easy!
This 80’s dresser makeover is almost complete
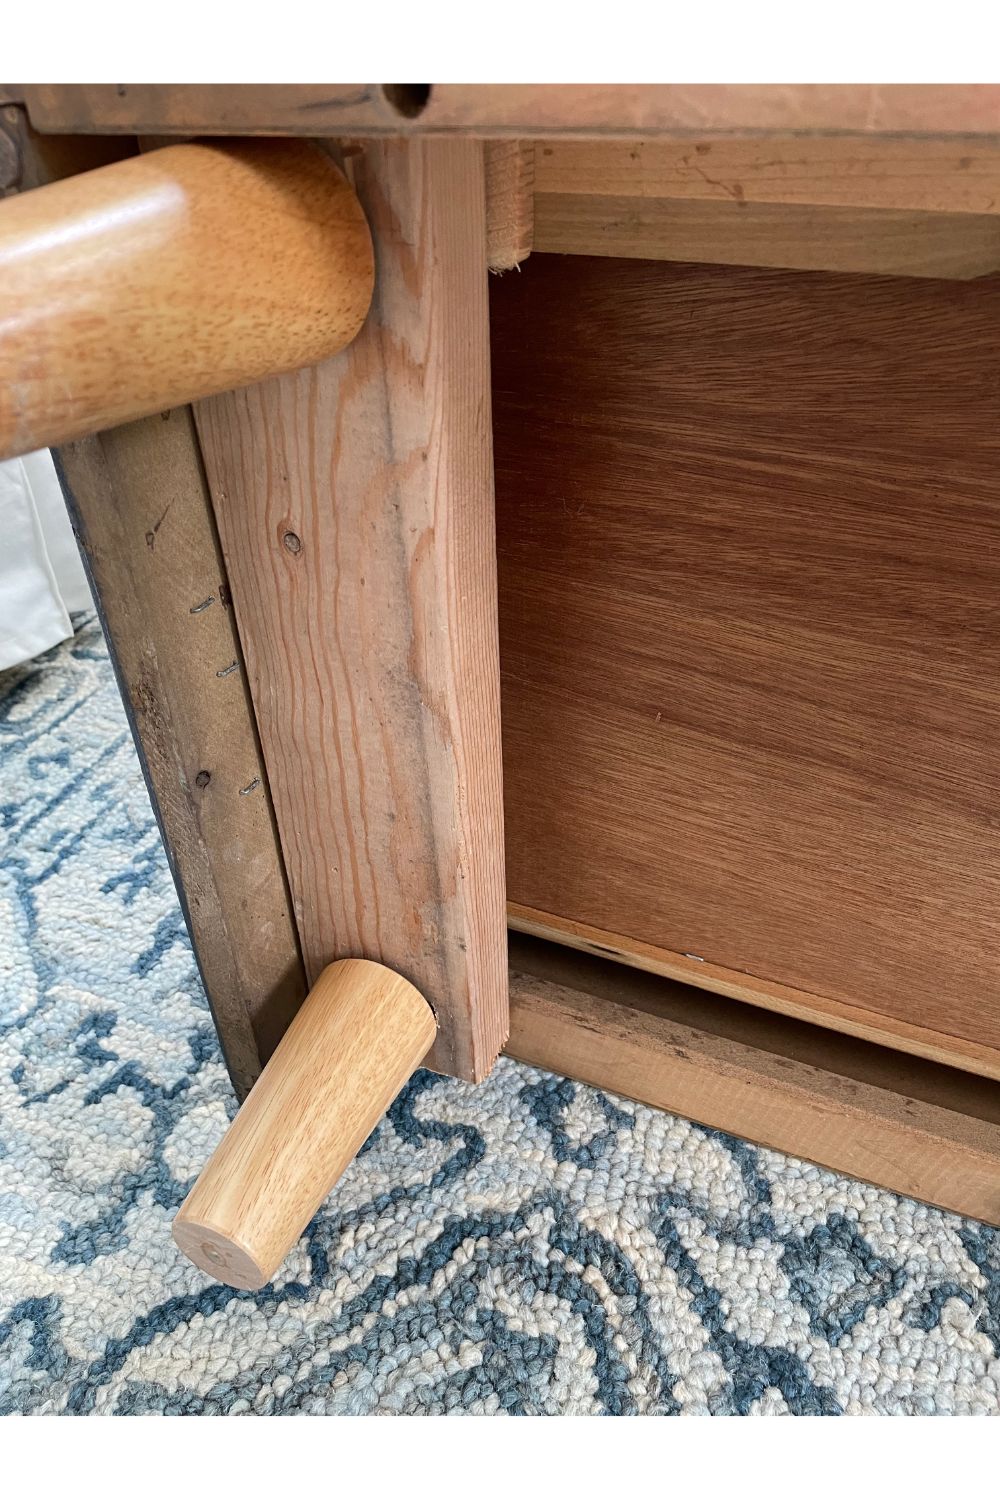
New legs – Forrest Gump
Now that the dresser is painted and sealed, the last step is to add new legs for visual effect and to give this lowboy a little more height. Since there is nothing under this dresser to screw the new legs into, I had to add two 2x4s to each side. I measured from front to back and cut the 2×4 to length. I predrilled all holes and slowly screwed all screws in to ensure I did not crack any parts of the dresser. Once the 2x4s were in place, I drilled pilot hols for the anchors that the new legs will screw into. Once all anchors were in place, I screwed the legs in, completing this 80’s dresser makeover.
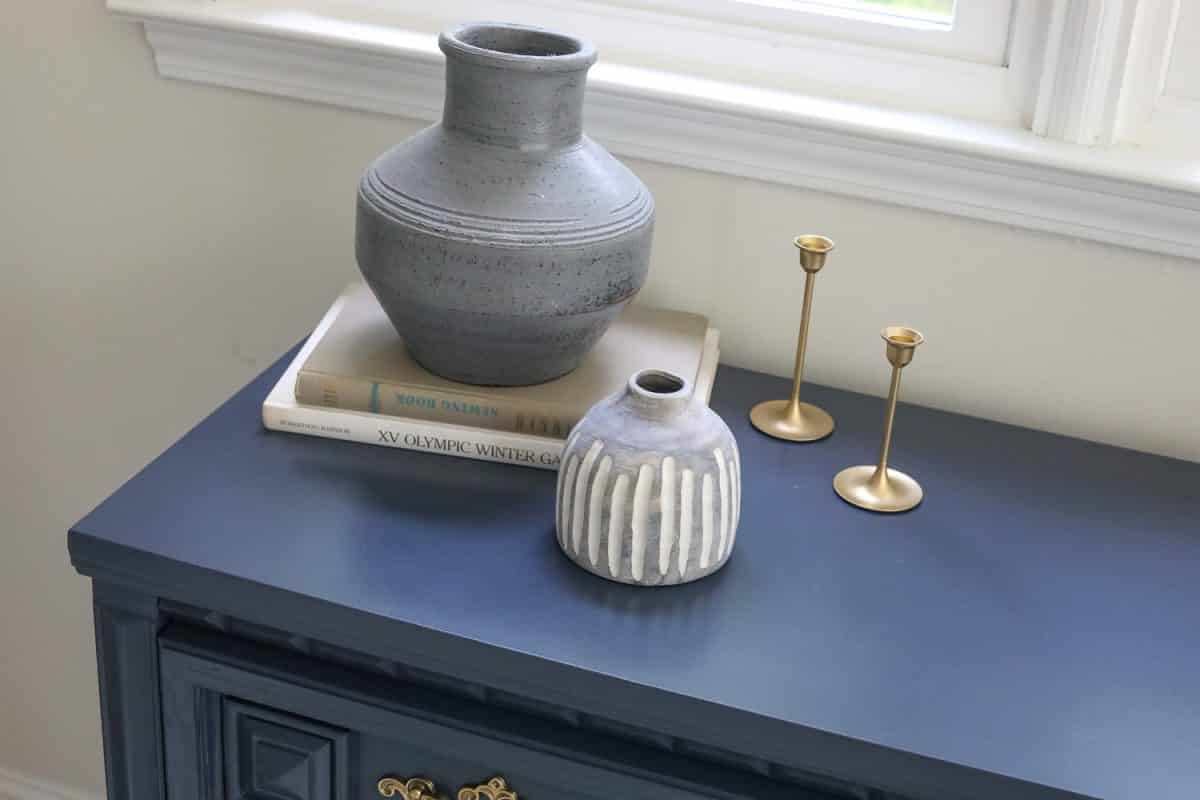
How do you modernize an old chest of drawers?
You can modernize an old chest of drawers in a few different ways. Restyle the top of the chest. Add some interesting coffee table books, a new lamp, a candle, or a plant. The second option is to update the hardware. Either clean the old (like I did in this post) or check out Pottery Barn, Restoration Hardware, and West Elm to see the current trend in drawer hardware, then head to Amazon and find something similar. New legs! By adding legs, you will modernize and give the chest some additional height. Lastly, do an entire makeover of the chest as well as update the styling of items that sit on top of the chest.
What is the cheapest way to redo a dresser?
This is actually a tougher question. You may think that restyling it would be the cheapest, but that stuff can add up quickly! Trust me, we have been renovating our house, and I have spent way too much time and money at HomeGoods! New hardware (new knobs or pulls) is a cheap alternative. You can score new drawer pulls on Amazon for about $2 per pull. An entire makeover can actually still be done on a budget. This can end up being more expensive with buying primer, paint, pulls, and styling items.
What kind of paint do you use on veneer furniture?
What kind of paint is not the best question. A better question is, how do I get it to stick to the veneer better? Primer! There are three primer options to choose from. Oil-based, Latex, and Shellac. An Oil-based is a good option for bare or exterior wood and will seal the wood allowing the paint to stick to the primer and not be absorbed as much by the wood. Latex is the easiest to use due to its versatility, strength, and ease of clean-up. Shellac is the hardest to clean but sticks the best to whatever you are priming. Shellac is my pick on a lot of laminate and veneer furniture. When you think of Ikea furniture – think of shellac!
More Refinish wood with Paint Projects:
- Painted Mid-Century Dresser
- Refinished Night Stand
- 40 DIY Dresser Makeover Ideas
- Blue Coffee Table Makeover
- How to Paint a Nightstand Tutorial
On to my next project
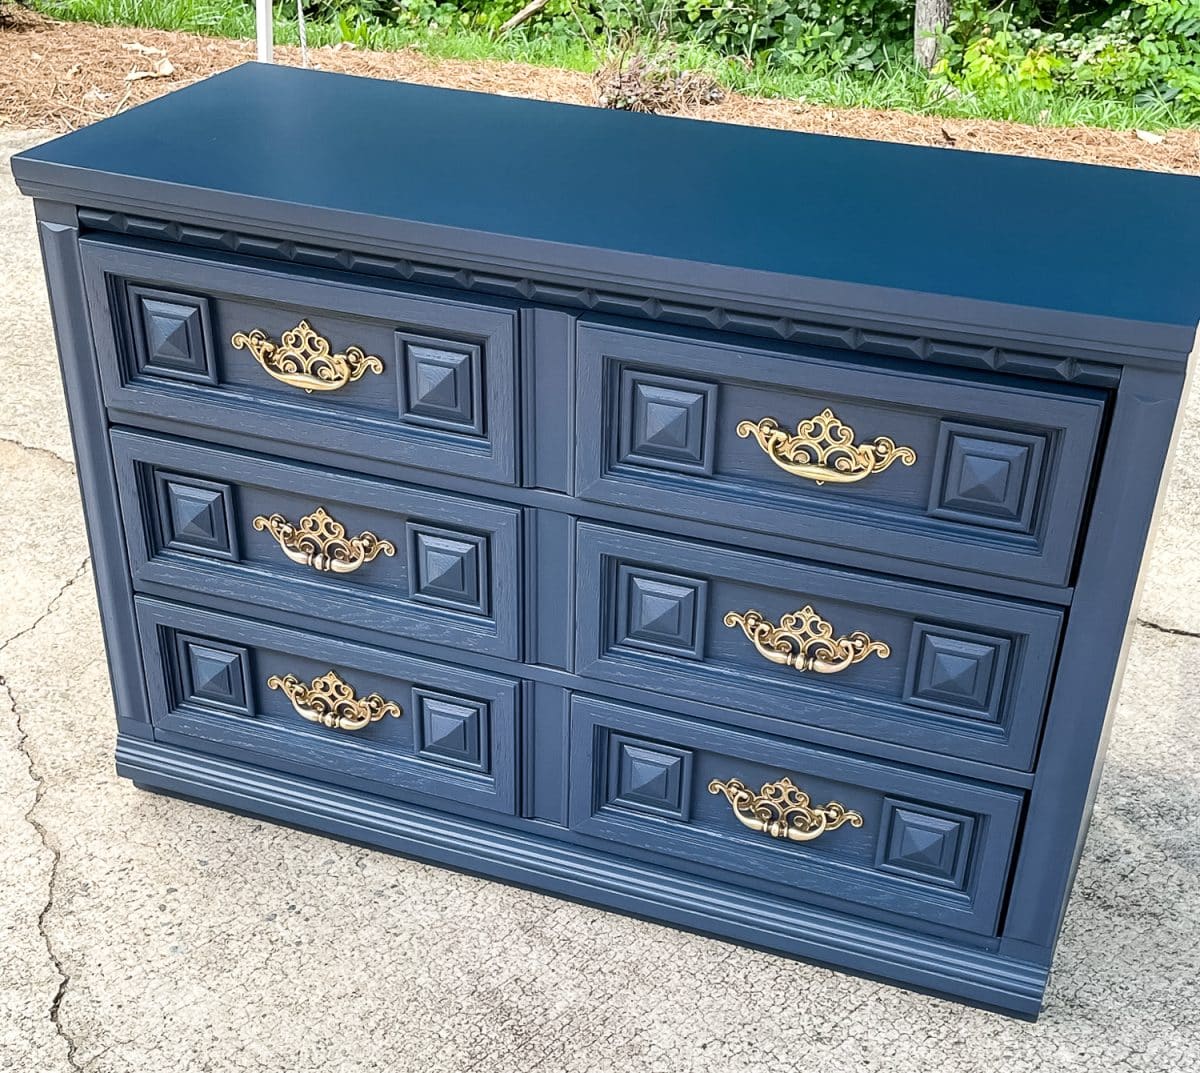
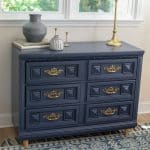
I trust you found something in this post helpful. This 80s dresser makeover turned into a really beautiful piece that can be used as a small dresser, a lowboy chest of drawers, a TV console, a small buffet, or a credenza.
I spent $40 to purchase the vintage chest of drawers (more than I would usually spend, but I loved the size of this piece), approximately $10 on primer and paint (I used primer and paint I already had), and $16 for the legs (I had a scrap 2×4 in my garage that was used as the base for the legs to anchor to). This dresser makeover totaled $66. I think that was well worth it!
If you haven’t gotten the courage to start on a furniture refinishing project, do it scared. All mistakes can be fixed. Don’t let that stop you from jumping into a project. Let me know what you’re working on or what your next project is!
80's dresser makeover - Complete guide with pictures
Materials
Instructions
- Mix the TSP per the directions. Spray the piece using a spray bottle or a cloth dipped in the solution, and wipe it down. Follow the safety directions regarding applying all chemicals. Use a dry towel to ensure the piece is dry and no streaks of grime or grease are left behind.
- Tip: Vacuum the inside of drawers and wipe them down. Adding a cabinet liner or a wood conditioning product is a nice touch.
- Use sandpaper or an electric sander (120 - 150 grit) to scuff sand the entire piece. This will give the primer a rough surface to help adhesion and bonding to the wood.
- Repair any drawer issues. I had to replace two slides that were cracked and loose.
- A Bar of soap or beeswax is excellent for lubricating drawer slides. Rub the bar of soap or a rag with beeswax along all parts of the drawer that comes into contact with a slide or rail on the dresser box.
- Find any imperfections that you want to repair. Use wood filler or Bondo to repair dents / dings, chips, corners, or gouges. Spread the compound with a putty knife along the area needing repair. Allow time to dry and lightly sand with 220 grit sandpaper.
- Apply Zinsser BIN shellac primer to the scuff-sanded 80s dresser. I used a 6" foam roller and a 2' angled paintbrush for the entire piece.
- With a paint sprayer, spray three coats of Benjamin Moore Hale Navy paint in satin finish. Remember, your goal is not to finish by spraying the entire piece with one coat. A paint sprayer takes many thinner coats of paint.
- Apply three coats of Minwax Polycrylic in satin to seal the entire piece of furniture. I used a paint sprayer to ensure no brush strokes. Between each coat, sand with 220 sandpaper. After the third coat has dried, give it a final sand with 600 grit sandpaper if there are any imperfections in the finish.s
- Boil the original, dirty hardware in a mixture of one part water to one part vinegar. Let boil for twenty to thirty minutes before removing to cool. Wipe the hardware with steel wool making sure to get in all of the cracks and crevices. Rinse and let hardware dry. Install refreshed hardware.
Leave a Reply