I have a favorite thrift store to visit in a small town a few miles south of where we live. I stop by during the school year on Monday mornings after I drop my son off at homeschool co-op. This thrift store is unlike any I have visited. Folks line up 30-40 minutes early to get the first shot at the good stuff—this is where I met a lovely older mid-century dresser that I thought would be the perfect addition to complete my oldest daughter’s bedroom. While it might not look like much to some, I could see this black beauty transform into a breathtaking painted mid-century dresser.

When looking for a furniture piece to flip, some might find it hard to look past what they initially see. Just about anything can be repaired or painted for DIY furniture makeover projects.
When we look for new pieces to refinish, first, we look for a brand stamp that can sometimes be found in a top drawer. We’ve often come across furniture made by expensive brands built with excellent craftsmanship when thrifting. Next, we check out the structure and drawers to see if any repairs are needed. It’s essential to look at the piece carefully to assess any cosmetic marks, scratches, water rings, chips, damage, etc., that will require work.
We also like to determine if the furniture is antique, vintage, mid-century modern, Queen Anne, art deco, farmhouse, country, etc. Right now, mid-century modern is super popular, so finding an authentic solid wood dresser in this style is a jackpot.

Look at this gorgeous dresser! It is dripping with potential!
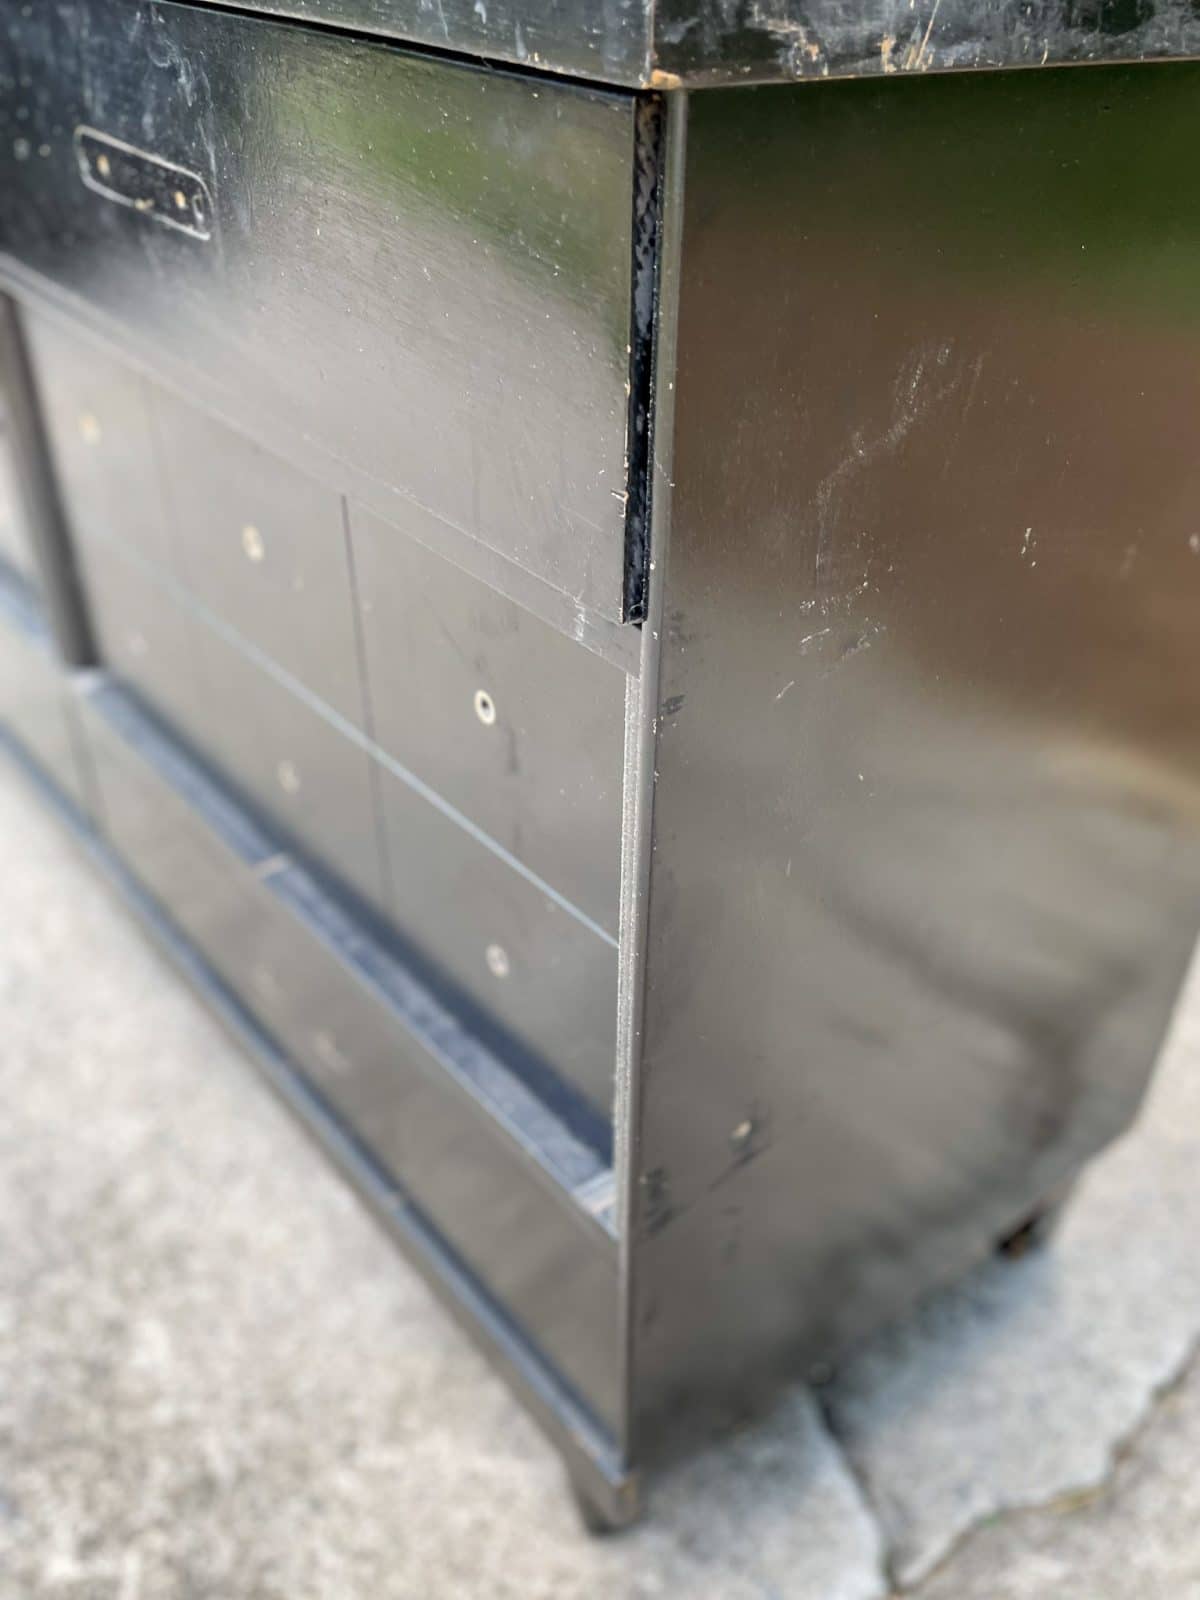
Now I will say that this piece has seen better days. It is a beautiful mid-century modern 6-drawer dresser made by Bassett Furniture. The top coat of paint is, well, how do I say this, terrible! My cat could have completed a better mid-century modern dresser makeover (painting only with her tail)! In addition to a horrible paint job, what on earth were the previous owners doing with this thing? It looks like it has been used as a cutting board, ping-pong table, and maybe even a saw horse. However, when I looked at the bones of this dresser, I knew this would be a tremendous makeover for a mid-century dresser painted to match my daughter’s room.
Let’s start this DIY mid-century modern dresser redo!
I think this project will take a lot of TLC to strip it down to a raw finish and repair all cosmetic issues. A little patience and elbow grease go a long way when working on DIY furniture projects.
Supply List for this mid-century modern dresser makeover
- TSP Cleaning solution (I typically use my DIY solution of 1 part vinegar to 1 part water with a few squirts of dish soap, but this project called for a stronger commercial cleaning solution.)
- Stripping agent (Citristrip is my go-to)
- Putty knife
- Wood filler
- 120 and 220 grit Sandpaper, sanding sponge, or orbital sander
- Mineral spirits
- Steel wool
- Painters tape
- Paint
- Polyurethane
- Paintbrush, paint roller, or paint sprayer
- New hardware (drawer pulls and knobs)
Time to tackle this MCM makeover
Here we go.
Clean the piece
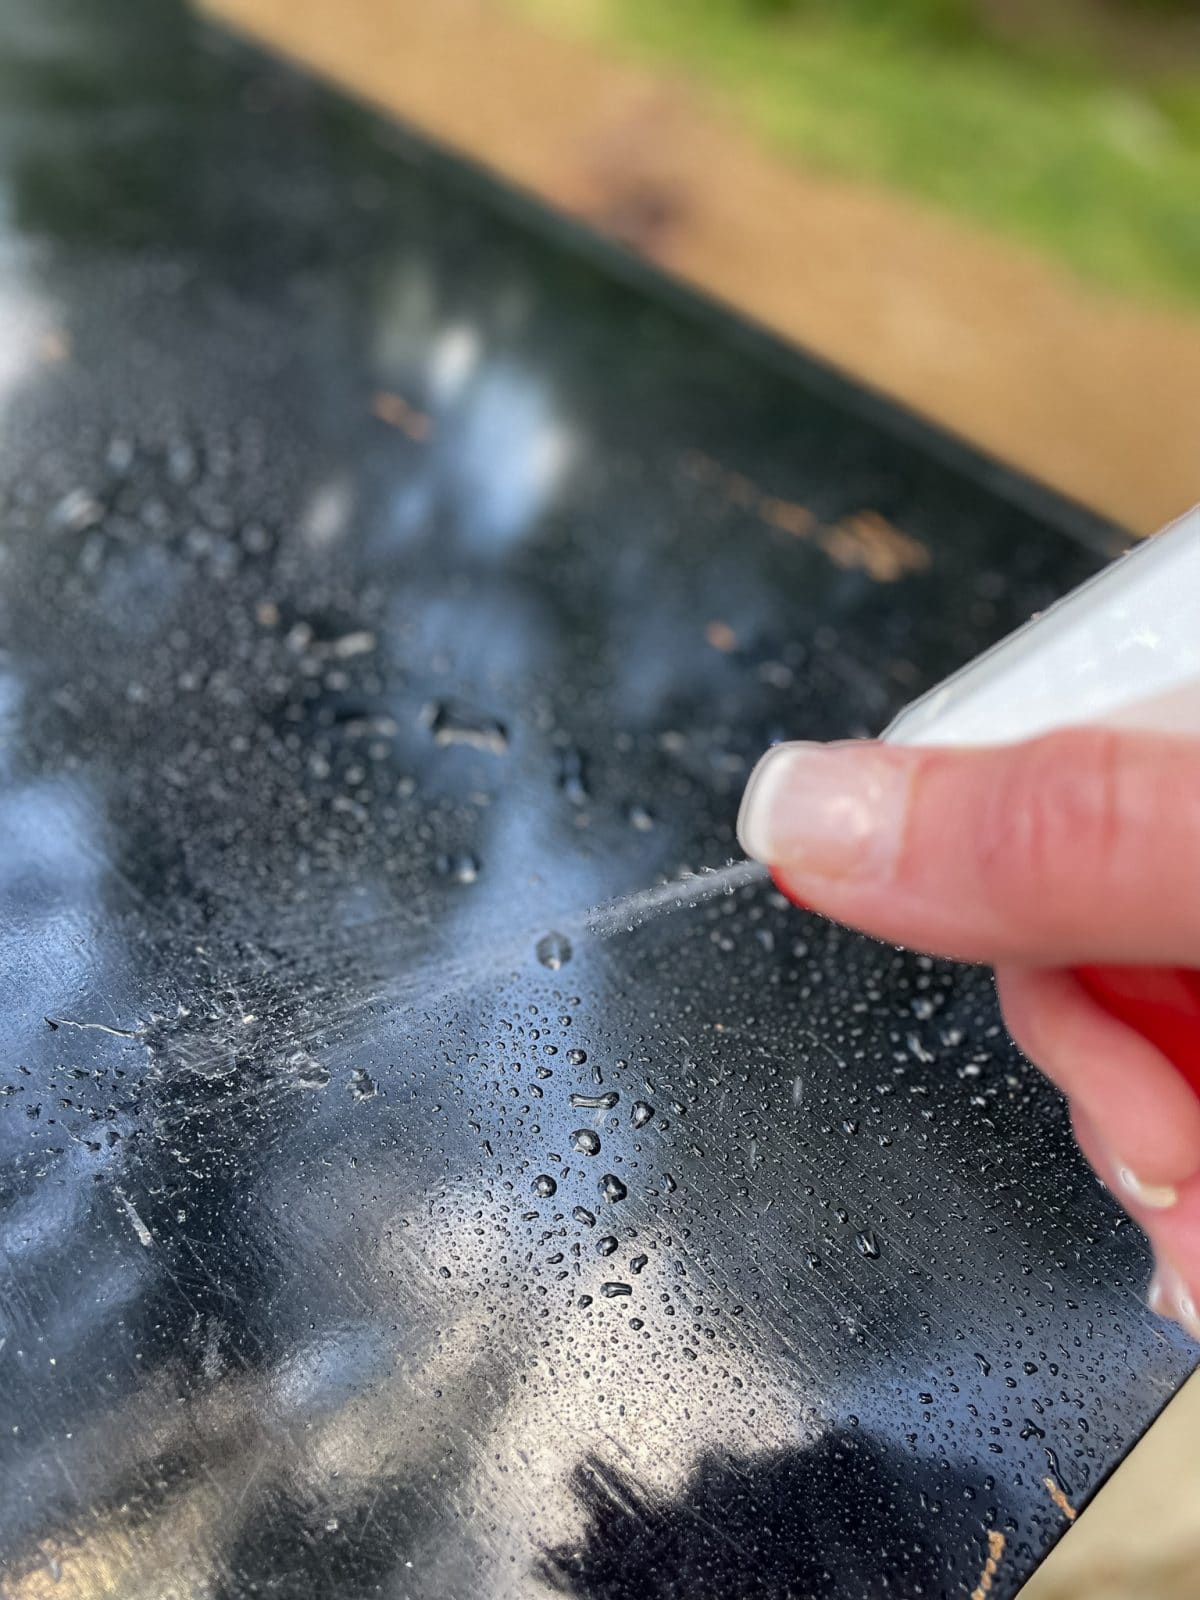
The first step with any furniture restoration project is to thoroughly clean the entire piece to remove all dirt, grime, and oils that may hinder the adhesion of your primer, paint, or stain. This piece was so dirty that I broke out the TSP. Typically I use my DIY cleaner (1 part vinegar to 1 part water), but I felt this MCM dresser needed something more potent than my usual cleaner. I mixed the TSP according to the directions, sprayed the piece using a spray bottle, and wiped it down with a rag. Make sure to follow the directions regarding applying any chemicals. After wiping the entire piece down, I returned with a dry towel and ensured the solution was gone and there were no streaks of grime or grease left behind.
Remove all paint and stain from the mid-century dresser
This mid-century dresser had a thick coat of high-gloss black paint and the original stain. It was a mess.

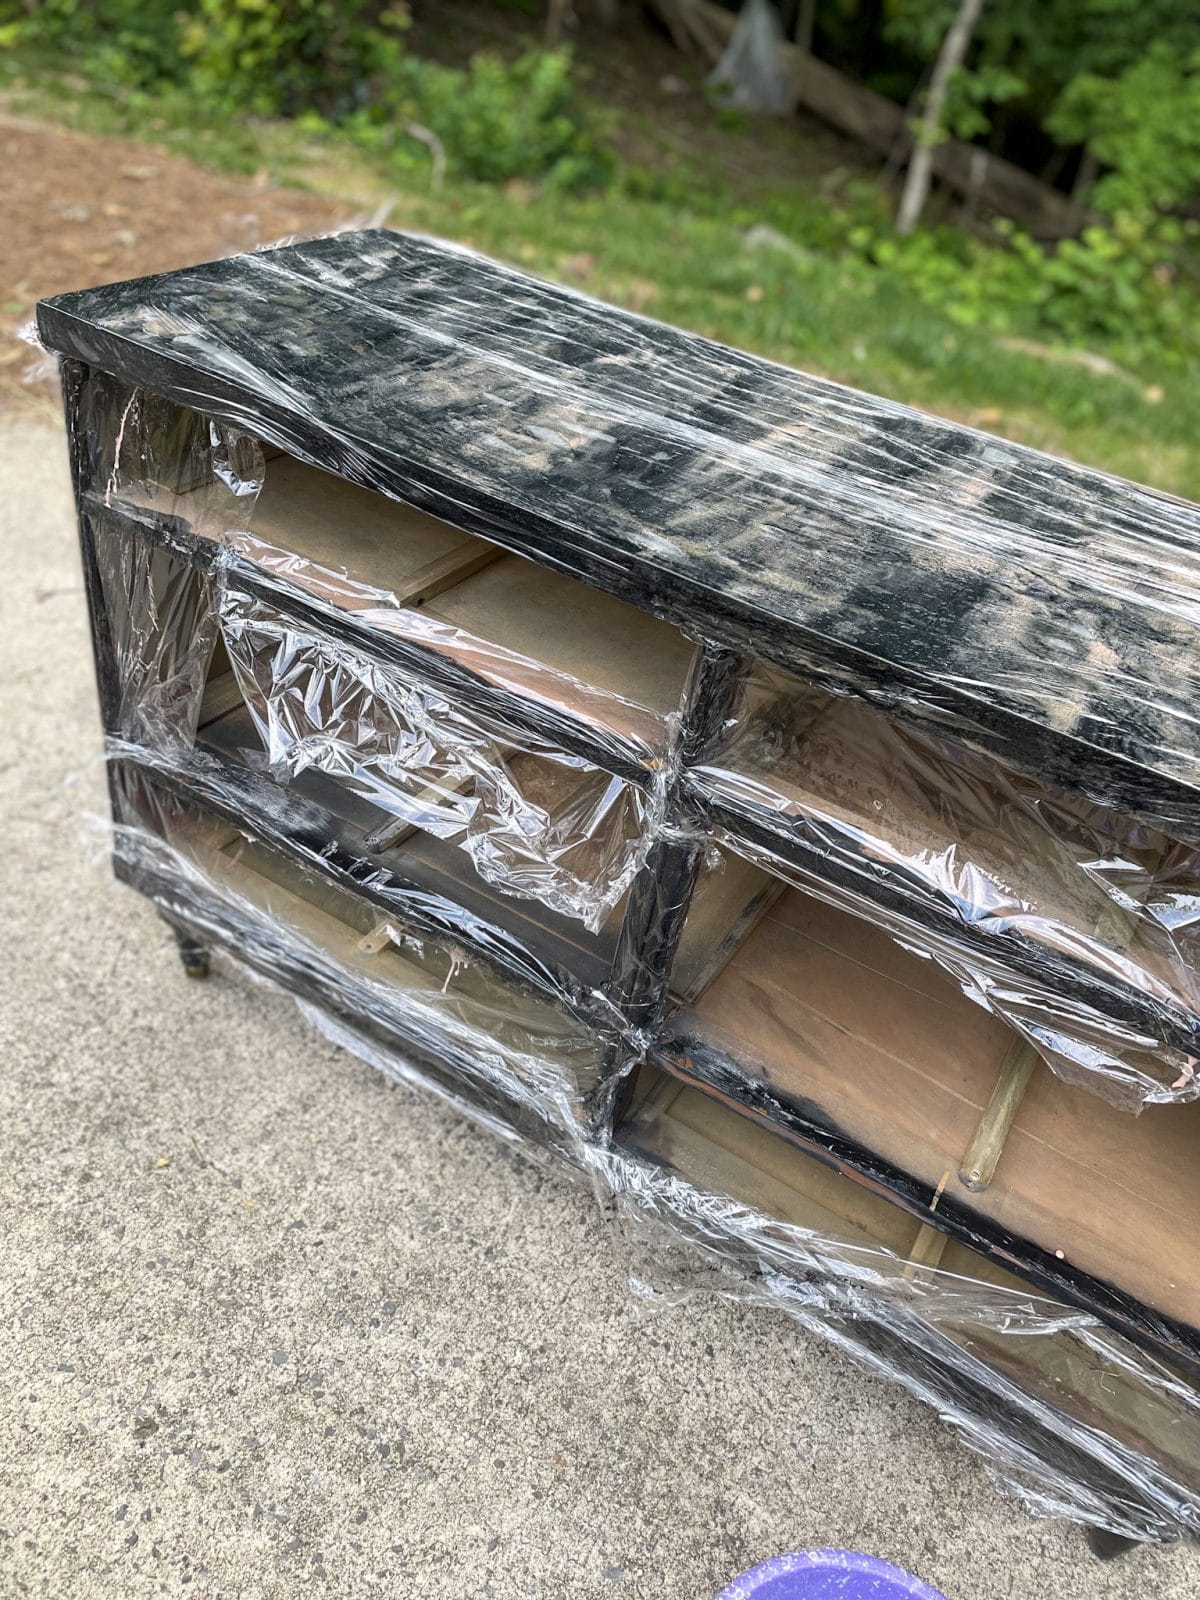
First, my wife liberally applied Citrastrip to the top and front of the dresser. Once she had a thick coat on the piece, she wrapped it with plastic wrap and let it sit for about an hour.
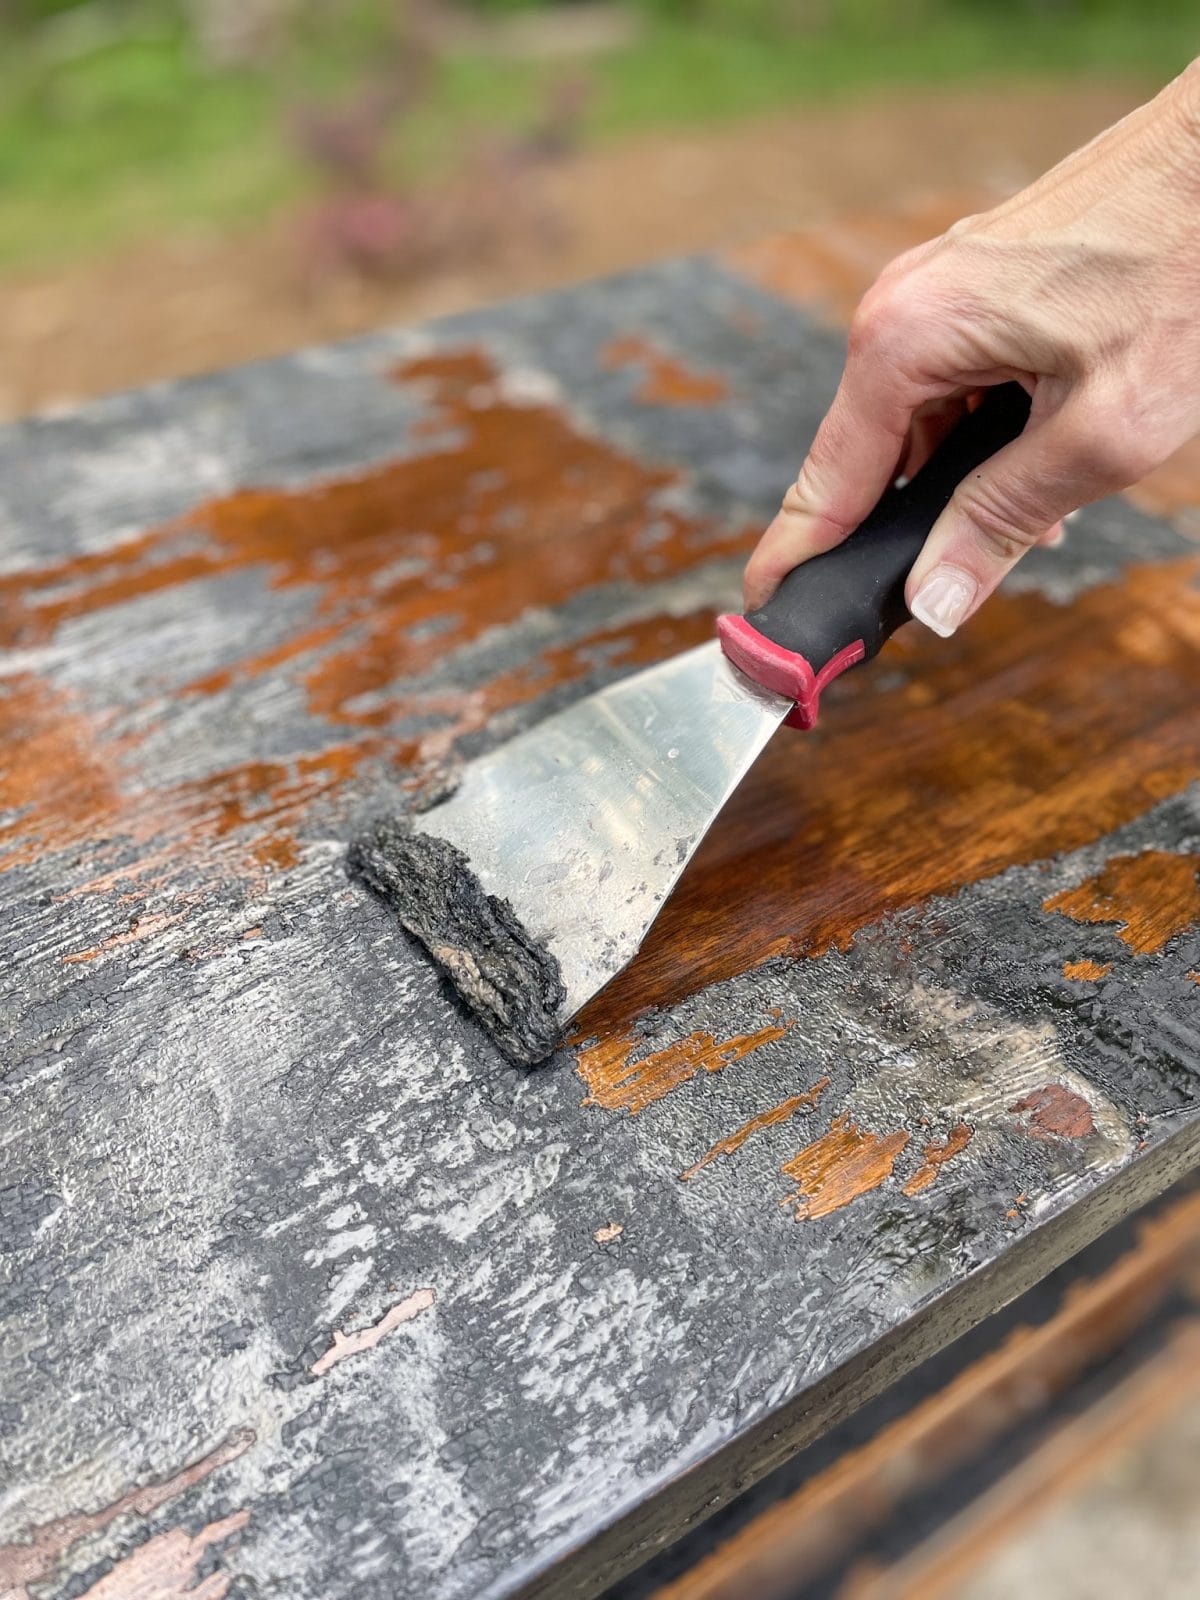
The Citrastrip had no mercy on the nasty high gloss black paint. The paint and original stain came off as soon as she started scraping the Citrastrip. Be careful when scraping anything off your pieces of furniture. A metal scraper or putty knife can dig and gauge the wood if you’re not careful. Kasey has quite a bit of experience stripping furniture, so she is comfortable using a metal scraper.
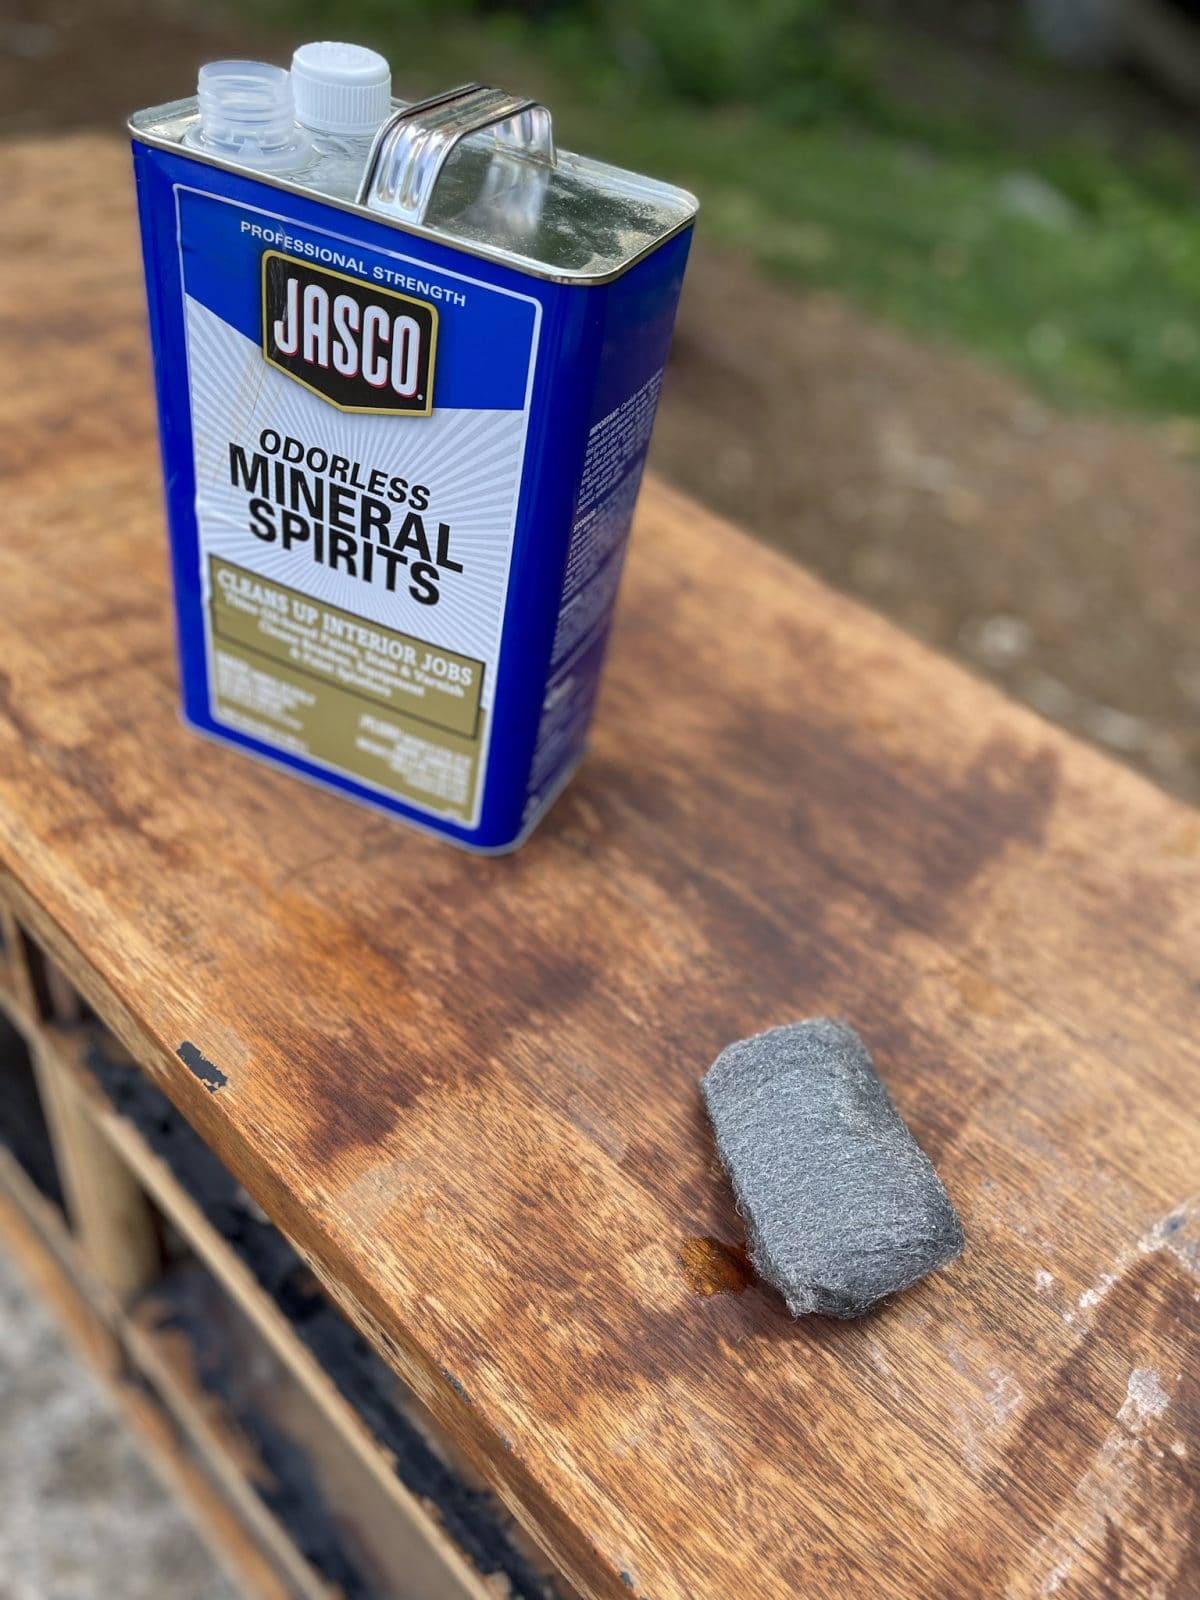
Once she removed all of the stripper, she used mineral spirits and fine steel wool to clean any remaining stubborn stain or paint. I hit the top and sides with 150 grit sandpaper, and the top and front were ready.
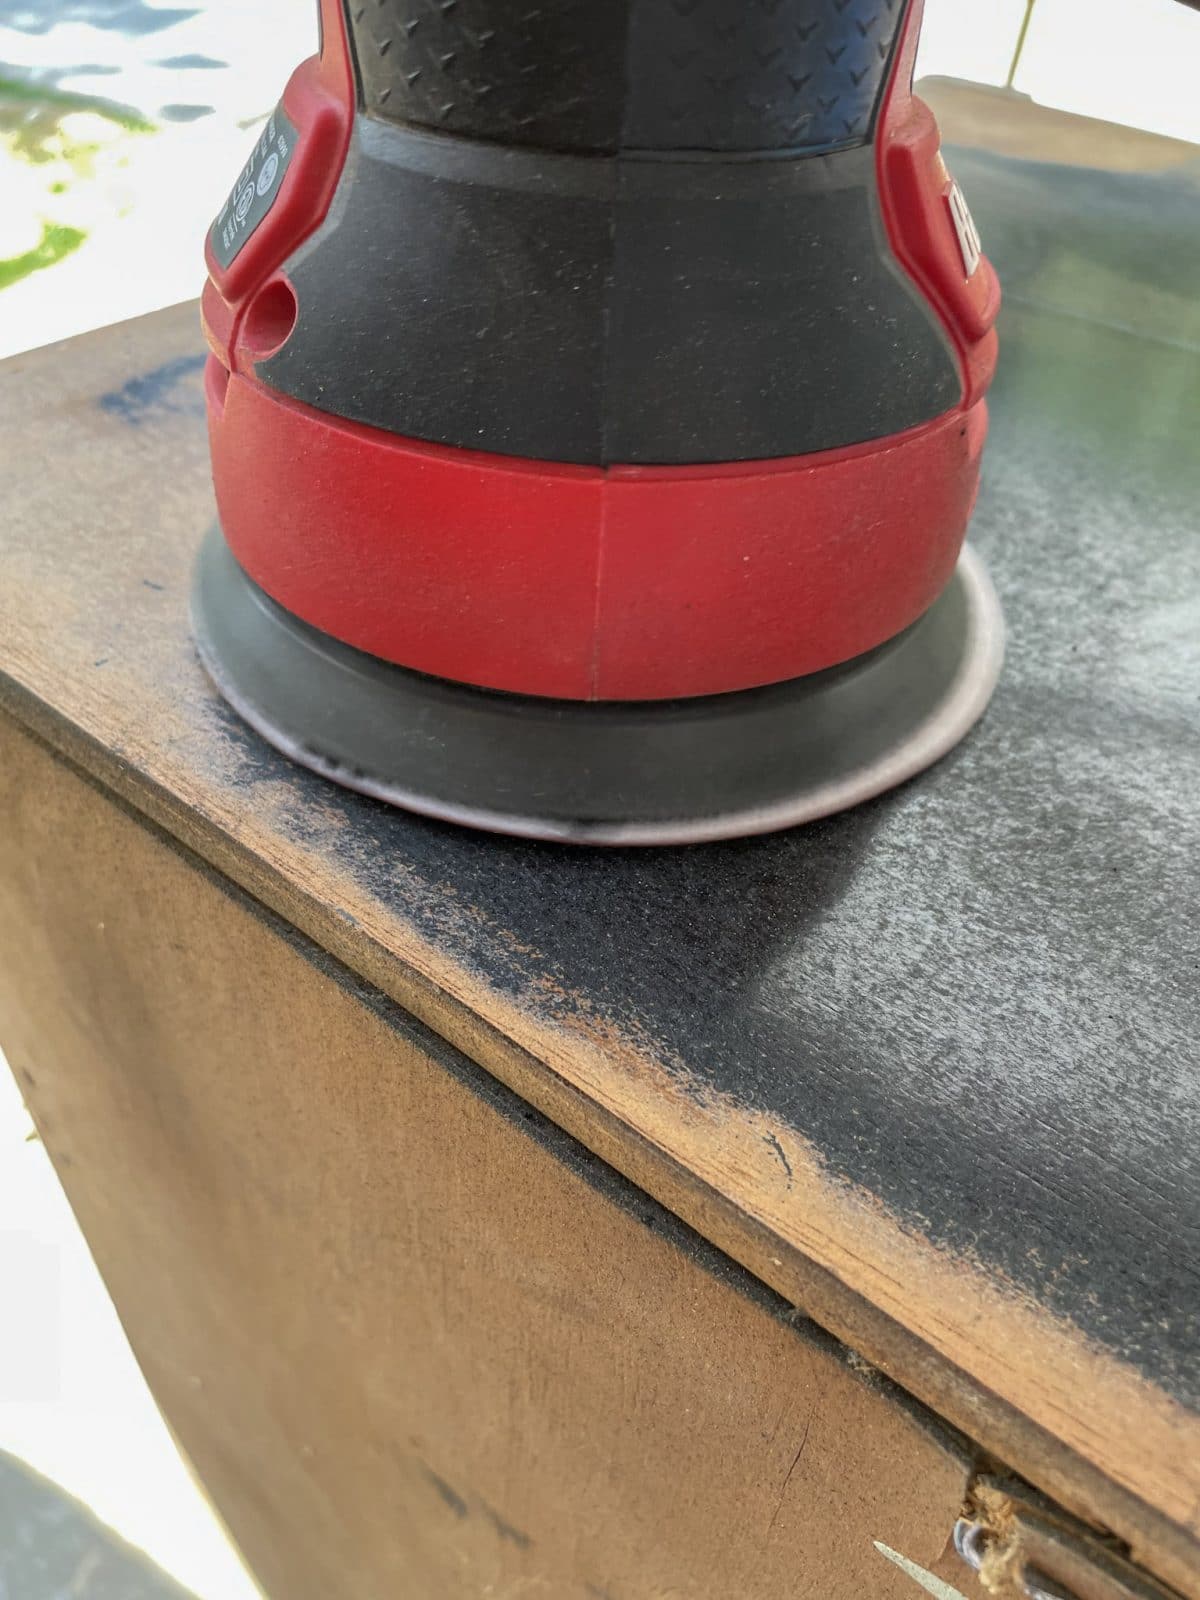
I used my 5″ orbital sander. 120 grit sandpaper helped the raw wood peek through quickly. Sanding the sides and drawer fronts was a breeze.
Note: While Kasey was stripping the stain and paint off the top and furniture frame, I used the orbital sander instead of stripping the sides of the furniture and drawer fronts since the paint was coming off easily.
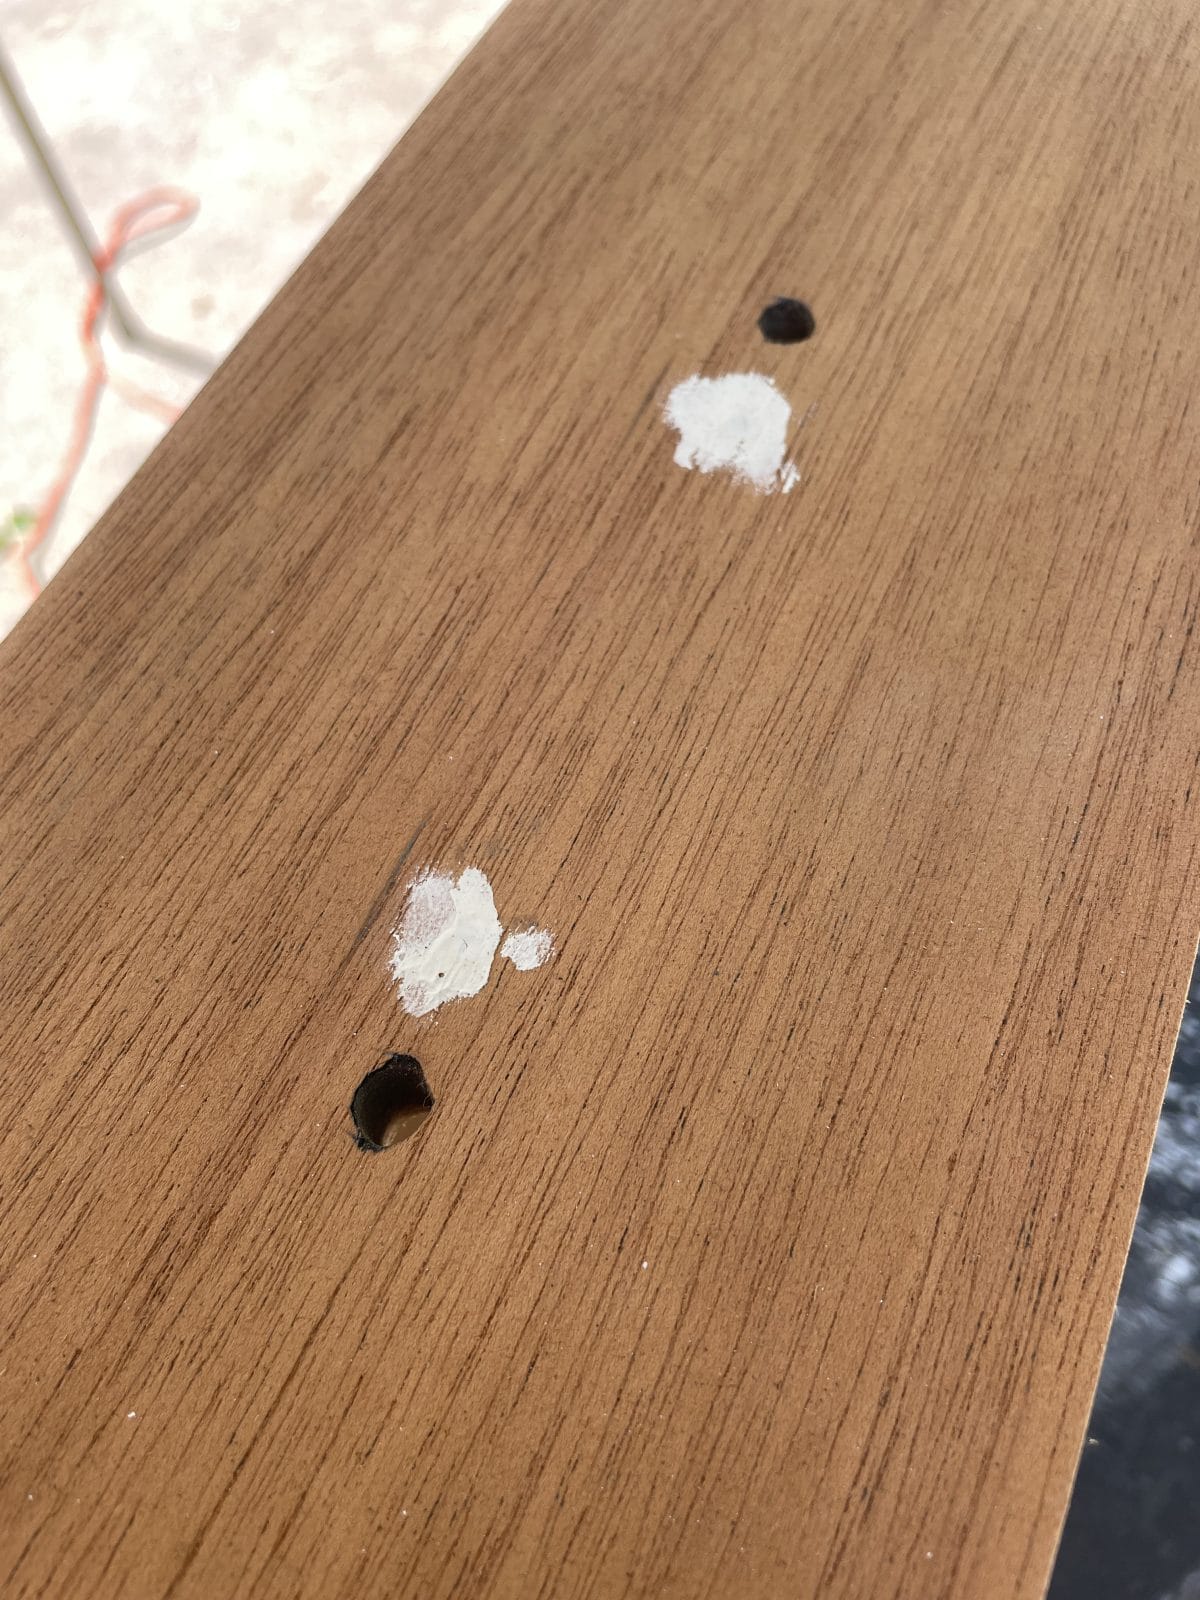
Prep drawer fronts for new hardware
The previous owners changed the hardware and used a different drawer pull size. They chose to leave the old holes rather than attempting to fill them in—wood putty for the quick fix. Make sure to apply the putty a bit proud (the dried putty should be higher than the drawer front so you can sand the putty down to be even with the front).
Time to paint this MCM dresser
I painted a nightstand for my daughter’s room several weeks ago. The paint was color-matched to a pillow on her bed. Check out my post on her refinished nightstand. I bought a little extra paint for the nightstand, knowing this dresser was right around the corner.
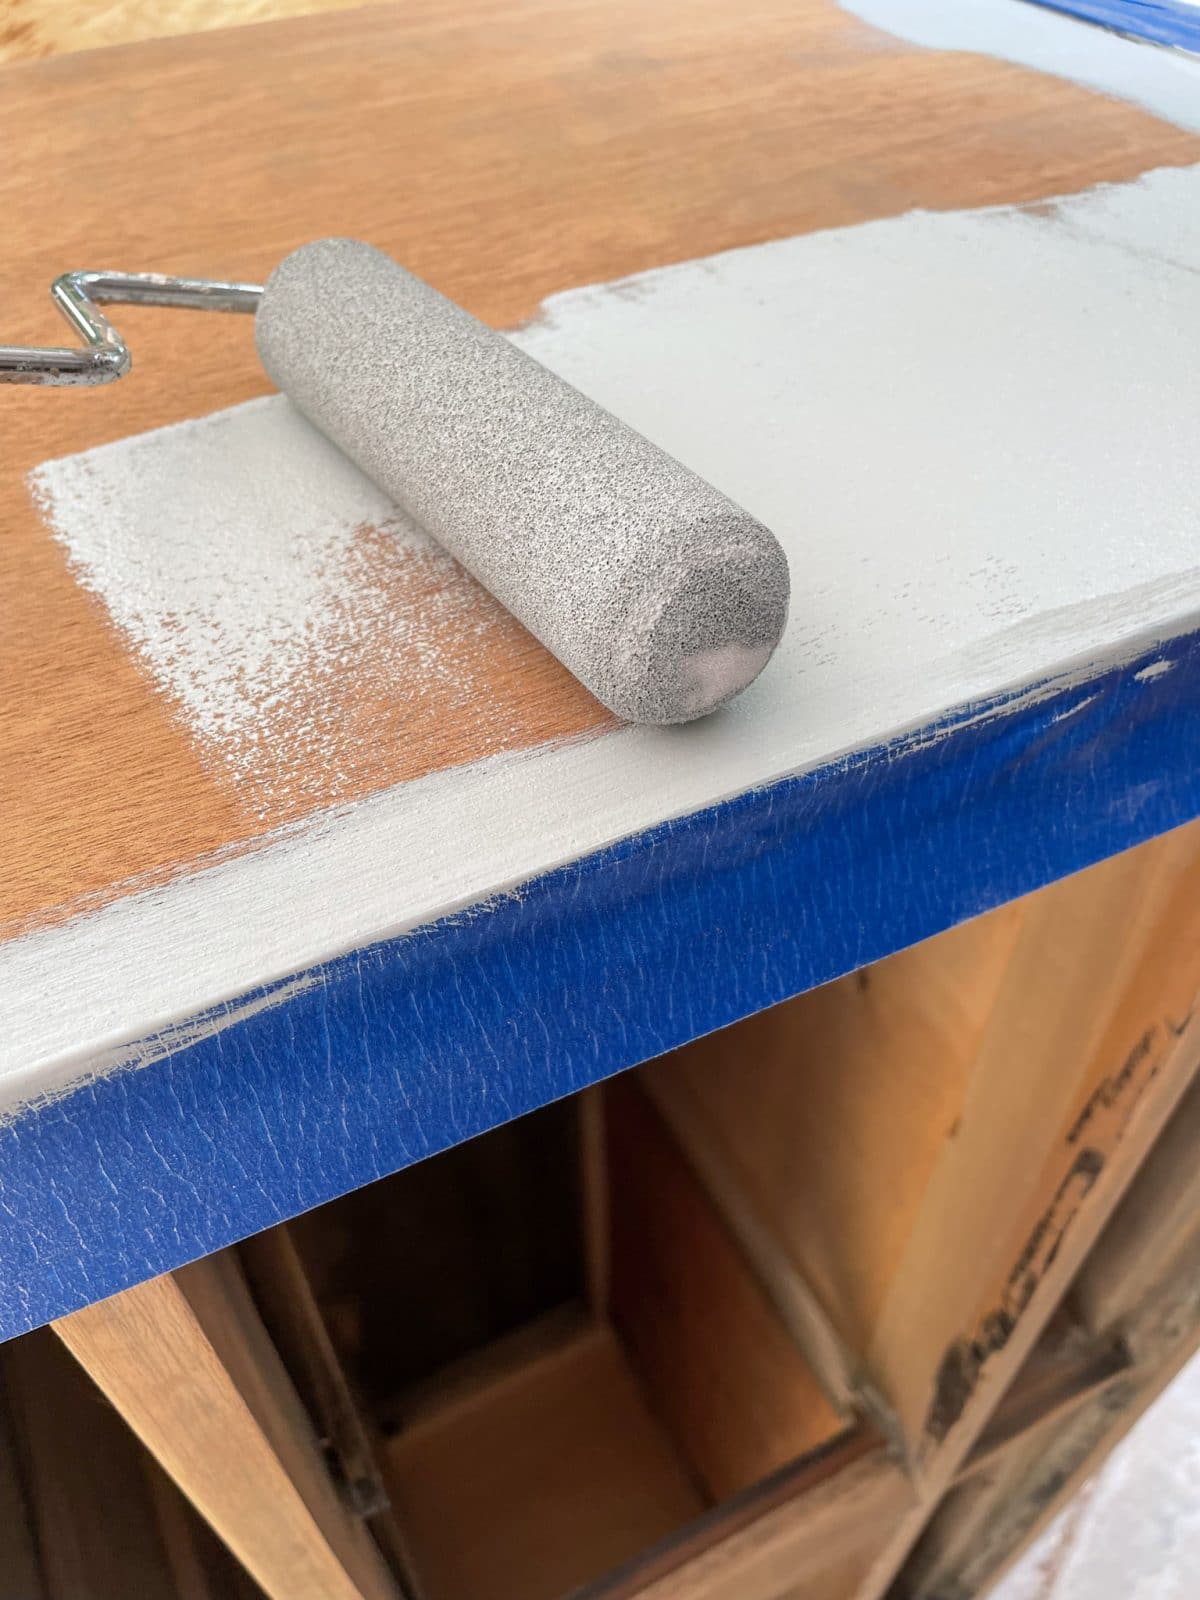
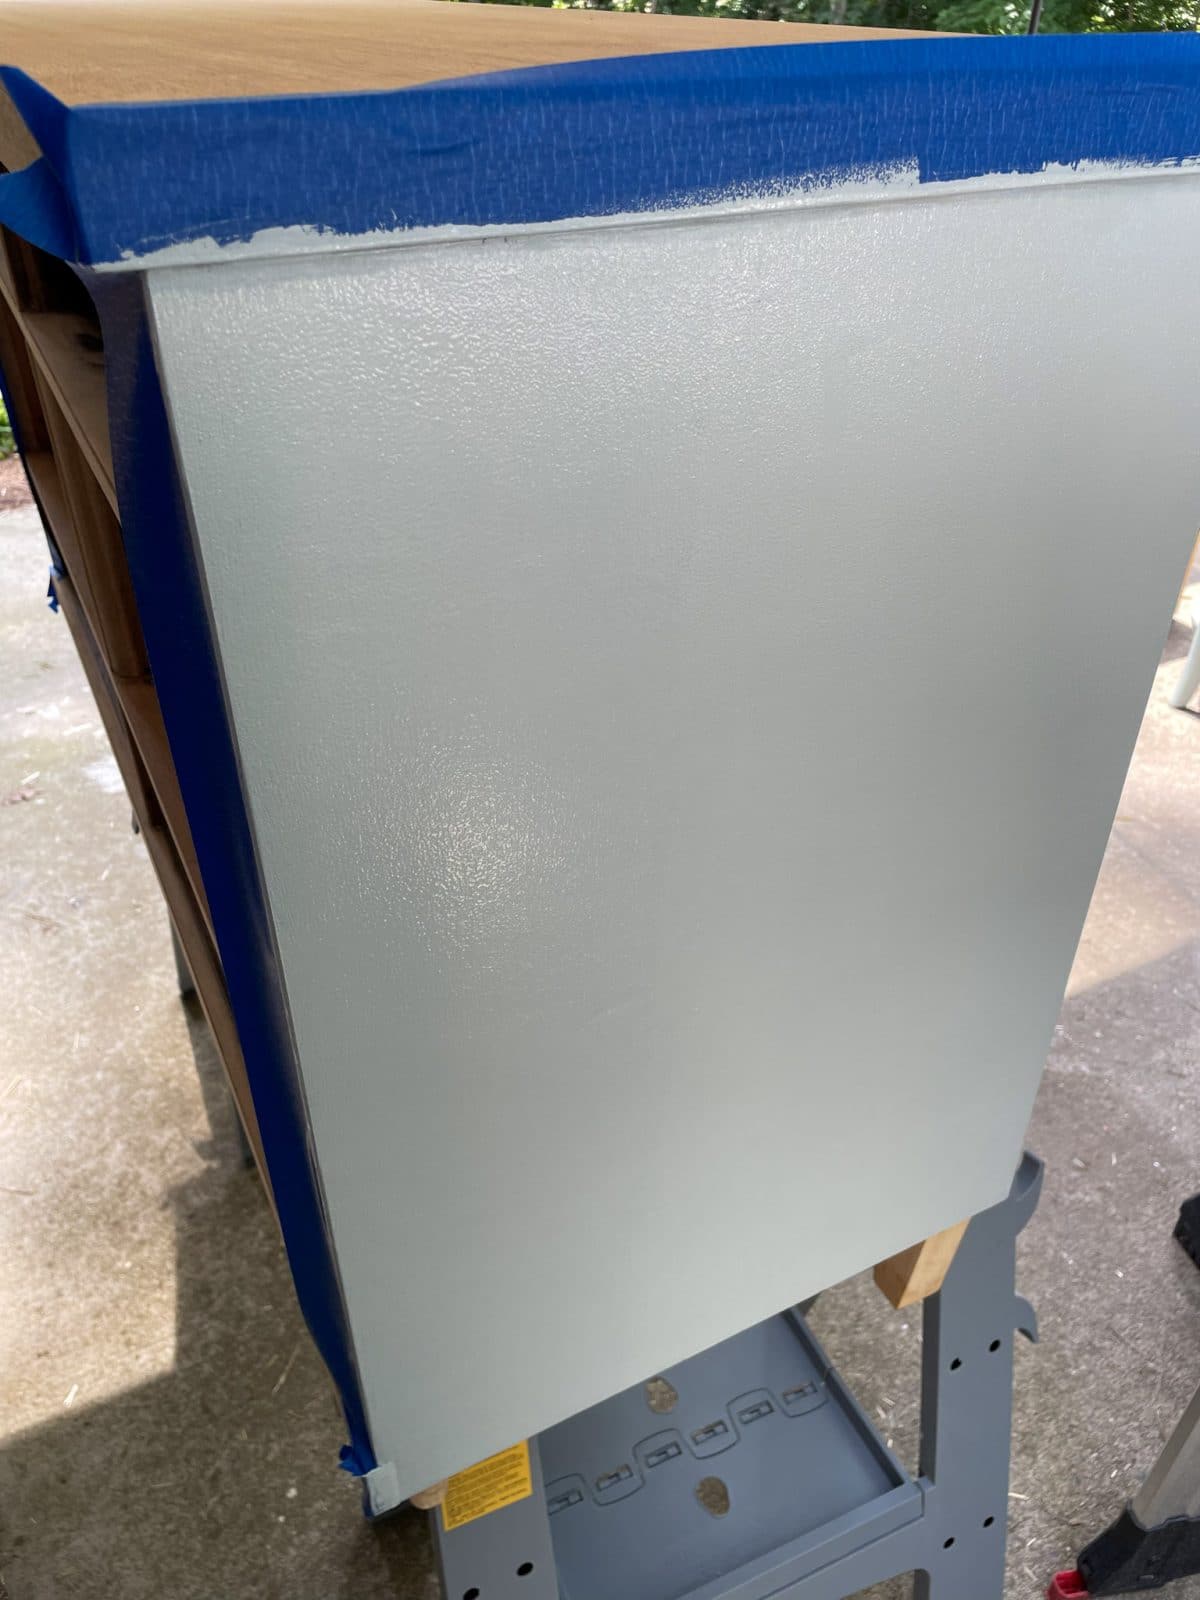
Due to how I wanted to paint this piece, I had to tape a bit of the dresser to get the nice clean lines for the two-toned natural wood and painted look. Once taped, I began priming the MCM dresser. I used a foam roller to apply Kilz primer. Two coats of primer with no brush strokes. I used 220 grit sandpaper between coats to ensure a smooth finish for the next coat to adhere. This MCM dresser is now a great canvas for my final two coats of paint.
Primer: Kilz Latex Primer
Paint Details:
Custom color-matched to my daughter’s bedroom
Brand: Home Depot Behr Ultra Scuff Defense Latex Paint in Satin
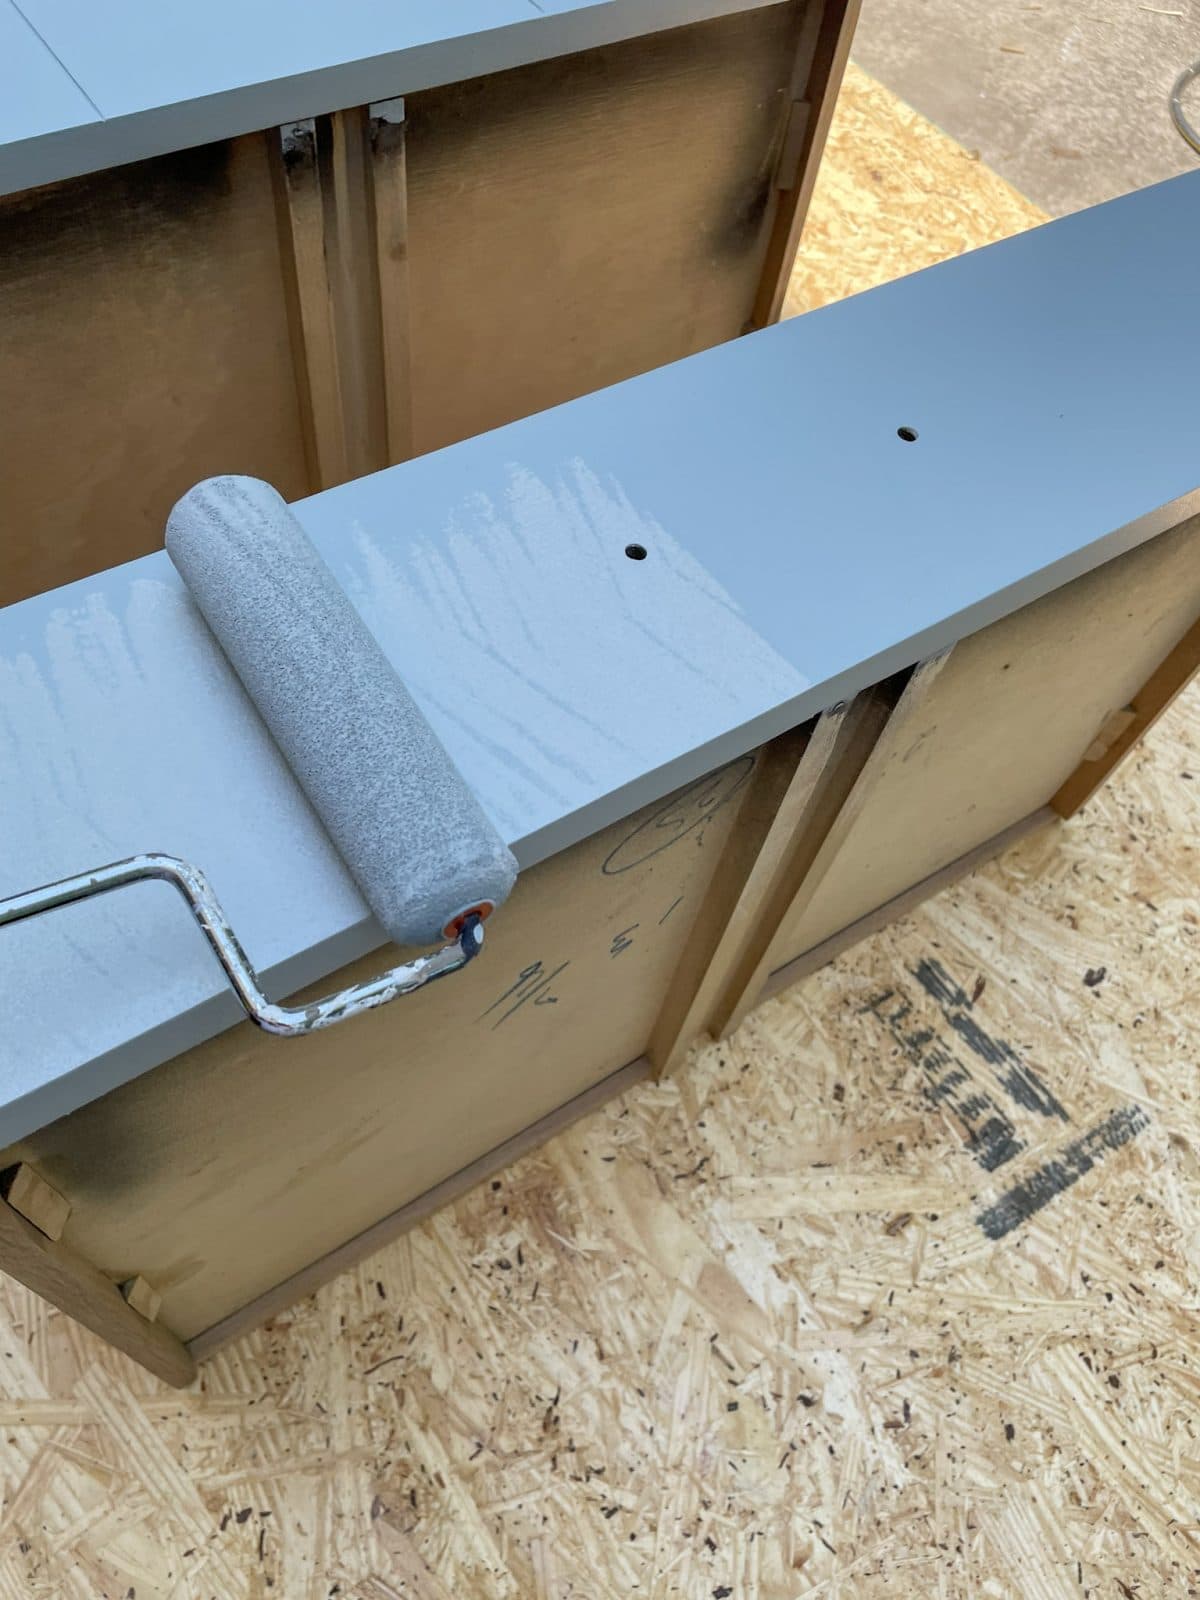
I again used a foam roller for the final coats of paint. The dresser cabinet is ready for poly. Now on to the drawer fronts. I primed the drawer fronts with a foam roller and gave them two nice coats.
 Two more coats of paint and the drawer fronts were ready for polyurethane.
Little touches make a huge difference
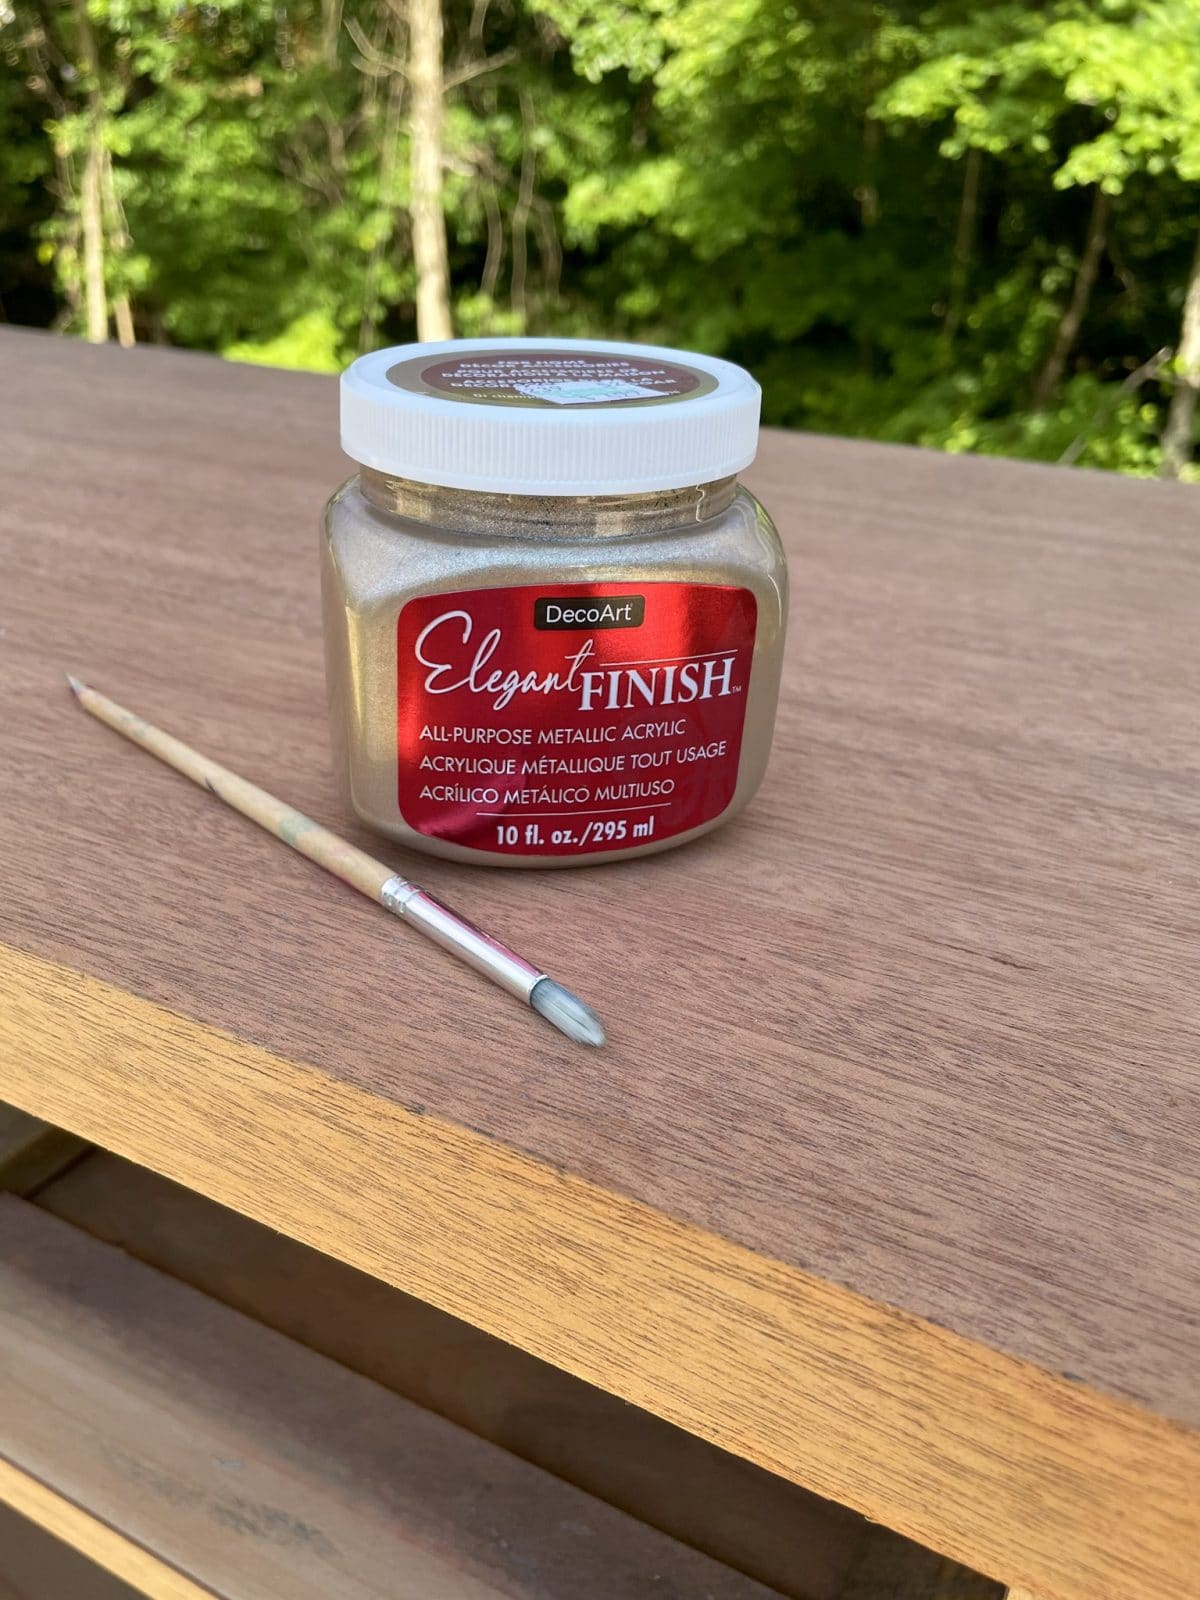
The dresser feet originally had a brass ring around the base of the leg. I guess time had won the battle because the rings were gone by the time this piece found our home. So, I bought an excellent metallic brass paint at a local craft store, and the rings of brass are back… okay, kind of…
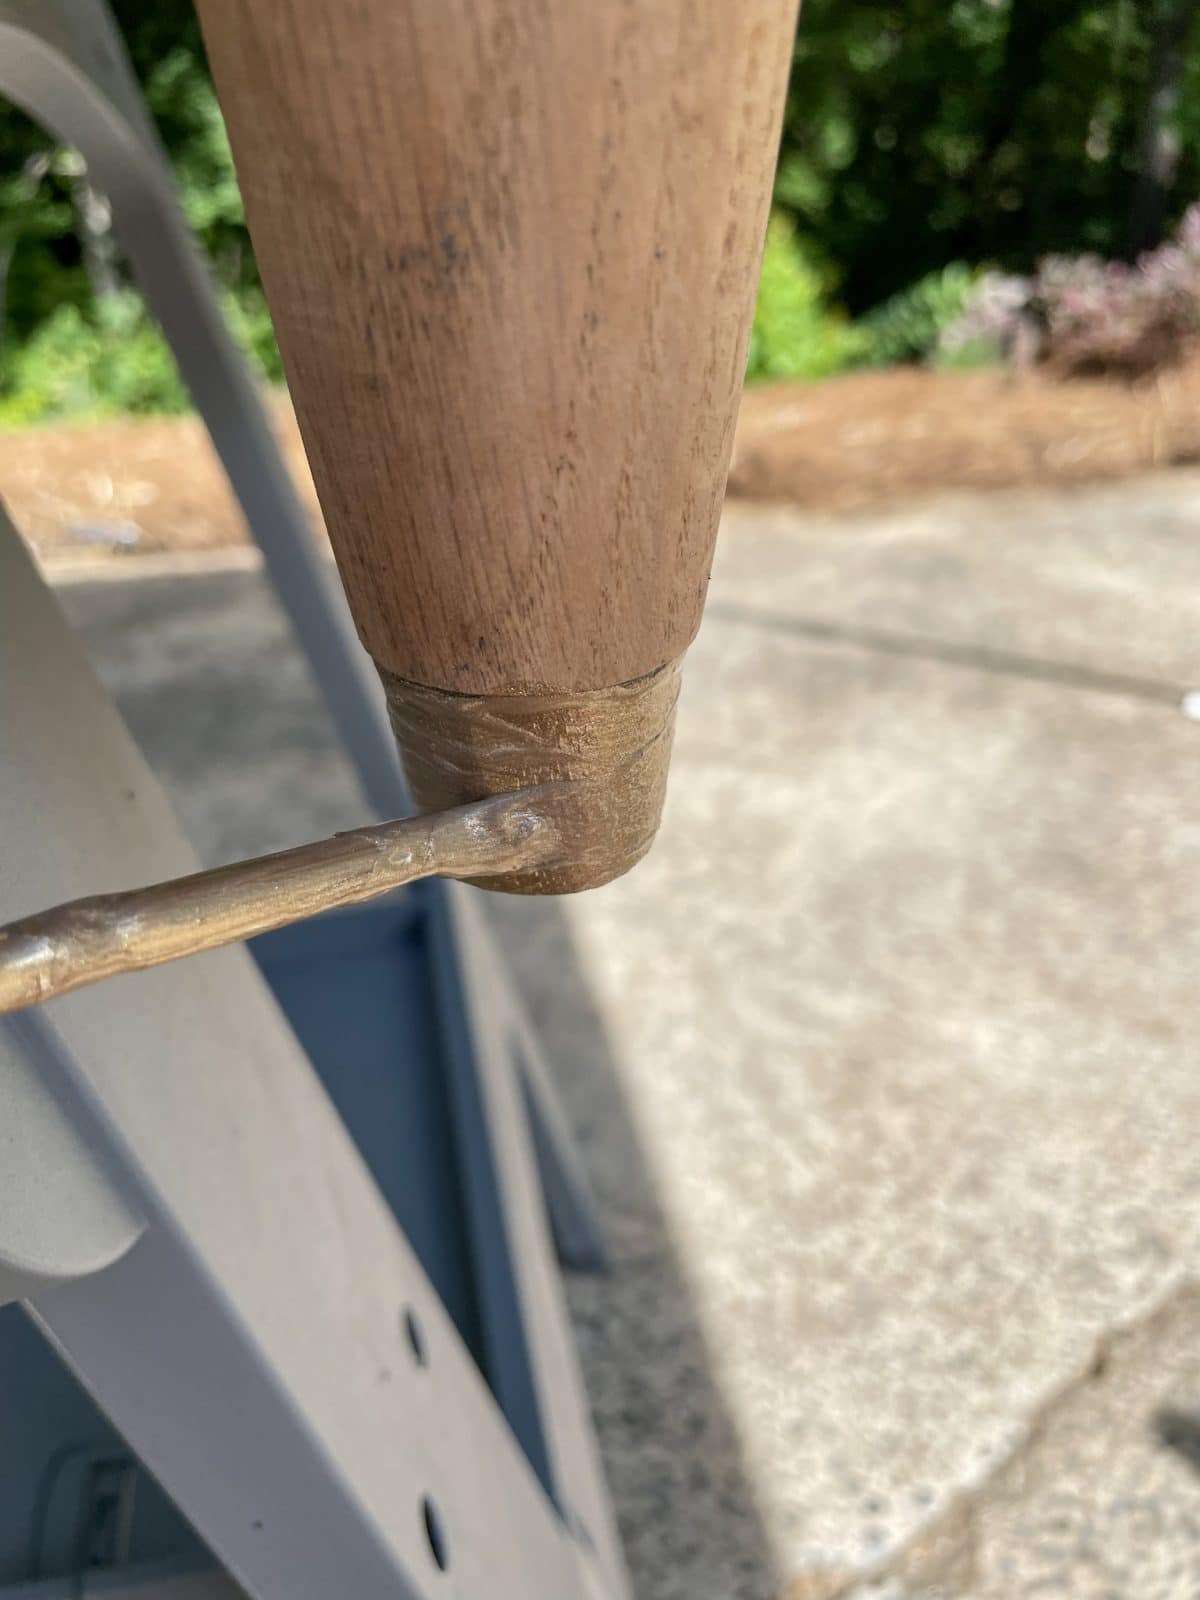
One of my daughter’s art brushes was the perfect choice to paint these rings.
The final steps on this mid-century dresser makeover
Our time on this painted mid-century dresser is quickly coming to a close. Only two more steps are remaining; then, I’ll try to answer a few helpful questions proactively.
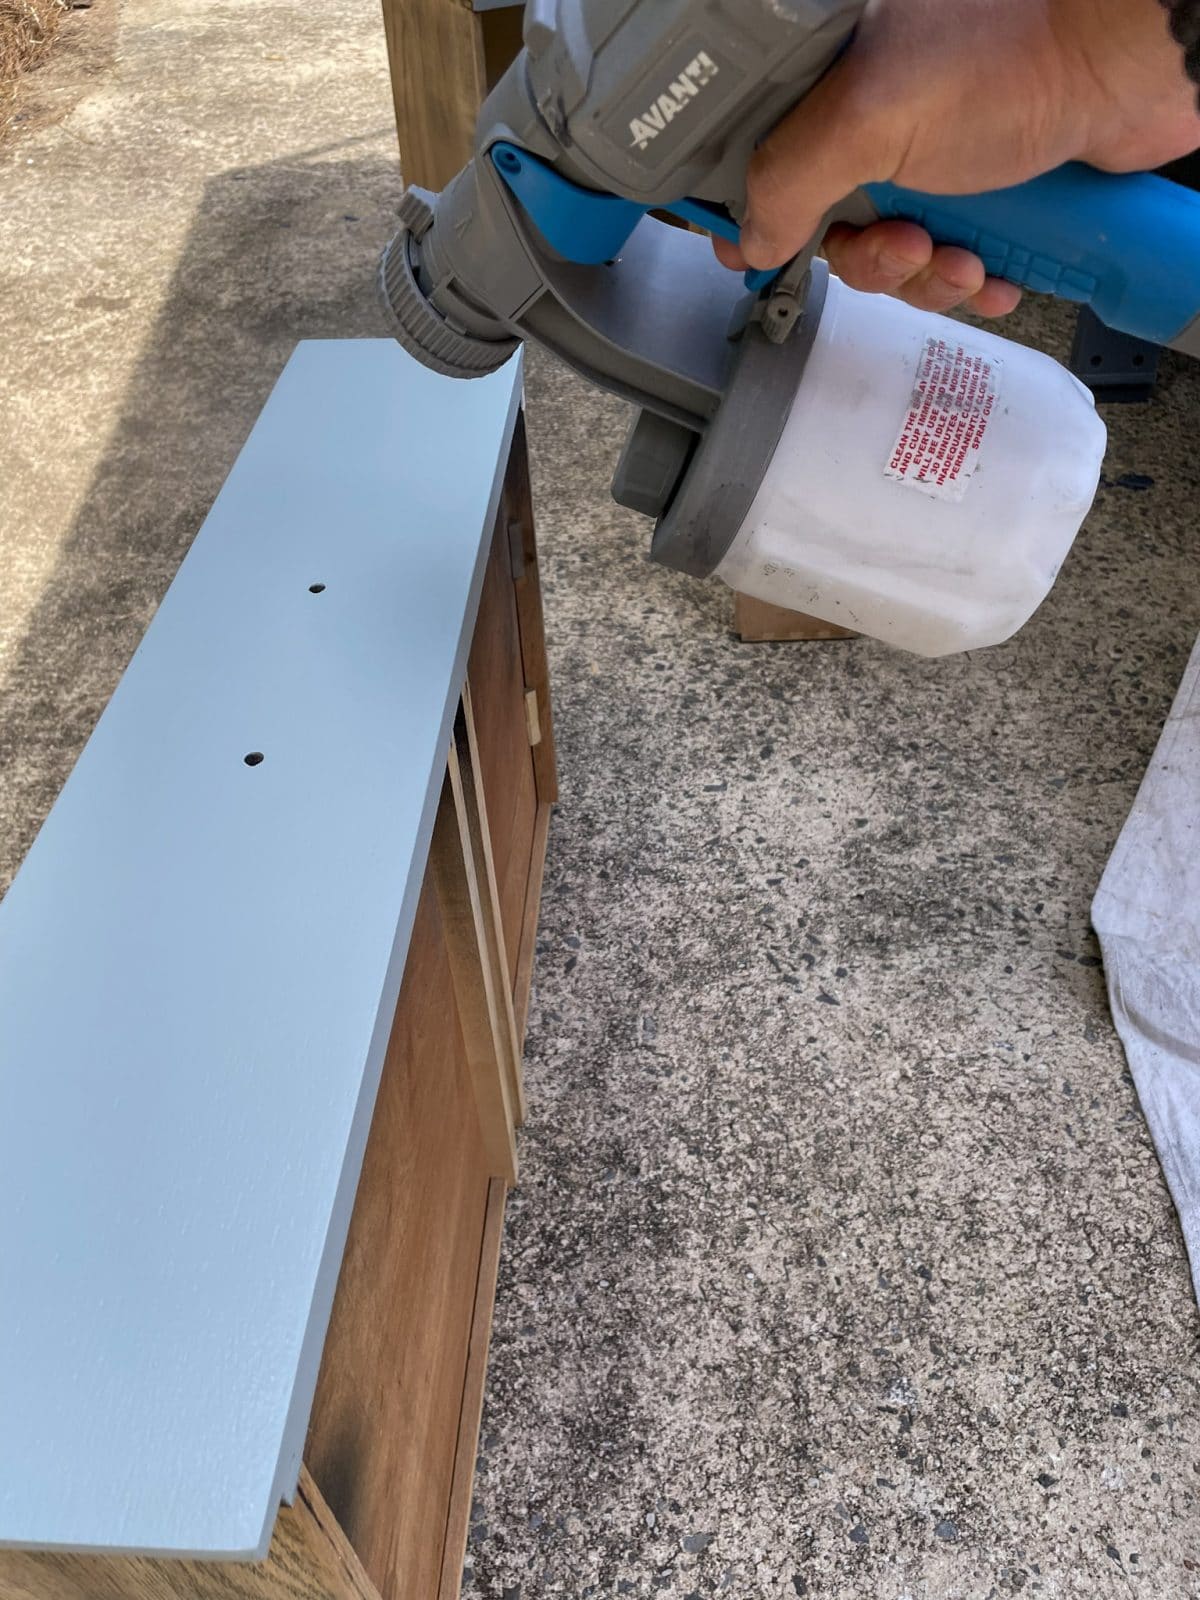
Let’s get some polyurethane on this dresser. I use water-based matte polyurethane because it sprays great in my paint sprayer and is simple to clean. I sprayed three coats of poly on the entire piece making sure for each coat to dry thoroughly. Between the first two coats of polyacrylic, I sanded the dresser with 220 grit sandpaper. Finally, after the third coat of polyacrylic I sanded with 600 grit sandpaper for a nice smooth finish.
Note: I kept the raw wood natural and sealed it with poly.
Polyurethane – Minwax Polycrylic in Matte
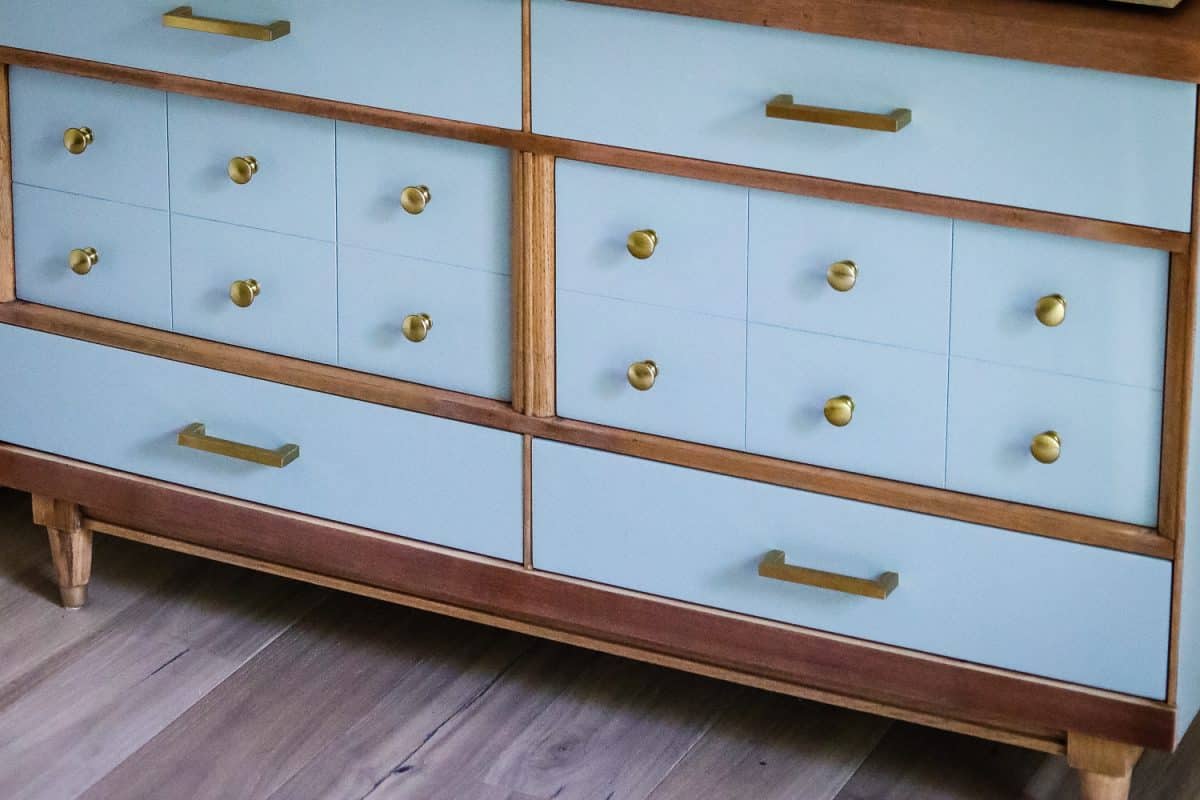
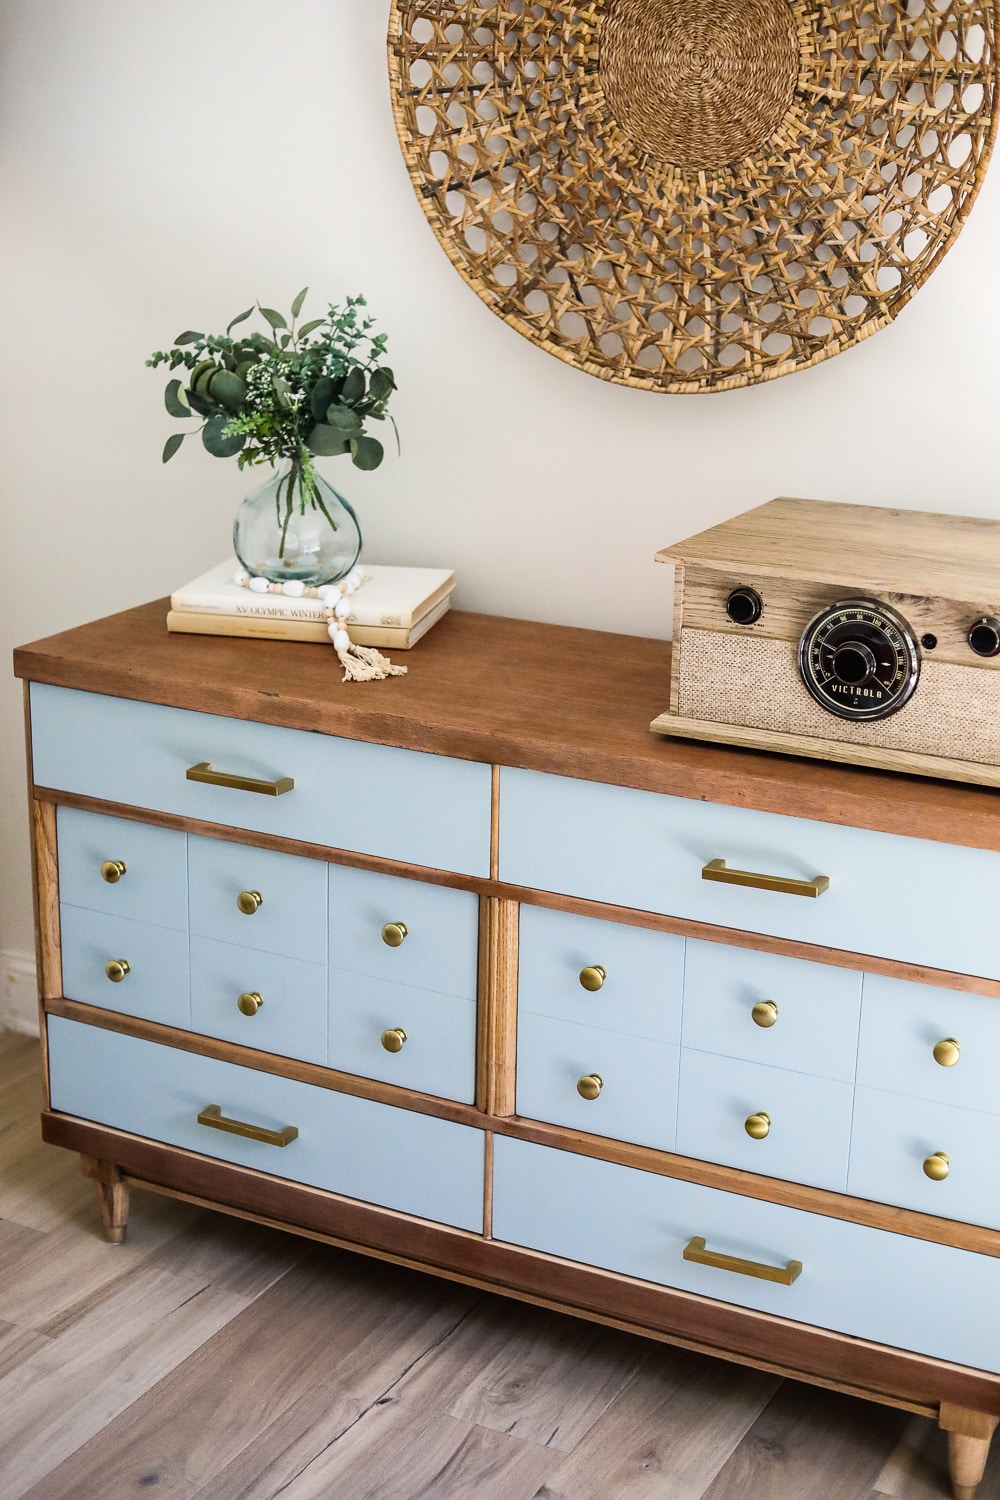
Last thing. New hardware. I chose modern brushed brass pulls and knobs. Boom, this painted mid-century dresser is complete. Our project looks fantastic in my daughter’s room. This painted mid-century dresser was a labor of love. Maybe dad spent a little extra time on this project to ensure his firstborn loved it.
Styling your two-toned MCM dresser
I had this part back to Kasey. Our daughter’s room has a bit of a boho feel with records and guitars mounted on the wall. She prefeed we kept the look very minimal.
Styling Ideas for Mid Century Modern Dresser:
Hanging Basket above dresser – Homegoods / I found this set of 3 oversized baskets on Amazon that look great too!
Record Player – We bought hers from Magnolia, but here is the same one on Amazon.
Vase – HomeGoods or similar vase here
Greenery – Michael’s Craft Store I found similar greenery on Amazon.
Books – Goodwill
How do you make furniture look mid-century modern?
This question is a little tricky. It’s nearly impossible to take furniture from other periods or styles and force them into the look of mid-century modern furniture. However, you can do a few things if you have a piece with clean lines. Add legs/feet. Just like Forrest Gump said, “You got new legs.” Mid-century drawer hardware can be one of the things that give your piece that MCM look you want.
How do you paint a two-tone dresser?
Couple things. Choose your color. Decide the best way to bring contrast to the piece—most paint the drawers or the dresser cabinet but not both when painting a two-tone dresser. You can always leave the other natural as I did on this piece. Last, make sure to use painter’s tape for crisp lines.
Can you paint over an old dresser?
The short answer is yes. Chalk paint allows you to paint over an old dresser just by cleaning the old dresser. Check out my post chalk paint best brands for a few of my favorite options, including my DIY recipe. If you choose something other than chalk paint, then there may be some prep work required.
I hope my projects inspire you to try a furniture refinishing project of your own. My goal is to make my projects and tutorials simple and economical. Let me hear about some of your projects!
MORE REFINISH WOOD WITH PAINT PROJECTS:
- Refinished Night Stand
- 80’s Dresser Makeover – Complete Guide with Pictures
- Mid Century Modern Dresser Makeover: Stripped and Refinished

More Refinish Furniture with Paint Ideas
- Gorgeous Blue Painted Coffee Table with Rattan
- Chalk Painted End Tables
- 17 Best Paibnted Furniture Ideas

Painted Mid Century Modern Dresser Makeover
Materials
- TSP Cleaning solution
- Stripping agent
- Putty knife
- 120 and 220 grit Sandpaper, sanding sponge, or orbital sander
- Mineral spirits
- Steel wool
- Painters tape
- Paint - Behr Ultra Scuff Defense Satin Finish
- Minwax Polycrylic matte finish
- Paintbrush, paint roller, or paint sprayer
Instructions
- Mix the TSP according to the directions. Then, spray the piece using a spray bottle, and wipe it down with a rag. Make sure to follow the directions regarding applying any chemicals. After wiping the entire piece down, finish with a dry towel to ensure the solution is gone and there are no streaks of grime or grease left behind.Note: Vacuum out the inside of drawers and wipe them off. Adding cabinet liner is a nice touch if you can't get them clean.
- Remove all paint and stain by applying Citrastrip liberally with a paintbrush in one direction. Wrap the wood in plastic wrap and let it sit for about an hour. You'll see it work as the old finish starts to bubble. It is helpful for beginners to strip small areas to not get overwhelmed.
- With a plastic or metal putty knife, Be careful when scraping anything off your pieces of furniture. A metal scraper or putty knife can dig and gauge the wood if you’re not careful. Kasey has quite a bit of experience stripping furniture, so she is comfortable using a metal scraper.
- Once the stripper is removed, clean any remaining stubborn stain or paint with mineral spirits and fine steel wool. If needed sand the top and front dresser frame with 150 grit sandpaper.
- With sandpaper or a 5″ orbital sander with 120 grit sandpaper, sanding the sides and drawer fronts was a breeze. (I used the orbital sander instead of stripping the sides of the furniture and drawer fronts since the paint was coming off so easily.)
- If changing the size of the hardware, you'll need to prep the drawers by filling in the original holes with wood putty, leaving a raised surface (it's called proud in furniture terms). Allow it to dry thoroughly, then sand until smooth.
- Tape off the parts of the furniture that you want to leave natural. Used a foam roller to apply two coats of Kilz Latex primer to the parts of the dresser that will be painted. Sand with 220 grit sandpaper to ensure a smooth finish for the next coat to adhere.
- Using a foam roller apply two coats of Home Depot Behr Ultra Scuff Defense Latex Paint in Satin finish. Make sure to allow time to dry between coats.
- Apply three coats of Minwax Polycrylic in Matte to seal the entire piece of furniture. Make sure to let it dry thoroughly and sand with 220 sandpaper between the first two coats. After the third coat has dried, give it a final sand with 600 grit sandpaper for a smooth buttery finish.
- Once the furniture has completely dried install the new hardware.
Leave a Reply